Content creation for Swift editors
This guide is intended to provide an overview for generating assets for real-time for Swift CG+. Swift CG+ is a content delivery tool, built to render many different media types such as 3D meshes, 2D Bitmaps, Movie Files and Fonts.

Support literature
Content creation for Swift Editors
|
About |
Description |
|
Revision |
1.0; 2.0 |
|
History |
20/10/2016 |
|
Authors |
Darrell James |
Overview
This guide is intended to provide an overview for generating assets for real time for Swift CG+. Swift CG+ is a content delivery tool, built to render many different media types such as 3D meshes, 2D Bitmaps, Movie Files and Fonts. It supports importing many file types commonly found in Digital Content Creation (DCC) applications, such as FBX, PNG and many more. This is not a full Swift CG+ manual, nor is it a guide on how to use 3rd party applications, it’s intended use is for explaining how to import assets without issue.
Real-Time Challenges
The biggest challenge in real-time rendering is getting the content to render as fast as possible, with many frames generated in a fraction of a second. In offline rendering, frames can take seconds, minutes or hours to create using computationally expensive renderers therefore does not suite the real-time need. Graphics hardware and software is getting faster all the time and with clever artist design it is possible to create the illusion of reality despite the limitations. In broadcast, performance is vital and needs to be consistent, therefore assets have to be optimised down to only what is needed to give the illusion, anything else should be removed.
Setup
Setting up DCC tools for Swift CG+ requires knowing how Swift CG+ will interpret them when imported after creation. Swift CG+ imports many types of assets, setting up common parameters for each is listed below.
Video Format
To ensure that any external assets are rendered at the correct resolution and playback speed, it is important to set up Swift CG+ for the target output. Any external assets will have to be created to match the output from Swift CG+ in order to be most efficient.
Opening Swift CG+ preferences via the edit menu and switching to the Video Tab will present a number of settings that correlate to the resolution of the output and the playback. In the Output section, changing the Format will change the resolution and the timecode.
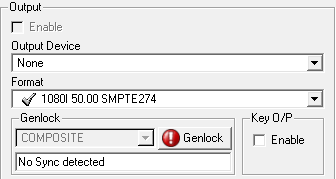
Swift CG+ uses the concept of fields from HD interlaced content and content should be authored to this value, in progressive frames and fields are synonymous, for example:
1080i 50, is 25 frames and 50 fields per second.
1080p 25, is 25 frames and 25 fields per second.
Choose the format in which the video will be output, from here it is necessary to match content creation tools.
Setting up 2D Applications
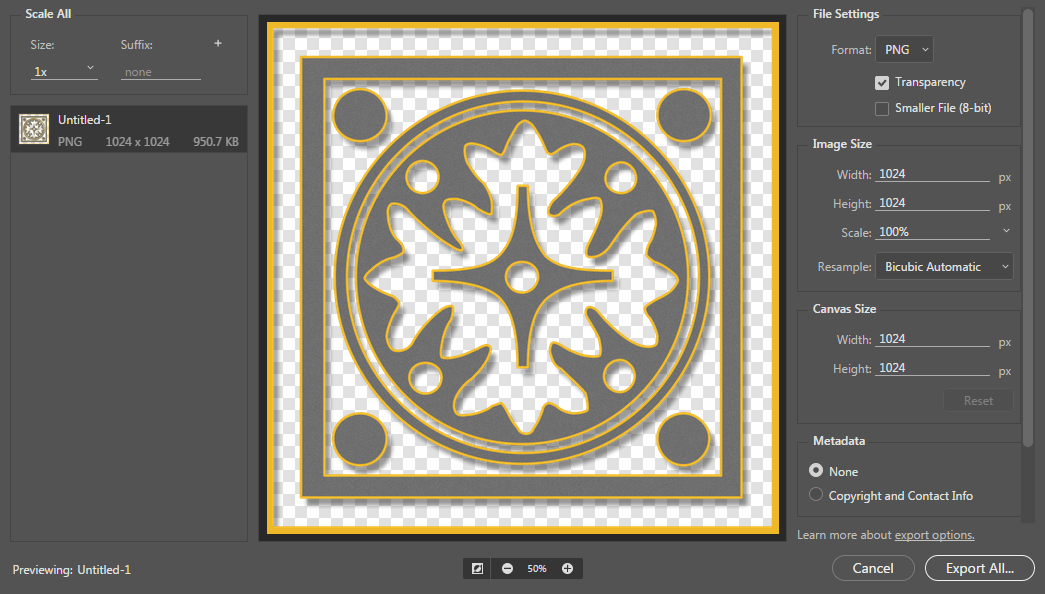
Photoshop: Document Setup
When working for graphics that are on screen, the only numbers that count in the document setup are the height and width. Dots per inch or pixels per inch can be ignored since this is a measurement for print only. Ensure that the document width and height measurement is set to Pixels since it will be displayed on a screen.
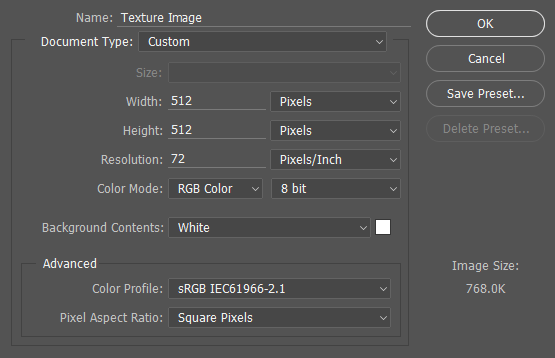
If the image is intended to be a texture on a 3D model (or plinth) then it is best to create this as a square image to the power of 2. For example:
256×256
1024×1024
For more information see the optimisation – resolution section.
Plugins and Tools
When working inside of Photoshop for real-time, there are some tools that can be taken advantage of that will help creating textures for 3D models.
Nvidia Tools
Nvidia offers a few Photoshop plugins to aid in creation of bitmaps for real-time. They have tools that handle texture compression, cube map formatting and normal map creation. The tools are available here for free from Nvidia’s website.
The tools can be installed using their executable and will place the relevant files in the Photoshop installation directory. Inside of Photoshop, these tools can be accessed by the Filter menu and in the Save As… D3D/DDS option.
xNormal Photoshop Plugin
The xNormal Photoshop Plugin offers some filters that help when making texture maps such as normals. The included filters are:
Dilation, which creates edge padding for the selected layer so that there are no issues with bleed.
Height2Normals, which will transform grayscale bitmaps to tangent normals.
Height2Occlusion, which will transform grayscale bitmaps to ambient occlusion.
Normalize Normal Map, will re-normalize the map so that it fits back into 0->1 space, if a normal map isn’t normalized there may be rendering artifacts.
Normals2Cavity, will generate a cavity map from the normal map.
The tools are part of the xNormal standard installation available here. To install them, browse to the xNormal installation directory, for example:
C:/Program Files/S.Orgaz/xNormal 3.19.2/x64
Inside of here is a folder labelled photoshop_plugins,copy and paste these into the Plug-ins directory in the Photoshop installation directory, typically found here:
C:/Program Files/Adobe/Adobe Photoshop CC 2015.5/Plug-ins
After restarting Photoshop, the filters will be in the Filter/xNormal menu.
After Effects
When creating a new composition inside of after effects be aware of the target output in Swift CG+. Choose the correct resolution at the start of the composition, be aware that if the movie is only taking up a small portion of the screen, then the resolution can be lower of the target output in Swift CG+.
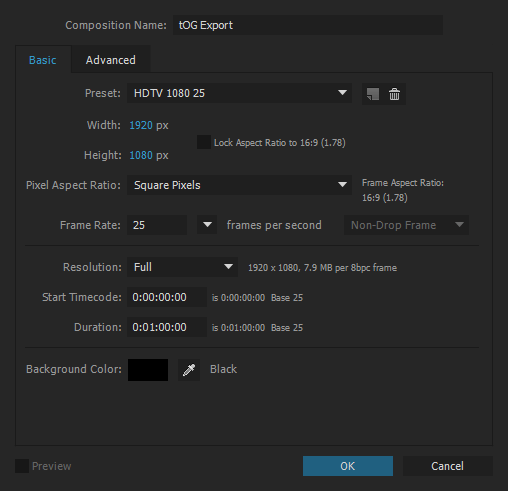
After Effects works only in Frames and not Fields, but has support for rendering out interlaced content.So if working in interlaced, set the frames per second of the composition to half of the fields. For example, 1080i 50.00 becomes 25 frames per second.To work with interlaced video footage inside of After Effects, right click the video in the project and go to the Interpret Footage > Main dialog. In the Main Options tab in the Fields and Pulldown section, set your Separate Fields value to match the footage.
Optimisation
This section will detail some considerations to take when creating 2D graphics and how to optimise them for real time.
In realtime it is necessary that we reduce load on the hardware in as many places as possible and assets present the biggest strain, therefore it is necessary to optimise them as much as possible for use in real-time. 2D assets such as bitmaps and videos will decrease the performance of the graphic and there is always a trade off between graphical fidelity and performance. Below are some considerations to think of when optimising 2D assets.
Resolution
2D assets should be no bigger than the size they get on screen, if the asset will never take up more than half of the screen then there is no reason for it to be the same resolution as the screen.
In relation, assets further away from the camera will typically take up less space on the screen and should therefore have lower resolutions.
Bitmap Resolution
Graphics cards use a lot of matrices to push pixels to the screen, square matrices are easier to account for, therefore they prefer images that are square compared to rectangular ones. If possible, author as many bitmaps in a square aspect ratio.
Similarly, the software take advantage of fast division of power of two numbers on a graphics card, therefore authoring textures to a power of two resolution such as 1024*1024 is recommended.[1]
Movie Resolution
Swift CG+ allows movies to be imported from a variety of different file types and encoding which can get pretty complex when it is time to optimise. Like mentioned , it is important that the resolution of the movie file is no more than what is required, else this is waste that decreases performance for no benefit. Unlike with images, movies cannot typically be made to be square so cutting down on the use of movies if possible is a large optimisation.
Another check to make is the framerate of the movie file, if it is higher or lower than the target output of Swift CG+ then it will result in the duration changing. Make sure that the frame rate matches Swift CG+s output to ensure desired playback.
Tiling
It is possible to tile 2D assets with a very minimal impact on the graphics card. Therefore if there is an opportunity to tile a lower resolution bitmap rather than one large bitmap then this is an optimisation that can drastically increase performance.
Tiling assets will produce a seam if no care has been given to the bitmap, The borders of the image must seamlessly match each other, in order to ensure it tiles seamlessly some techniques must be applied. In Photoshop, the Offset filter will shift the image allowing the user to make modifications to the borders of the image. From here the use of spot healing brush or clone stamp tools will help remove the seams. Other tools such as Substance Designers “Make it Tile Photo” node offer a more procedural approach.
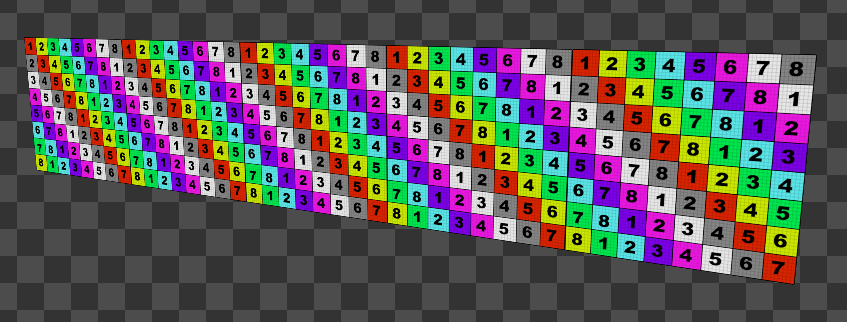
Above is an example of a tiling texture, a simple 512*512 pixel texture has been tiled along this piece of geometry 5 times. This saves the texture from being 5 times the size for the same level of fidelity.
Bitmap Exporting
Layers
When exporting images for use in Swift CG+ ensure that the format does not contain layers, else this will take longer to traverse through and may reduce performance. If saving using TIFF or TGAs a dialog should offer the option to collapse layers.
Alphas
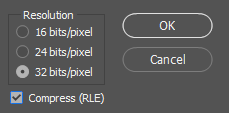
If the image does contains transparency then ensure that it uses a format that supports it. Photoshop allows for two types of alpha’s, the alpha channel and layer alpha, Swift CG+ supports both. Check that the chosen format to export allows alphas, for example JPEGs do not.
Bits per Channel
If the image is used to carry data (such as environment lighting in the PBR shader) then it will be best to export it at 32 or 16 bit, however if the image needs only 8 bits per channel then that should be specified in the export.
Recommended Formats
PNG
Portable Network Graphics (PNG) are a zipped up image that gets unzipped when used. They use export alphas on layers only, individual layer alphas they do not support an alpha channel for the flattened image. It is 8 bits per channel to make up 32bits of information with alpha included. It is possible to use Photoshop’s Export As options to save the image without any transparency which will reduce the total number of bits down to 24.
TGA
Targa images are a staple of 3D productions for their simplicity. They offer different bitrates and the ability to collapse layers in the export options. The alpha for Targa’s will only get saved with 32 bit, it uses an alpha channel rather than layer alpha like PNG.
[1]This also helps to create and swap Mip-Maps faster.
