Media Watcher Manual

| About | Description |
| Revision | 1.6; |
| History | 09/05/2014;
Updated from 25/11/2020 |
| Authors | Sean Kirwan |

Overview
MediaWatcher takes sources of external data – such as RSS feeds and XLS files – and converts them to a form which RT Renderers can use.
MediaWatcher runs continuously in the background, checking for new data in the data sources, processing them according to the source type and outputting the result to the selected destination. It supports a variety of source and destination types and a single instance can handle multiple sources.
If the data source required is not covered by the list of existing source types, the application’s functionality can be extended using plugins (C++ DLL) and scripts.
Installation
The MediaWatcher installer can be downloaded from the RTSW ftp site. Running this application setups a basic folder structure and populates it with executables, basic configuration files and a launcher for the application.
Location
Depending on the customer requirements, MediaWatcher can be installed on either a server machine or on the renderers directly, or both. Important criteria such as network speeds for database write and retrieval play critical roles in determining the optimum location for the MediaWatcher installation.
Folder Structure
The configuration files are set up through the interface. On Windows, they are stored at RTSWconf by default – but this is selectable.
The following sub-folders are created:
- bin – contains the application executable as well as some utility executables (for example, wget.exe is used for downloading files),
- conf – contains one sample configuration file (TMW_Basic.conf),
- icons – icons used by the application launcher,
- logs – all logs are written here,
- TOGMediaWatcher/backups – some plugins will backup all files processed here,
- TOGMediaWatcher/fails – some plugins will save any file that could not be successfully imported will be copied here,
- TOGMediaWatcher/inbox – files to be imported should be copied here,
- TOGMediaWatcher/outbox – some plugins will write output files here,
- TOGMediaWatcher/plugins – dynamic plugins should be placed in this folder,
- TOGMediaWatcher/tmp –
- Uninstallers – contains the uninstaller for the application.
Application Launcher
A sample application launcher is written to the RTSW folder by the installer. It is not fully configured. Right click on the launcher and select properties. Add the following to the Target property:
<RTSW>binTOGMediaWatcher_r<revision>.exe –conf <RTSW>/conf/TMW_basic.conf
where:
- RTSW – the installation folder (by default, C:/Users/tog/Desktop/RTSW),
- revision – the revision number for the application (check in the bin folder for the correct name of the executable which will include the revision number).
Copy the configured launcher to the desktop. Double click on the launcher to run MediaWatcher. The application is immediately minised to the system tray.
Maintaining Application Execution
MediaWatcher is not a service and does not by itself maintain its over execution after it crashes or after the host system restarts.
An alternative way to launch MediaWatcher is to use the batch file in the bin folder loopMediaWatcher.bat. This runs the application (it will be necessary to alter the batch file if the install folder has been changed from the default) and then loops. If the application fails, it is started again after a timeout period has expired. The batch file can also be copied to the Windows Startup folder so MediaWatcher is started if the system is restarted.
Configuration File
The configuration file is found by default in the RTSW/conf folder.
It contains general parameter values and the details of all the inBoxes specified through the interface. With each inBox is stored a name/value pair list of all the parameters specified for the inBox.
| <tOGMediaWatcher>
<home>C:ProgramDataRTSoftwareRTSW</home> <clearWorkingOnLoad>false</clearWorkingOnLoad> <exitWhenEmpty>false</exitWhenEmpty> <processOneFile>false</processOneFile> <numberBackupDays>0</numberBackupDays> <checkFileHasChanged>false</checkFileHasChanged> <numberLogBackups>7</numberLogBackups> <logFileBaseName>MW</logFileBaseName> <logDatabaseStatements>false</logDatabaseStatements> <allDownloadsFirst>false</allDownloadsFirst> <inBox> <name>BeeOn_NeverNo</name> <inputType>0</inputType> <outputType>1</outputType> <inputDirectory>\haroldarenaexchangeneverno</inputDirectory> <databaseHost>localhost</databaseHost> <databaseUserName>root</databaseUserName> <databaseName>SABC_SocialMedia</databaseName> </inBox> <inBox> <name>BBCHeadlinesData</name> <inputType>1</inputType> <outputType>1</outputType> <inputDirectory>C:ProgramDataRTSoftwareRTSWTOGMediaWatcherinbox</inputDirectory> <urlURL>http://feeds.bbci.co.uk/news/rss.xml</urlURL> <urlDownloadPeriod>120</urlDownloadPeriod> <urlFileName>BBCHeadlinesData</urlFileName> <databaseHost>localhost</databaseHost> <databaseUserName>root</databaseUserName> <databaseName>SABC_Headlines</databaseName> </inBox> <inBox> <name>IBMSEForecastMovie</name> <inputType>1</inputType> <outputType>0</outputType> <inputDirectory>C:ProgramDataRTSoftwareRTSWTOGMediaWatcherinbox</inputDirectory> <urlURL>https://webpubcontent.gray.tv/wcax/Weather/XTRA/Zone4/XTRA_Sefcst.mov</urlURL> <urlDownloadPeriod>120</urlDownloadPeriod> <urlFileName>IBMSEForecastMovie</urlFileName> <urlFileType>mov</urlFileType> <outputDirectory>C:ProgramDataRTSoftwareMediaStoreimages</outputDirectory> <command>ffmpeg.exe -i “$IFILE$” -c:v qtrle “$OFILE$”</command> </inBox> </tOGMediaWatcher> |
MediaWatcher maintains a list of inBoxes. An InBox specifies data sources and other parameters for processing the data acquired from these sources. As MediaWatcher runs it checks each inBox in the order specified in the inBox list on the interface, acquires and processes data as specified by the inBox.
The configuration file contains a section per inBox and the details of inBox setup is detailed below in the section describing the interface.
The general parameters apply to all inBoxes. They are listed at the top of the configuration file and are detailed below in the section describing the interface.
Workflow
The MediaWatcher workflow proceeds as follows:
- Setup the details of what data to acquire and process,
- Acquire the data and watch the specified folders for new files,
- Process the data appropriately and save the result as directed,
- Repeat steps 2 and 3 indefinitely.
Data Acquisition
This proceeds as follows:
- If there is a feed specified make a http request using the specified url and save the downloaded data to a file in the specified watch folder. NB. the application wget.exe in the bin folder is used to do the download.
- If a serial port is specified then read data from the port between STX and ETX characters and save the data to a file in the specified watch folder (with a .dat extension).
- If a web server is specified then MediaWatcher runs a simple web server at the port supplied through the interface. External applications can post messages to this web server. These messages are saved to the watch folder with a name of the form httpMessage_<messageId>.xml – where messageId is an internally generated serial number.
Data Processing and Output
This proceeds as follows:
- MediaWatcher checks the watch folder periodically (every second).
- A file is copied to the folder with an extension which is not recognized by MediaWatcher and then once it is copied over completely it is renamed to a form which MediaWatcher will recognize.
- When MediaWatcher finds a file it creates a temporary file with a .size extension which contains just the current size of the file.
- Periodically the size of the file is checked and if it’s the same as the size stored in the .size file, it is considered to be complete. The file is then processed and deleted.
- If there is a file present it is backed up the the backups folder (if it exists) and moved to the tmp folder (this MUST exist).
- It is then presented to all the registered plugins and if any plugin accepts it then that plugin is used to process the file.
- If no plugin accepts it then it is copied to the fails folder (if it exists).
- It is then deleted from the tmp folder.
Combining InBoxes
It is possible to combine inBoxes. For instance, an RT renderer could be controlled usings messages on a serial port as follows:
- an inBox with a serial port and out folder specified will save messages written on the serial port (between STX and ETX) to files in the out folder.
- an inBox whose watch folder is the output folder of the last inBox will read that file. A command specified on this inBox could extract data from the file and write a file (with a .mos extension) to a different output folder.
- an inBox whose watch folder is the output folder of the last inBox will read that file and with the details of a MOS output specified on it will send the command to the RT renderer.
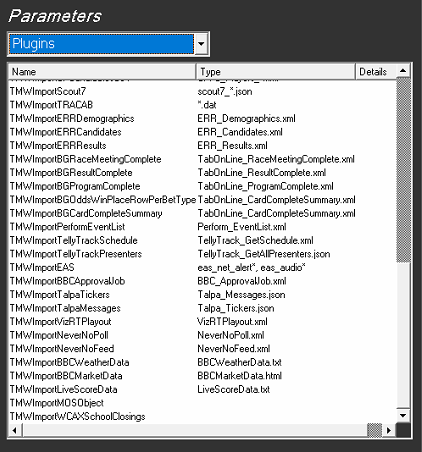
Plugins
The processing by each inBox is performed by plugins. Some are built into MediaWatcher and others are loaded when the program starts from the plugins folder.
All implement the following API:
| bool <plugin_name>_pAccept(char *fileName); bool <plugin_name>_pIsSerial(); bool <plugin_name>_pImport(char *fileName,TMWInBox *inBox); |
These methods have to have unique names – so the plugin name is included in the name of the API methods.
A plugin type is not explicitly matched with a particular file type. When a file is to be processed the pAccept method of each plugin is called with that file. This method returns true if the plugin can process the file. If it can then the pImport of the plugin is called on that file. pIsSerial determines whether the processing of a file can be threaded out. Only one plugin can process a file. The file is removed after the file has been accepted and processed by a plugin.
The order in which the plugins are tested with the new file is as follows:
- Command plugin If a command is specified,
- MOS output plugin If a MOS output is specified,
- Non-built in plugins,
- Customer-specific plugins (Opta, Scout7 etc.),
- General plugins (XML, RSS, XLS etc.).
Users can of course write their own plugins – which just have to implement the extern C interface specified above. These non-builtin plugins are stored in the plugins folder.
Built-in plugins
There are many types of plugins. Some are general and handle well known file types. Some handle formats that are specific to certain data providers (for example, the company Opta provides live and seasonal sports data).
RSS feed files
This plugin looks for a .xml extension and then inside for standard RSS tags. It parses the file and inserts the header and item data into a database.
XML files
This plugin looks for a .xml extension. It parses the file and inserts the data into a database. It uses the xpaths specified on the interface. These are not simple xpaths. Each one maps onto a column in a table. It specifies the table name (TNAME), column name (CNAME) , column type (CTYPE), column modifiers (CMODIFIERS) and the actual xpaths (CXPATH). The following is an example:
| TNAME=party_results;;CNAME=region_id;;CTYPE=varchar(65);;CMODIFIERS=PRIMARY KEY;;CXPATH=foreignkey/region_results/id |
All the xpath descriptions are used to create new tables in the database (if they don’t already exist) with the specified columns. These are then populated using the xpaths.
XLS files
The plugin looks for a .xls extension (spreadsheet). Each sheet is written to the database as a separate table. The table column names and types come directly from the spreadsheet.
CSV files
The plugin looks for a .csv extension. All the data goes into a single table in the database and the name of the file is used as the table name. The first line should contain the action to perform with the data (INSERT/DELETE/UPDATE), the second line specifies column names and the third specifies column types. The rest of the lines should contain the data.
Stack files
The plugin looks for a .stk extension. The file is moved to the out folder of the InBox e.g. the Stacks folder in a project.
Image files
The plugin looks for a recognised image or movie extension. The file is moved without alteration to the out folder of the InBox e.g. the Images folder in a project.
Zip files
The plugin looks for a .zip extension. The file is unzipped first and is expected to contain standard RT asset files (graphic, material, sound files etc). These are then copied to the appropriate folder (e.g. into a project) – the output folder specified in the inBox.
JSON files
The plugin looks for a .json extension.
Script files
A command must be specified. If it is blank then this plugin does not accept any files. The specified command must contains these two substrings:
- $IFILE$ – this is the name of the input file (in the tmp folder)
- $OFILE$ – this is the name of the output file (in the output folder).
This allows for a general conversion of any file. Previously ImageMagick has been used to scale image files and ffmpeg to convert movie formats.
MOS files
MOS protocol is used to control RT renderers over a network. Refer to the Swift CG+ manual for details of the MOS protocol. The file is assumed to contain an XML packet that conforms to the MOS protocol and is sent directly to the RT renderer without alteration.
MOSObject files
MOS Object files are extracted from rundowns created in a NRCS. They are XML files and will contain a mosPayload tag containing information about a graphic (name, project name and parameters). This is used to drive a Swift Engine instance and save a clip of the graphic to disk.
Opta feed files
This plugin reads the F9,F24, F27, F30 and F42 feeds. It looks for a .xml extension and a specific format for the file name. The file is parsed and the data inserted into a database. These feeds contain data for teams and players for individual matches and across whole seasons. Opta uploads files continuously via ftp to the watch folder.
Scout7 feed files
This plugin makes a series of http requests using the Scout7 restful API to retrieve a full set of Scout7 data. This covers a wide range of actual player, team and competition data for a wide variety of leagues as well as specific scouting information for a Scout7 login. All this information is stored in a database.
STATS feed files
This plugin reads STATS datafiles. It looks for a .xml extension and a specific format for the file name. The file is parsed and the data inserted into a database. The schema for Opta data is used.
RT Analyst (formerly Southampton BlackBox)
This set of plugins support the operation of the Analyst product. MediaWatcher is run every day to retrieve and process raw football data and populate a local database. It is then run to calculate KPIs from the raw data and a third time to ingest customer specific data.
- ImportBB_CalculateMatchKPIs
- ImportBB_CalculateSeasonKPIs
These plugins convert basic match and seasonal data (captured by other plugins in a database) into KPIs using formulae specified through tOG Analyst. They act on empty files named kpi_match.xml and kpi_season.xml which are simply copied into the watch folder.
- ImportBB_SFCPlayerPerformanceCSV
- ImportBB_SFCScoutsCSV
- ImportBB_SFCVideoLibraryCSV
- ImportBB_CPCandidatesCSV
- ImportBB_CPRiskAssessmentCSV
These are customer specific plugins to ingest data that only that customer uses. They read data from spreadsheets which are used internally by the customer.
SW6086
The ingests data from a parliamentary system which posts information to the MediaWatcher web server about the attendance and voting of parliamentary members. This was implemented for the Scottish parliament.
XIgnite*
This ingests financial data from the XIgnite web server using http requests and uses it to populate a database.
TRACAB
This ingests player tracking data for a match from the ChyronHego TRACAB system and stores the tracks in a database.
ImportBBC*
The MarketData plugin will ingest the BBC market feed – this will give a value, change and % change for a list of financial markets. Then for each of the markets the historical values for the previous year are also ingested. All data is stored in a database.
The WeatherData plugin reads a file containing a list of locations. For each of which the plugin will ingest the weather data for today and the next week. All data is stored in a database.
ImportBG*
This plugin ingests horse racing data from a few data providers. The plugin extracts lists of venues, trainers, horses and results and stores all this data in a database.
ImportNeverNo
NeverNo is a provider of social media data – handling data from a wide variety of social media platforms and providing the data in a consistent format. The plugin moves the images and movies (for avatars and attached assets) to a specified folder and message contents and poll results are stored in a database.
ImportEAS
EAS is the United States Emergency Alert System. The plugin watches a folder to which EAS systems write XML files containing alerts. It then sends MOS commands to the specified MOS output (an RT renderer) which transmits a graphic showing the alert information.
LiveScore data
This plugin ingests LiveScore football data (including fixtures, results, league tables) and saves it to a database. The data is acquired by making HTTP requests to LiveScore servers using a purchased api key.
There are also some very customer specific plugins that are listed here for completeness:
- ImportSwissTimingSwimming – reads Swiss Timing swimming results data and stores them in a database.
- ImportBayernMunichClip – transcodes movie files used by Bayern Munich football club. This is now replaced by a command.
- ImportBBCApprovalJob -EOL..
- ImportERRCandidates/ImportERRResullts – EOL.
- ImportTV3Schedule – EOL.
- ImportVizRTPlayout – this processes the VizRT xml data file and puts the results in a database.
- ImportWCAXSchoolClosings – EOL.
- ImportICESchedule – EOL.
- ImportPerformEventList – EOL.
Interface
The application popups up this interface and then minimizes it to the system tray.
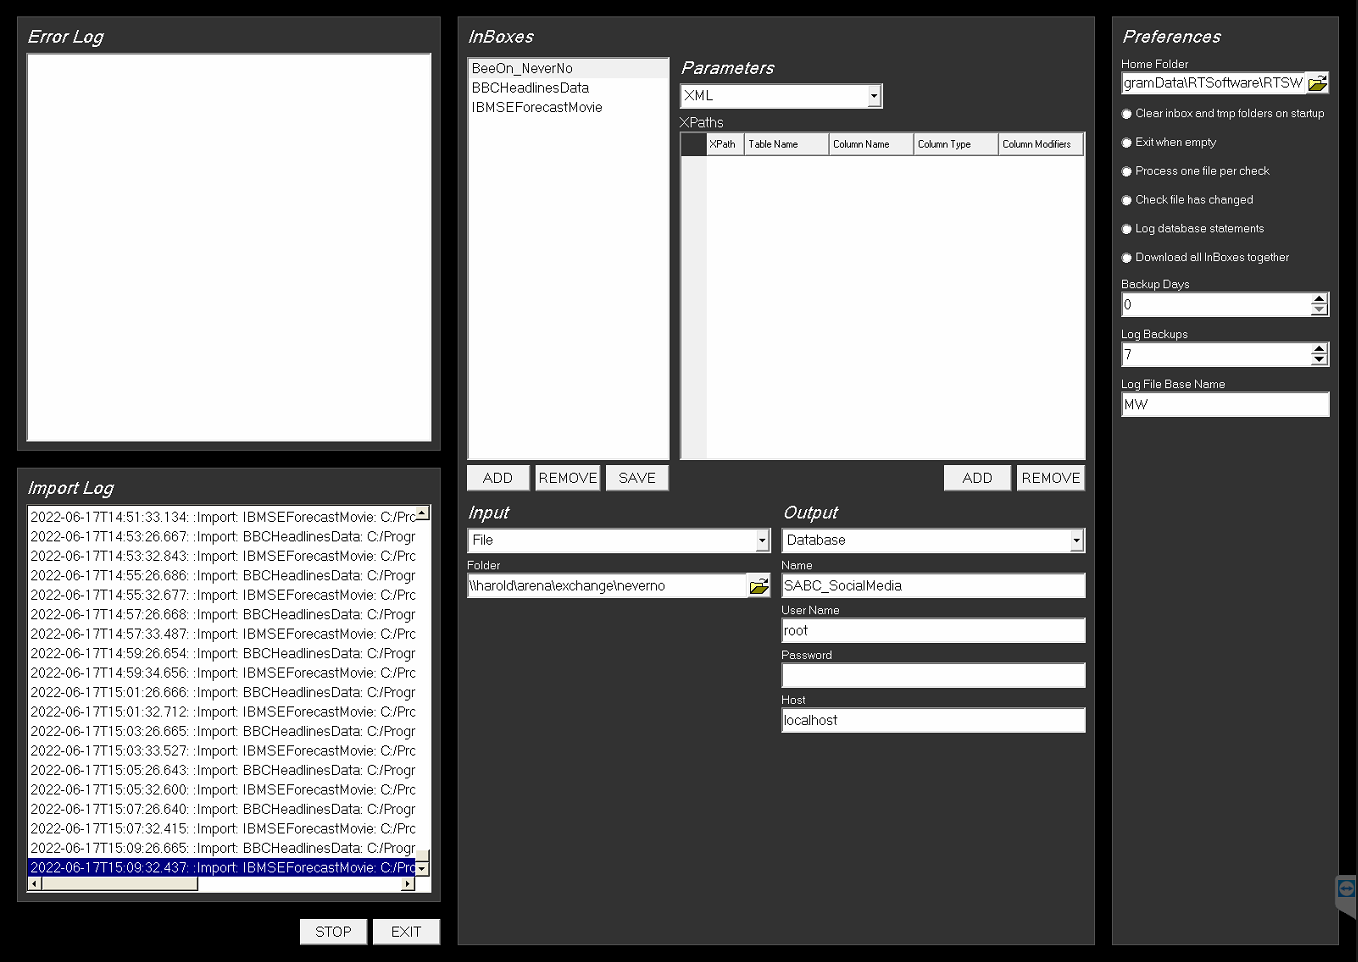
All the available controls are on this single interface.
Preferences
This section allows for the editing of general parameters – these apply to all inBoxes.
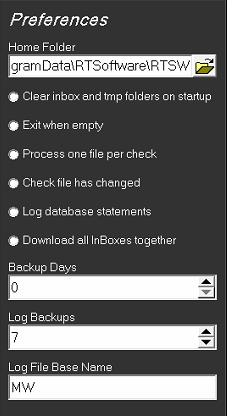
Home Folder – this is the location of the RTSW folder.
Clear inbox … – this will clear out the watch folder when MediaWatcher is started.
Exit when empty – if true, MediaWatcher will exit if the watch folder is empty.
Process one file per check – if true, MediaWatcher will process one file from the watch folder at a time (before a further download cycle), otherwise all files in the watch folder are processed.
Backup Days –
Check file has changed – if true, MediaWatcher will save the last downloaded version of this file. The current version is compared with this saved file and if it has not changed then the file is not processed any further.
Log Backups – the number of log files to retain when rotating lo files.
Log File Base Name – a string to include in the log file name (to make it unique).
Log Database Statements – save all the database statements to the log file (this can make the log very big).
Download all inBoxes … – if true, MediaWatcher will download all the files specified in the inBoxes before any processing is done.
Errors and Imports
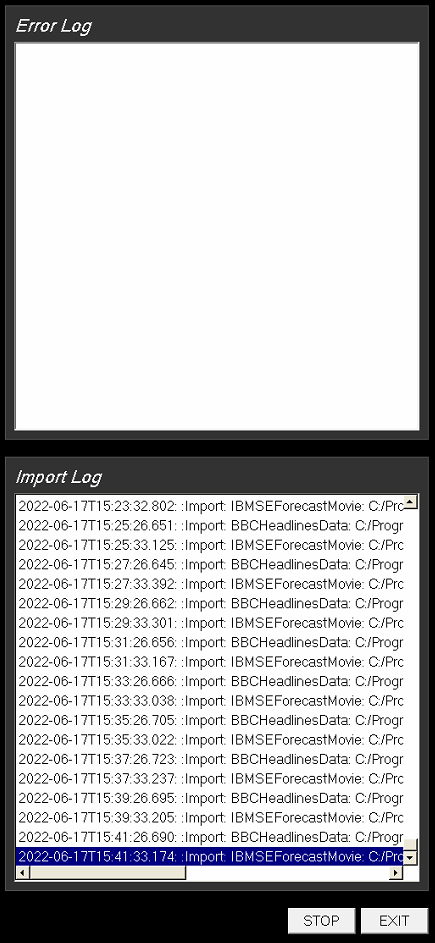
Every successfully processed file is listed on the Import Log list and any errors on the Error Log list. This information is also written to the log file in the log folder.
InBox Management
The inBoxes are listed here.
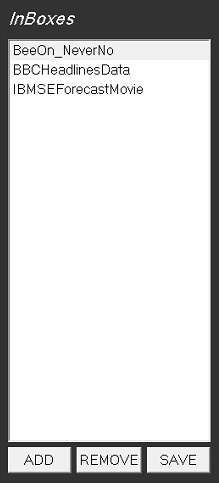
Any number of inBoxes can be created using the ADD button. They can be removed using the REMOVE button. The selections on the Input, Output and Parameters tabs are specific to each inBox.
Inputs
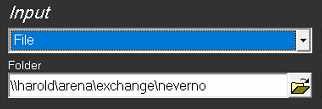
This option sets the watch folder for the inBox. The watch folder is checked for new files every second and if the file stops growing in size for a specified duration the file is considered to be complete and ready to be processed.
Folder – this is the watch folder. It is the default but not necessary behaviour to set it to RTSW/TOGMediaWatcher/inBox.
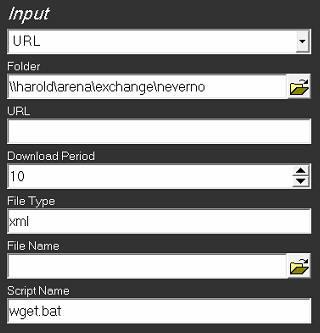
This option sets up the inBox to download a file. The file is downloaded to a watch folder and is then handled just as files in the File input type.
URL – this is a list of URLs. Periodically a http request is made to these urls and the resulting file is saved to the Folder.
Folder – this is the watch folder. It is the default but not necessary behaviour to set it to RTSW/TOGMediaWatcher/inBox.
Download Period – the period in seconds between downloading from urls.
File Type – the extension of the filename downloaded from the URL.
File Name – the downloaded file is renamed to this name.
Script Name – this script is used to download the file. The script is located at RTSWbin and by default is wget.bat. This bat file runs the wget.exe. The script takes the parameters: the URL above, the input file name, the log file name and the output file name.
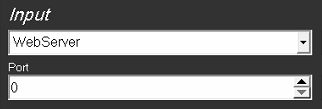
Setting a port on this inBox will cause MediaWatcher to run a Web Server and wait for POSTs.
Port – a simple web server is run at this port which accepts POST requests.
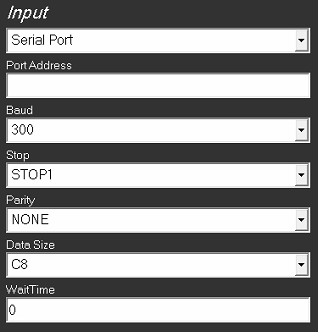
Port Address – the number or descriptor of the serial port.
Baud – the serial port speed (default: GM_SIO_19200),
Stop – the end of a message bit (default: GM_SIO_STOP1),
Parity – Parity bits are a simple form of error detecting code (default: GM_SIO_NONE),
Data Size – the serial packet size (default: GM_SIO_C8).
Wait Time – time to wait until a serial feed is considered to be disconnected (default: 0 no timeout).
Inputs
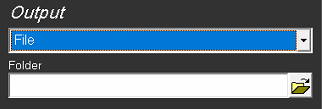
Folder – this is the output folder. It is the default but not necessary behaviour to set it to RTSW/TOGMediaWatcher/outBox.
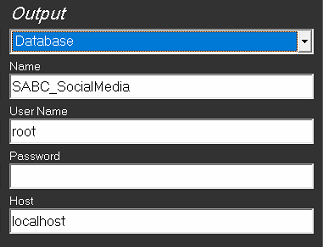
Name – the name of the database.
User Name – the user name (usually root).
Password – this password (usually blank).
Host – the ip address or name of the machine hosting the database.
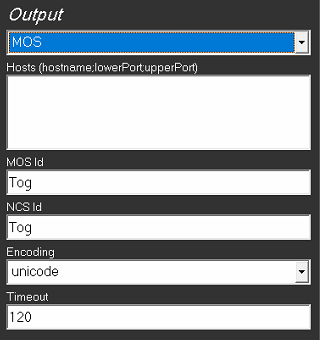
These parameters should match the MOS protocol parameters on the Swift CG+ instances running at the specified hosts.
Hosts – this lists the connection details of the Swift CG+ instances to be controlled. Th
MOS Id – the MOS Id of the Swift CG+ instance (usually Tog).
NCS Id – the NCS Id of the Swift CG+ instance (usually Tog).
Encoding – the text encoding of the messages being sent (either ascii or unicode – usually unicode).
Timeout – the heartbeating period and comms timeout.
XML XPath Parameters
These are used by the general XML plugin to extract data from the file. One xpath is defined per line.
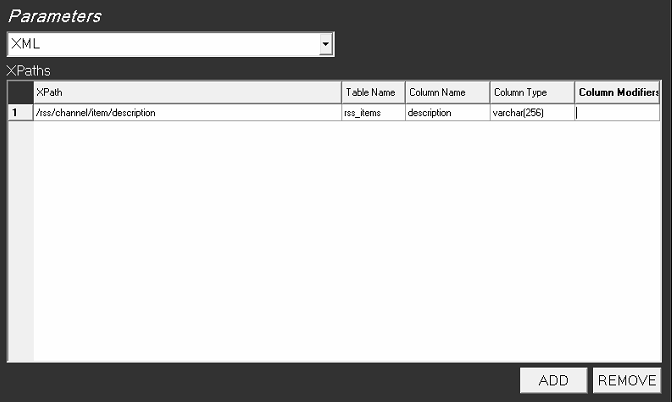
XPaths can be added and removed. They map an XPath descriptor (this identifies a part of an XML file – the website: https://www.freeformatter.com/xpath-tester.html describes them an allows xpaths to be tested against sample xml) onto a database table column. The table will be created if it does not exist (using the column types and modifiers).
XLS Cell Selection Parameters
These are used by the general XLS plugin to extract data from the file. One cell selection is defined per line.
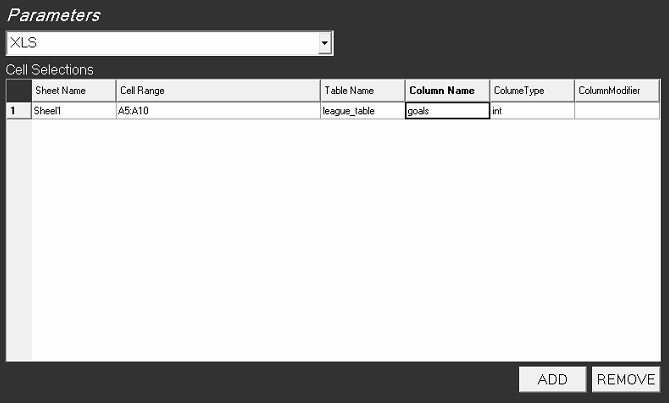
This maps a selection of cells in a spreadsheet to a column in a database table. The cell selection is defined by a sheet name and a cell range. The table and column are defined by the table name and column name, type and modifiers. The table is created if it does not exist.
Command Parameters
This interface specifies a command to be applied to input files and general parameters that can be used by any plugin.
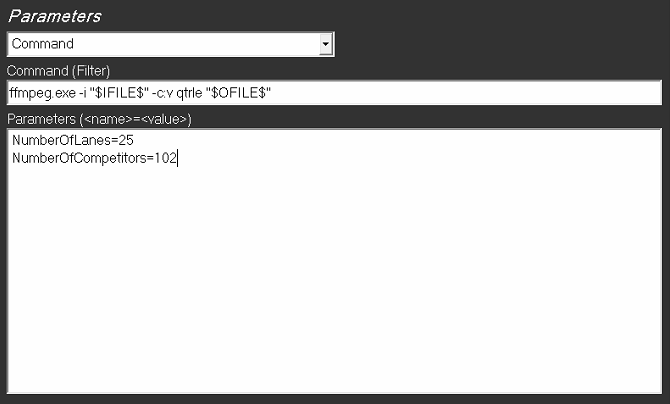
The general parameters table the form of name/value pairs and are accessible inside any plugin. The command is applied to any file just after it has been downloaded and before it is processed or moved to an output folder. It can be any command or script that is on the system path. THE IFILE and OFILE literals will be replaced by the appropriate filename when the command is run.
Appendix A
Windows Install for Mysql
Locate the correct version of MySQL: 5.5.35 or 5.1. This can be downloaded from the RTSW ftp site onto the machine desktop.
- Double click on the installer which opens the install application.
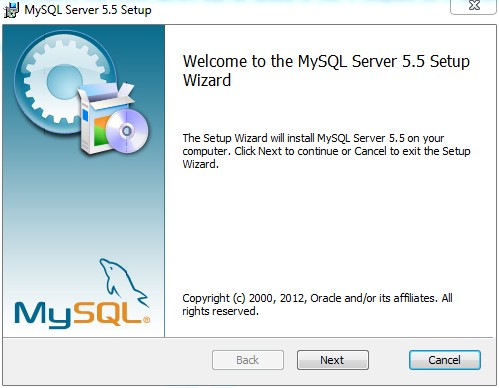
- Click Next.
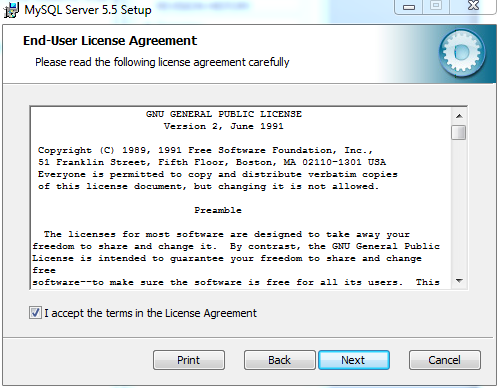
- Click Accept then Next.
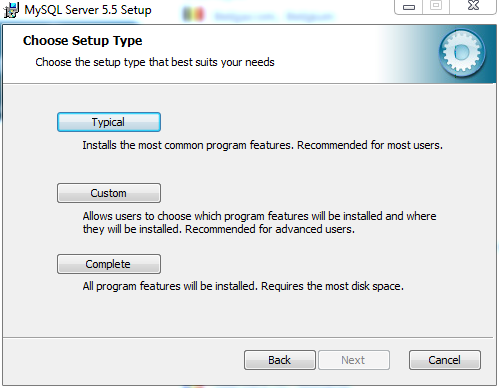
- Click Typical.

- Click Install. Mysql will now install.
- Click Next.
- Click Next.
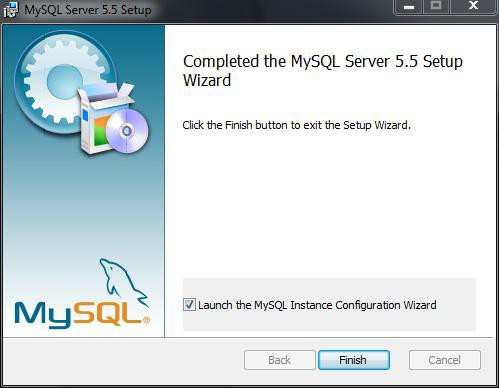
- Mysql will now launch the Mysql Instance Configuration.

- Click Next.
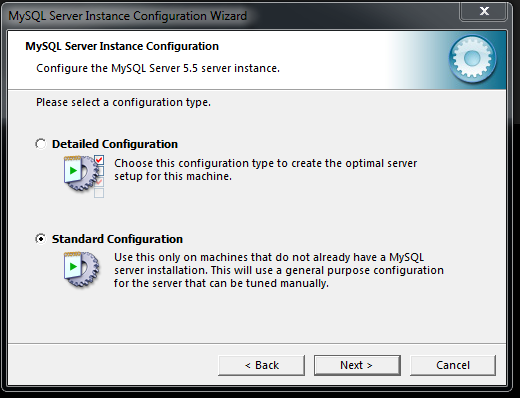
- Select Standard Configuration and then Next.
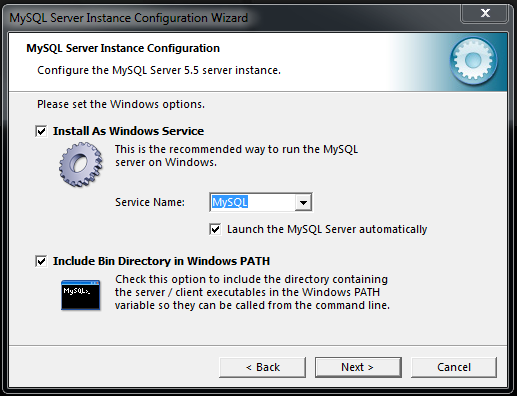
IMPORTANT NOTE: : Ensure you select “Include Bin Directory in Windows PATH” option
- Click Next
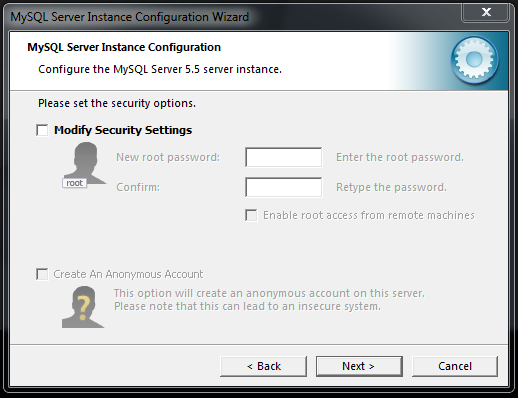
IMPORTANT NOTE : Deselect the ”Modify Security Settings”
- Click Next – this remove the need for a password when logging into the database.
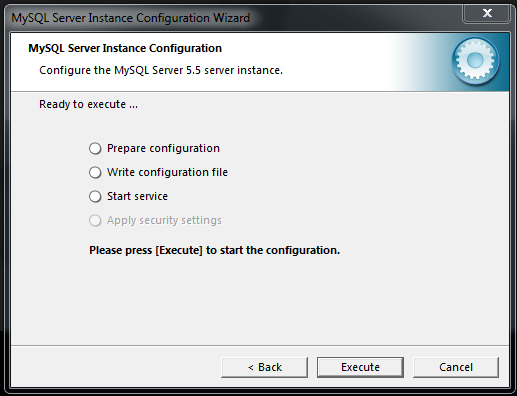
- Now click Execute.
The Mysql service will now be started and install should complete.
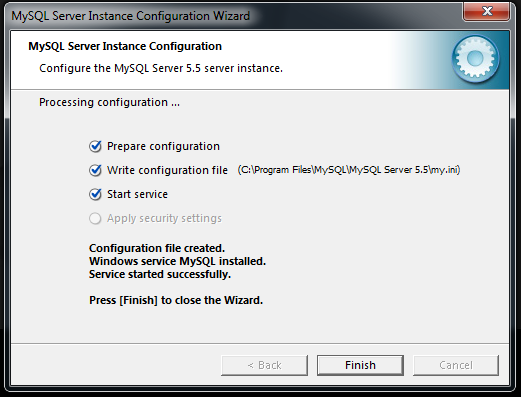
- Click Finish to complete the Mysql install.
Once MySQL has been installed, we have the framework ready to create specific databases into which our data can be written to and retrieved from.
Creating a database
Now MySQL is installed a new database is required into which data can be stored and retrieved.
- Click the Windows Start button.
- Enter into the search string: cmd
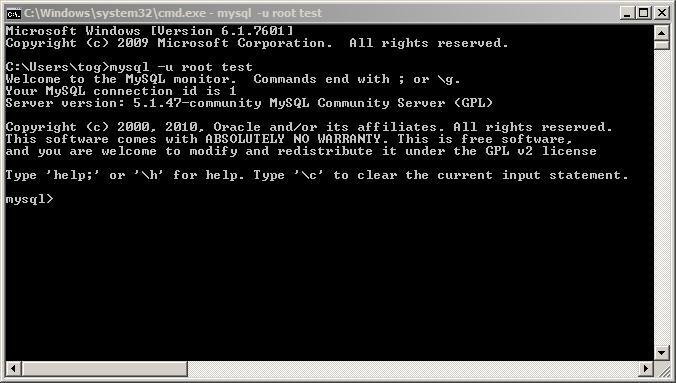
- Enter: mysql -u root
- Press <return> on the keyboard.
- Enter: create database xxxx; where xxxx is the name of your database.
- Press <return> on the keyboard.
IMPORTANT: Do not forget to input the semi-colon.
You should see the line:
Query OK, 1 row affected <0.01 sec>
- Enter: exit
- Close the command window.

