TacticDraw-5.4.3
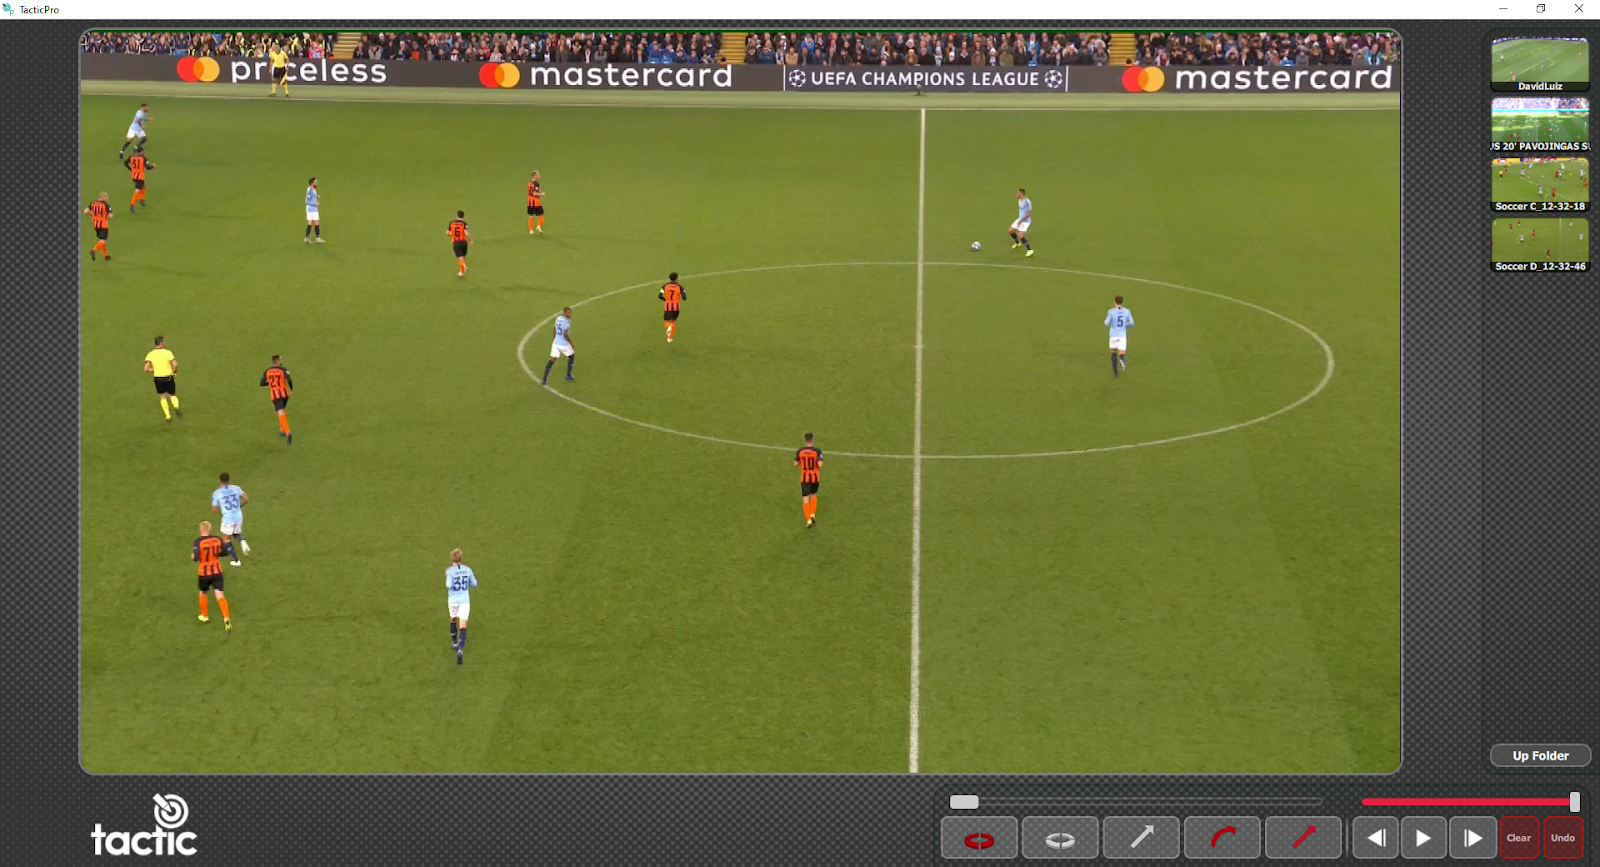
Tactic Draw is an interactive application that allows you to place specifically designed graphics into recorded video. It has various configurations and modes of operation that meet the demands of live telestration worldwide.

Reference Manual
| About | Description |
| Revision | 5.4.3 |
| History | v1.0 |
| Authors | RTSW Support |

Overview
Tactic Draw is an interactive application that allows you to place specifically designed graphics into recorded video. It has various configurations and modes of operation that meet the demands of live telestration worldwide.
Tactic Draw can work with either internal, file-based clips or via external video, including SDI, NDI or uncompressed IP video such as ST2110 coming from either live sources or from VTR devices using a number of industry standard protocols. Video control is provided via an intuitive VTR control panel on screen.
Tactic Draw operates purely in a 2D camera mode. The camera mode dictates how the graphics drawn will appear in relation to the real broadcast camera used to film the footage.
As well as supplying a set of predefined graphics you can also build your own by customising any of these predefined graphics. These will automatically appear on the user interface.
Video Tutorials
Video tutorials are available to assist with installation and using Tactic Draw.
Installation
General Guidelines
Please observe these guidelines. Observation of these simple guidelines will avoid many typical installation problems.
- For Windows users to install, the user account name MUST have Administrator rights
- The user account name MUST NOT contain spaces or any non-English characters
- The software can only be used on the PC on which it is installed (no network / fileserver)
- The recommended screen resolution is 1920 x 1080
(1366 x 768 minimum, 3840 x 2160 maximum)
Supported Hardware
Check our website for the latest supported hardware configurations.
https://rtsw.co.uk/support_info/supported-hardware/
See Tactic Draw Hardware Specs.
Supported Operating System
- Windows 10 x64
nVidia Graphics Card and Drivers
If not already installed, these may be obtained from the nVidia website www.nvidia.com and are specific to the hardware installed in your PC.
AJA Video Card and Drivers
To send and receive SDI video an AJA video card is required. If you require uncompressed IP video (ST 2110) please contact us about Mellanox Connect X support.
Always use the AJA driver version that is available with the installed version of Tactic Draw.
If you are re-installing or updating then refer to the uninstall section below before attempting a reinstall/update.
Locate the appropriate driver from the RTSoftware web site or FTP site.
You will need an authorised login to access this site. If you do not have one then please contact support@rtsw.co.uk.
DO NOT INSTALL AN AJA DRIVER FROM THE AJA WEB SITE UNLESS EXPLICITLY DIRECTED TO BY RTSoftware
RT Software Security
Tactic Draw is licenced using one of the following methods.
1 – Software Licence (SL)
A software licence key installed on the PC.
A Trial licence is available upon request from RT Software. To obtain a software licence, contact sales@rtsw.co.uk
2 – USB Security Key – Hardware Licence (HL)
The USB Security key (dongle) must be inserted in a USB port of the PC at all times.

To obtain a USB Security key (dongle), contact sales@rtsw.co.uk
NOTE: See the relevant sections in the Appendix to request / install / update or transfer the licence.
Download the Installers
Tactic Draw is available to download from our website at this location: https://rtsw.co.uk/software-downloads/
Please contact support@rtsw.co.uk if you have any questions.
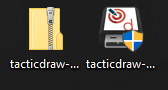
The following lists the installers needed for Tactic Draw:
| Installer | Description |
| tacticdraw-5.4.3_rxxxxx-windows-installer.zip | Tactic Draw installer |
| ajadriver-<version> -windows-installer.exe | AJA video card driver. Optional. |
Installation
Once you have downloaded the necessary installer you are ready to proceed.
tacticdraw-5.4.2_rxxxxx-windows-installer.zip* (The file name may vary depending on the latest downloaded version where the release number (rxxxxx number) would be different.
Unzip the file and place a copy of the installer on your desktop.
Run the installer, accept all defaults and conditions and click  as required.
Reboot your PC
NOTE: Once the installation is complete – Reboot your PC
Users Desktop
The installation process will have created an RTSW folder on the user’s desktop.
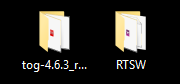
NOTE: Do NOT delete this folder.
This RTSW folder will contain the Tactic Draw project folder etc..
The installation process will have created a Tactic Draw shortcut on the user’s desktop.
Uninstall
To uninstall Tactic Draw run the uninstaller in the RTSW folder.
or
Use the system “Settings” tools, “Control Panel” or “File Explorer”.
AJA Driver Installation (Optional)
Once you have downloaded the necessary installer you are ready to proceed.
ajadriver-<version> -windows-installer.exe
Run the installer, accept all defaults and conditions and click as required.
Reboot your PC
For details of cable connections see the separate document AJA Driver Installation.pdf
AJA Driver Uninstall
To uninstall the AJA Driver open up the Control Panel.
Locate the 2 AJA entries and uninstall both.

Note that only 1 AJA driver can be resident on the machine at any one time. If you see more than 2 AJA Drivers then uninstall all of them. The entries are identified by either ‘RT Software’ or ‘NTV2 Drivers’
Locate the directory
C:Program Filestogdrivers
Remove any entries starting with ‘AJA’
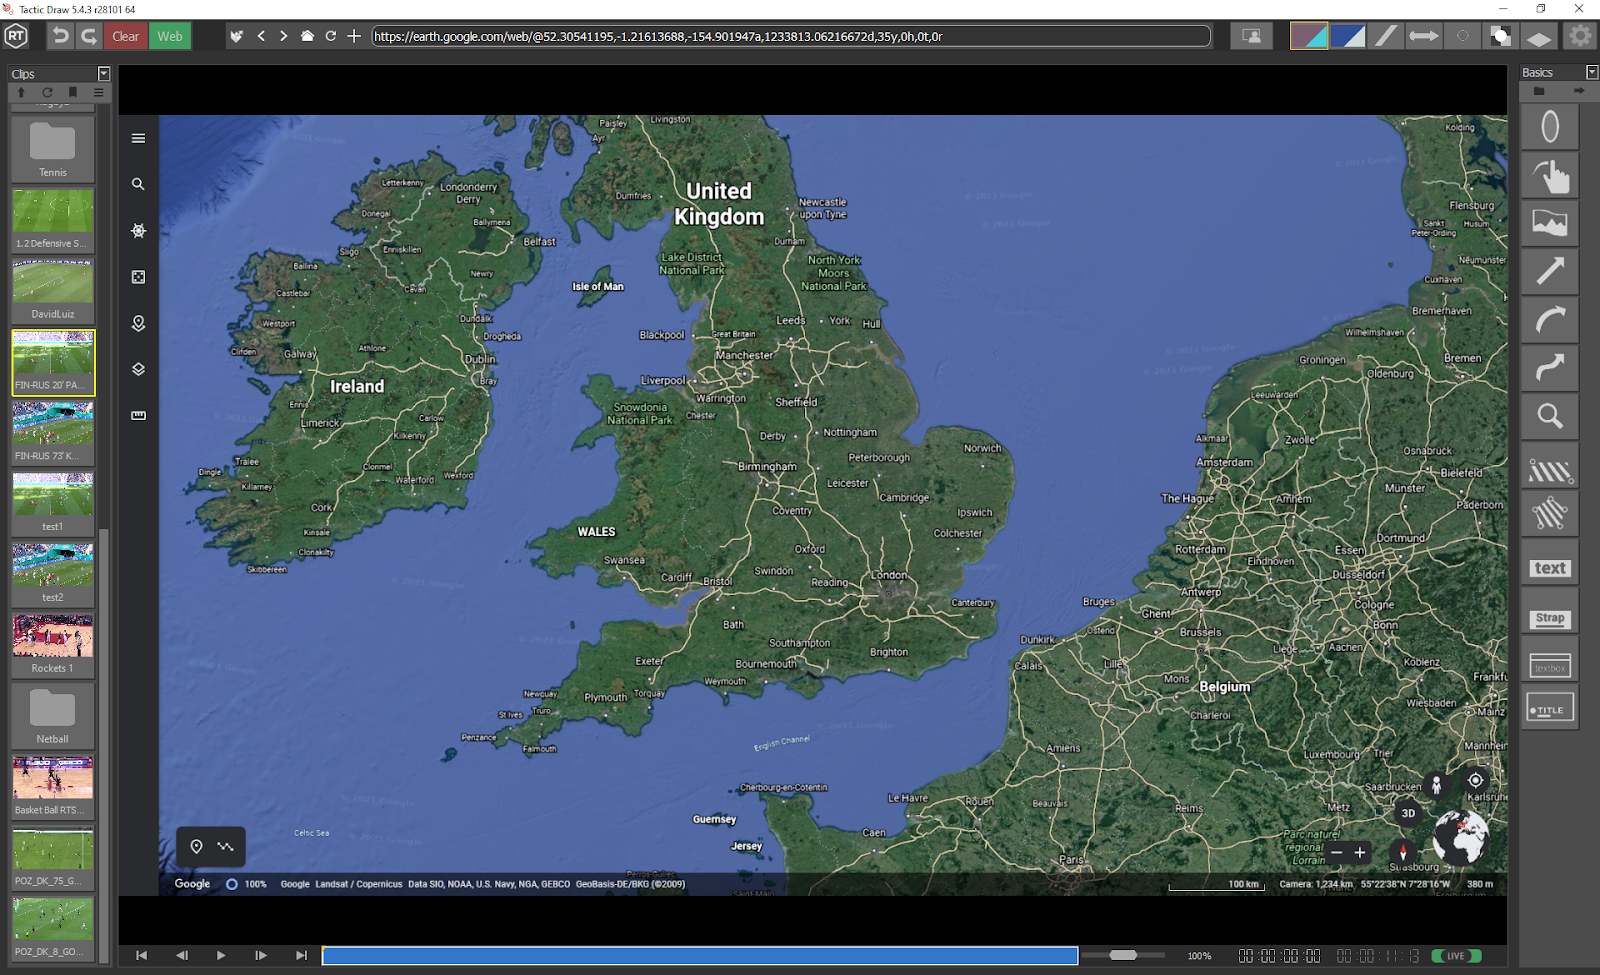
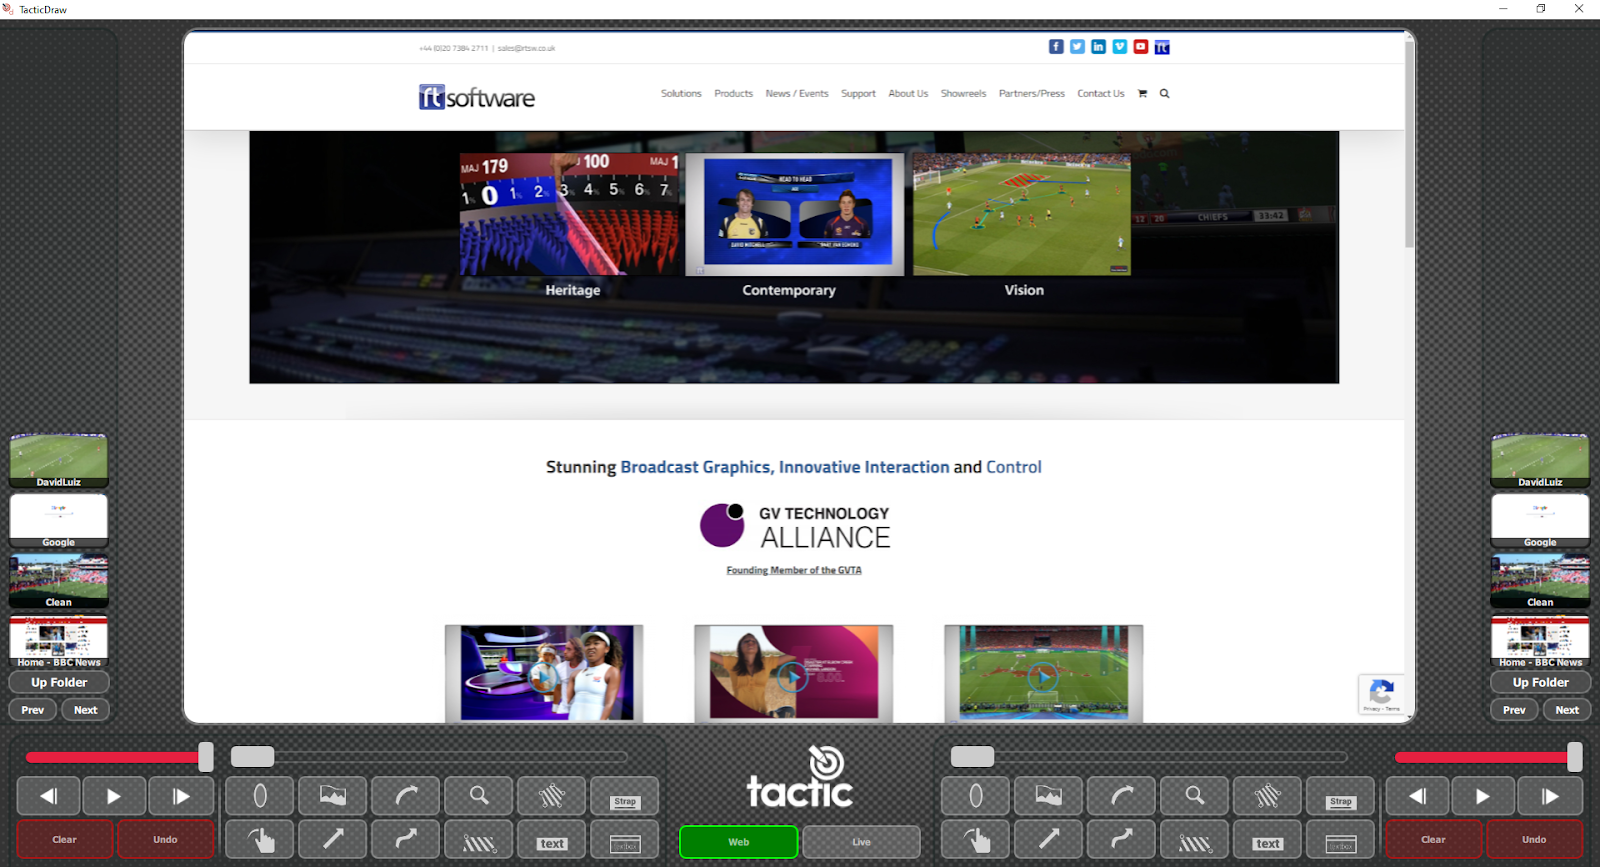
Interface Overview
- Toolbar
- Undo/Redo
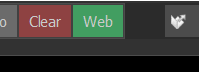
- Clear
- Web
- URL Bar
- Palette
- Preferences
- Video
- Clip Browser
- Clips
- Stories
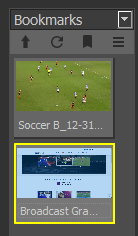
- Bookmarks
- VT bar
- Play/Pause/Rewind/etc
- Seek bar
- Live/Channels
- Graphics
- Basic Graphics
- Composite Graphics
Basic Configuration
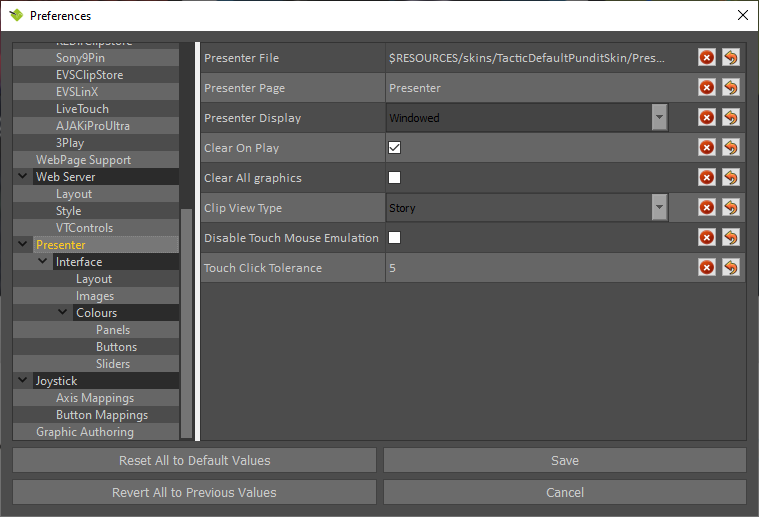
Preferences
Tactic Draw should be pre-configured for your system and ready to use.
Access the Preferences to change the default configuration.
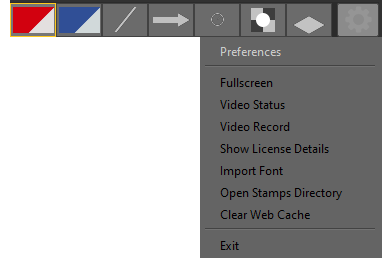
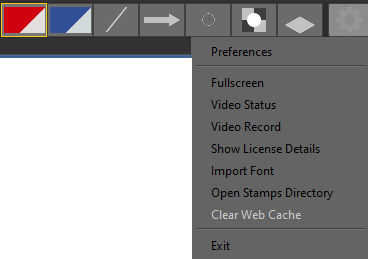
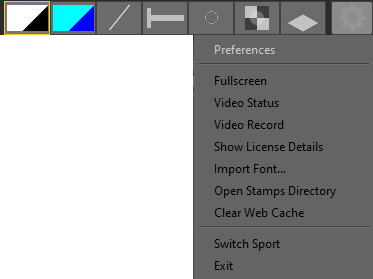
Select the “gear” icon in the top right corner and select “Preferences” …
For details of all application Preferences see Appendix A in this document.
User Data
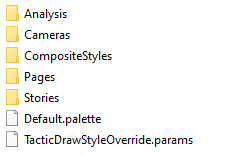
All user data and application Preferences are stored in a single folder on the user’s desktop.
This ensures that each video project can be configured independently, and any project specific analysis tools are separated.
e.g. DesktopRTSWTacticDraw
Initialisation File
It is recommended to use the preferences menu in Tactic to review settings. Tactic Prefrences can be reset by deleting or renaming this file.
C:UsersusernameAppDataRoamingRTSoftwaretacticdraw.ini
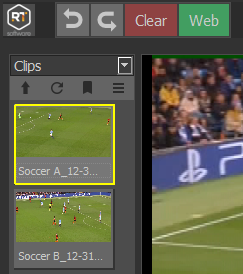
Clip Browser
Thumbnails of all stored video clips in the folder specified in Set FileClipStore options.
e.g. DesktopRTSWclips
Select Refresh Clips to update the display

Load a Video Clip
Choose and select a video clip from the Clip Browser.
VT Controls
The VT Controls are used to Play/Advance/Rewind the video clip.
Rewind to beginning, Step back one frame, Play, Step forward one frame, Fast Forward to end.

Seek Bar. Drag the vertical line to the desired clip position (Timecode).

Jog video clip backwards or forwards.

The Timecode for the current video clip position and total duration of clip.

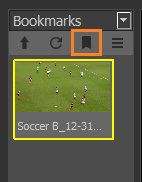
Clip Bookmarks
Use the VT Controls to Play/Advance/Rewind the video clip and create a Bookmark at any point in the video clip that may be useful for future analysis.
Add Bookmark
Add a Bookmark at any position (timecode) within the current loaded clip.
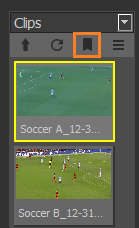
Load Bookmark
Choose and select a Bookmark to analyse from the Clip Browser.
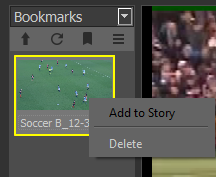
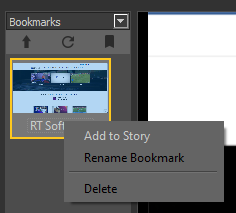
Delete Bookmark
Select the Bookmark, press the “Right Mouse Button” then Delete
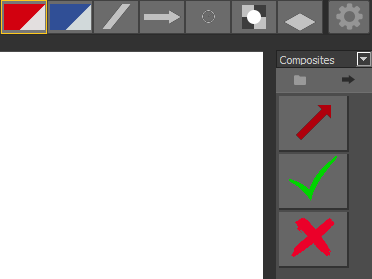
Palette
Use the Palette tools to set preferences for the graphics tools.
Palette tools include 2 colour combinations, Thickness, Arrow Type, Size, and Opacity.

Right click on the required Palette tool to change preferences.
Colours
Select and hold the Colour Palette tool to change preferences.
A selection of colours has been pre-defined.
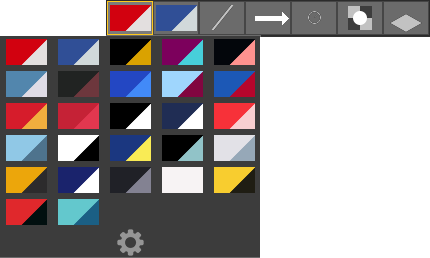
To edit the Colour combinations, select the “gear” icon at the bottom of the list.
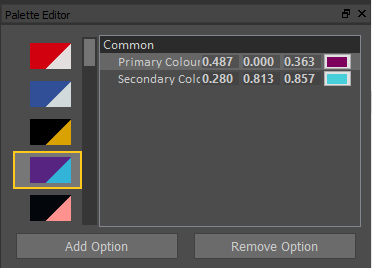
To change either the Primary or Secondary colour enter numeric values for RGB or use the Colour Picker.
Colour Picker
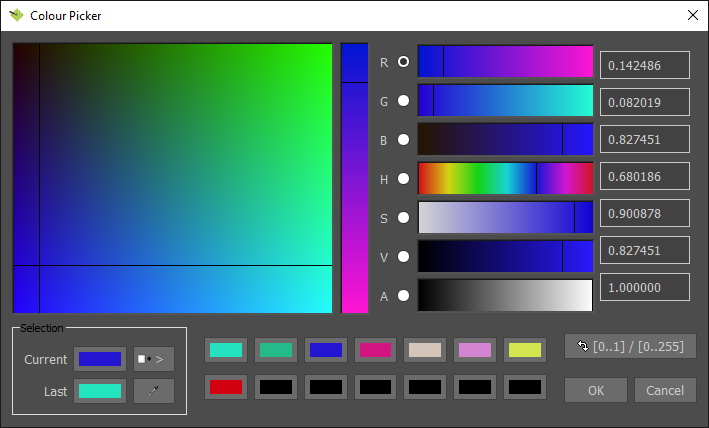
Add current colour definition to the colour palette.

Use the colour grabber to select colour from anywhere on screen.

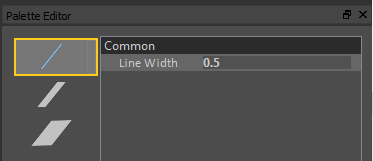
Thickness
Select and hold the Thickness Palette tool to change preferences. This will affect all tools, including arrows and ellipses.
A selection of line thicknesses has been pre-defined.
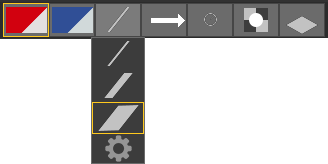
To edit the line Thickness, select the “gear” icon at the bottom of the list.
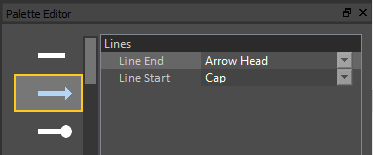
Arrow Type
Right click on the Arrow Type Palette tool to change preferences.
A selection of Arrow Types has been pre-defined.
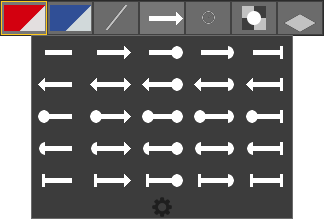
To edit the Arrow Type, select the “gear” icon at the bottom of the list.
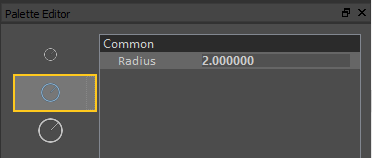
Size
Select and hold the Size Palette tool to change preferences.
A selection of Sizes has been pre-defined.
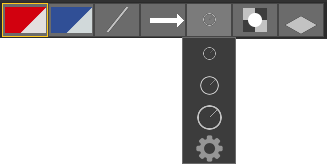
To edit the graphic Size, select the “gear” icon at the bottom of the list.
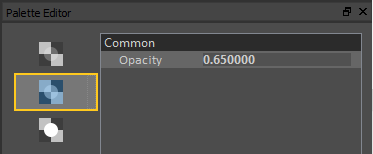
Opacity
Select and hold the Opacity Palette tool to change preferences.
A selection of graphic Opacity settings has been pre-defined.
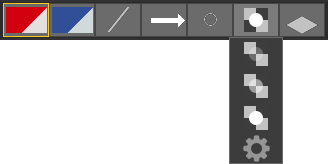
To edit the graphic Opacity, select the “gear” icon at the bottom of the list.
Edit a Graphic
The colour, thickness, style, size and opacity of many Graphics are controlled by the Palette.
These, and additional parameters of the chosen Graphic can be modified once the Graphic has been added to the video clip.
Navigate using the thick red line on the Seek Bar to the desired video clip position or use the VT Controls so that the chosen Graphic is visible.
Or navigate to the chosen Graphic using

Parameter Editor
Editing parameters is done via the parameter editor which is opened by right clicking the graphic and selecting Open “Parameter Editor”.
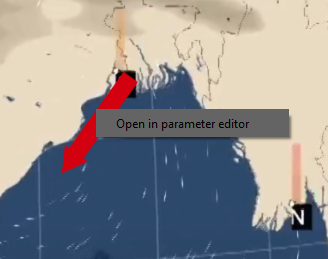
The parameters of the chosen graphic will be displayed.
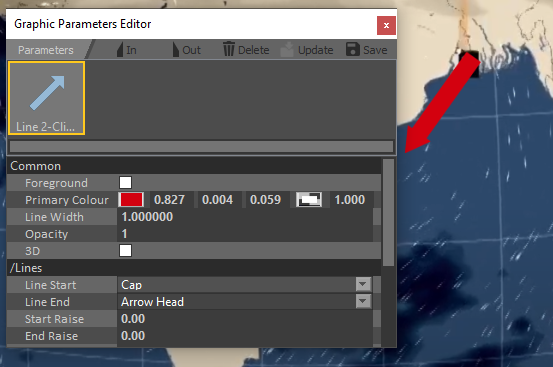
Adjust the colour, thickness, style, size and opacity etc.. as required.
Set In/Out Timecode
The In timecode for Graphic(s) are initially set at the timecode when the Graphic(s) are added to the video clip.
The Out timecodes for Graphic(s) are set individually or all at the same time.
Adjust the In and/or Out timecode by navigating using the red line on the Seek Bar to the desired video clip position or use the VT Controls and use

Delete Graphic
Delete the current Graphic from the Analysis sequence using

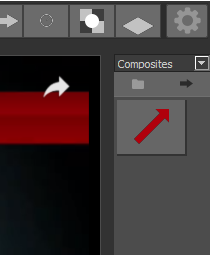
Create Style
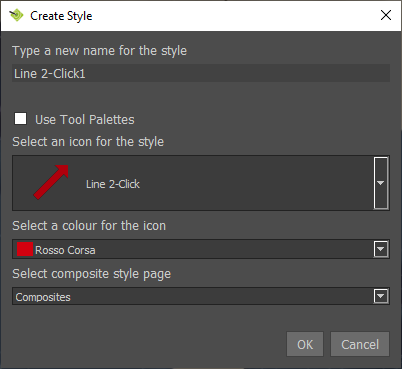
Change the Parameters of the current Graphic and Save this as a new style using

Choose a name and an icon to represent the new style.
To allow the new Graphic to share colour, thickness, style, size and opacity from the Palette, enable “Use Tool Palettes”.
It is possible to save the style to a different tool page directly by selecting the desired page in the dropdown box.
This will be added to the Composite Styles page on the Graphic menu.
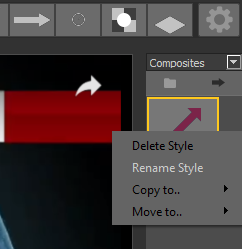
Delete Style
Select the Graphic with the “Right Mouse Button” to delete it from the Composite Styles menu
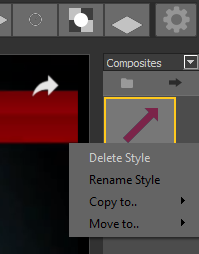
Rename Style
Select the Graphic with the “Right Mouse Button” to rename it from the Composite Styles menu
Add Pages for Composite Styles
Select the dropdown box and choose ‘New Page’
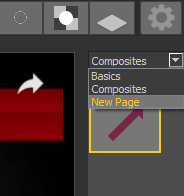
Enter the page name in the dialog
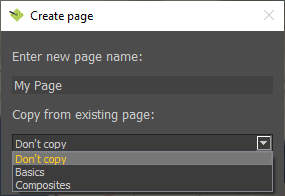
Choose a page to copy all styles from if wanted.
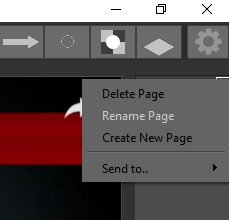
To Delete a Page, select the dropdown box with the “Right Mouse Button” or click the page icon
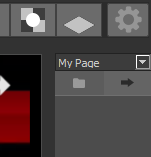
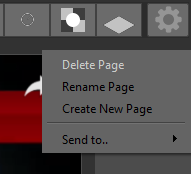
To Rename a Page, select the dropdown box with the “Right Mouse Button” or click the page icon
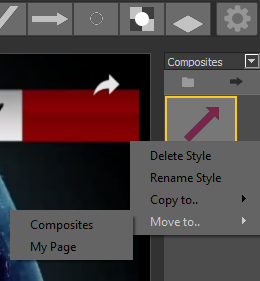
Organising Styles
Composite styles can be moved and copied to user created pages or the Composites page
To Copy a style to another page, select the style with the “Right Mouse Button” and select the page to copy the style to
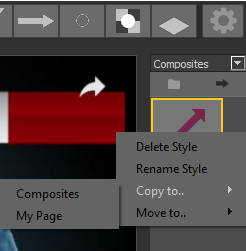
To Move a style to another page, select the style with the “Right Mouse Button” and select the page to move the style to
Stamps
Stamps provide an easy approach to inserting image graphics onto the scene.
Search for the images on your systems file manager and select images
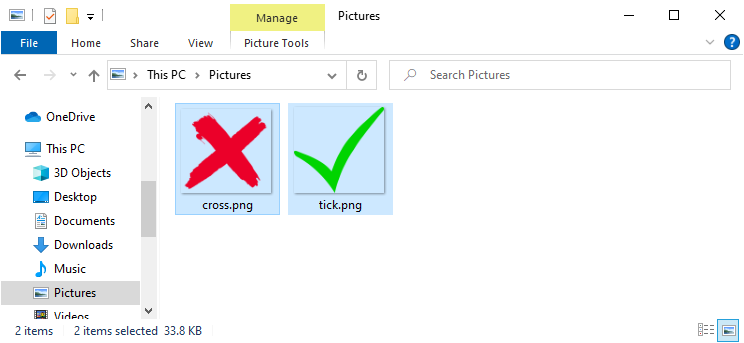
Drag onto the tool box in Tactic Draw
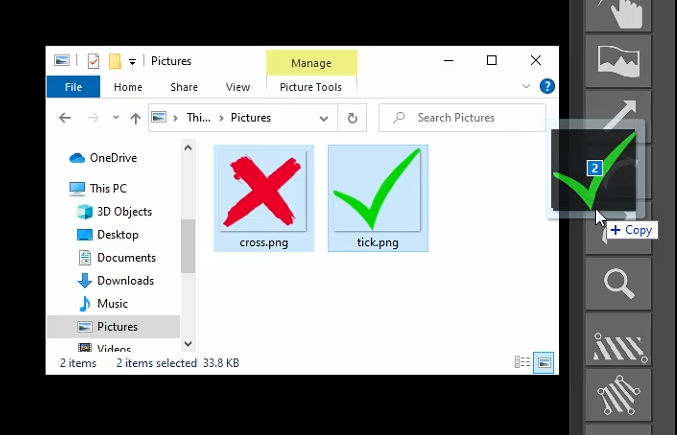
Custom styles are created and stored in the current active tool page or the Composites page if the Basics page was previously active
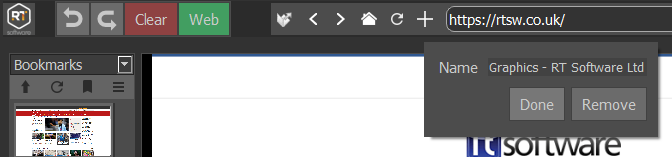
Web Pages
Enter a URL in the URL bar and press Enter to load the web page. Local directories can be used here too to show local images and PDFs.
Graphics can be placed on top of the web page.


URL Bar
The URL bar has tool buttons to help navigate through the web browser.
From left to right:
- Open file
- Open a file to load into the web browser
- Back
- Navigate to previous page
- Forward
- Navigate to next page
- Home
- Navigate to the home page set in preferences under ‘WebPage Support’
- Refresh
- Reload the current web page
- Bookmark Page
- Create a web bookmark (see Web Bookmarks)
Interactivity
Toggle Web mode with the Web button in the toolbar.
With Web mode active, mouse and keyboard inputs will be passed to the web page.
While Web mode is active, placed graphics will not be interactive without deactivating web mode.
Clicking a graphic tool will automatically deactivate web mode.
Cache
Web cache is stored while web pages are in use.
Clear web cache by selecting ‘Clear Web Cache’ in the cog menu.
Web Bookmarks
Bookmark a web page with the bookmark button in the toolbar.
Navigate to the web bookmark by selecting the bookmark in the bookmarks page.
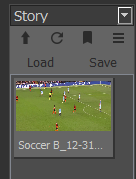
Story
Use a story to collate a particular set of Clips, Clip Bookmarks, or Web Bookmarks for presentation, rather than providing the entire contents of the Clips folder.
Add a Bookmark to a Story
To Add a Bookmark to a Story select the Bookmark with the “Right Mouse Button”
View Story
To view the contents of a Story, select the Story tab from the dropdown box
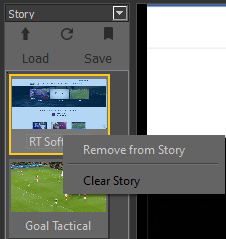
Remove from Story
To Remove an item from a Story select with the “Right Mouse Button”
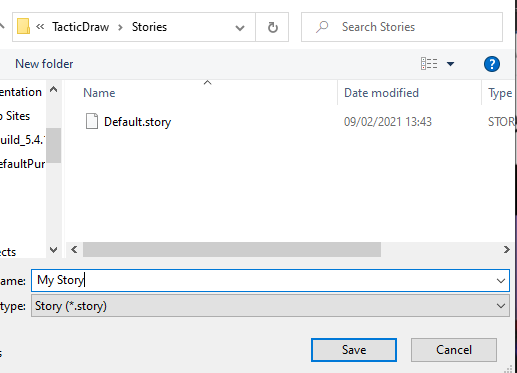
Save/Load Story
By default, your story is saved to a default story file which is automatically loaded and saved when Tactic Draw starts up.
Stories can also be named and saved to a story file and loaded separately.
To Save the default story to a separate story, click the Save button once the Story page is selected

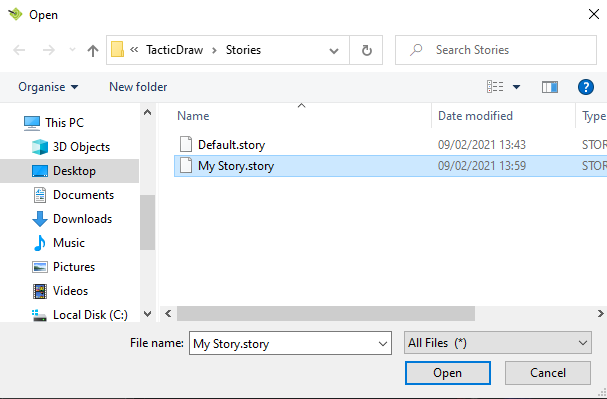
To Load a story, click the Load button and select the desired story to load

Present a Story
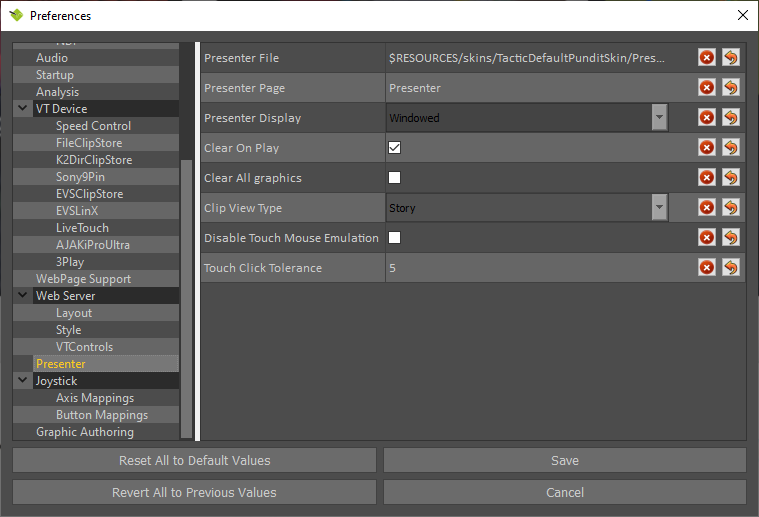
In Preferences, set the Clip View Type to Story to view the Story in Presenter mode…
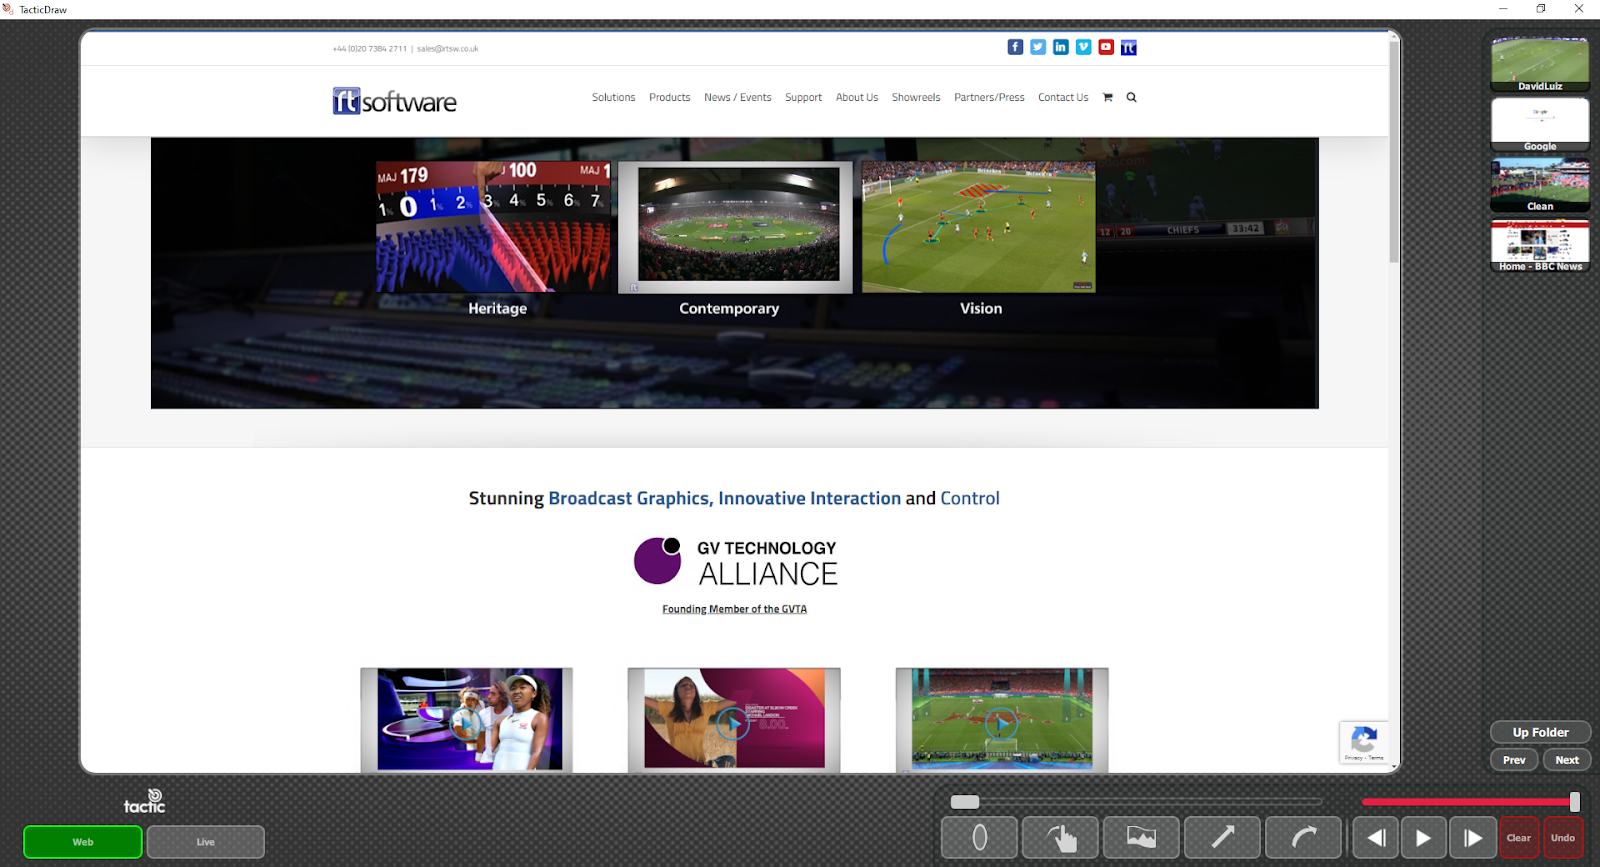
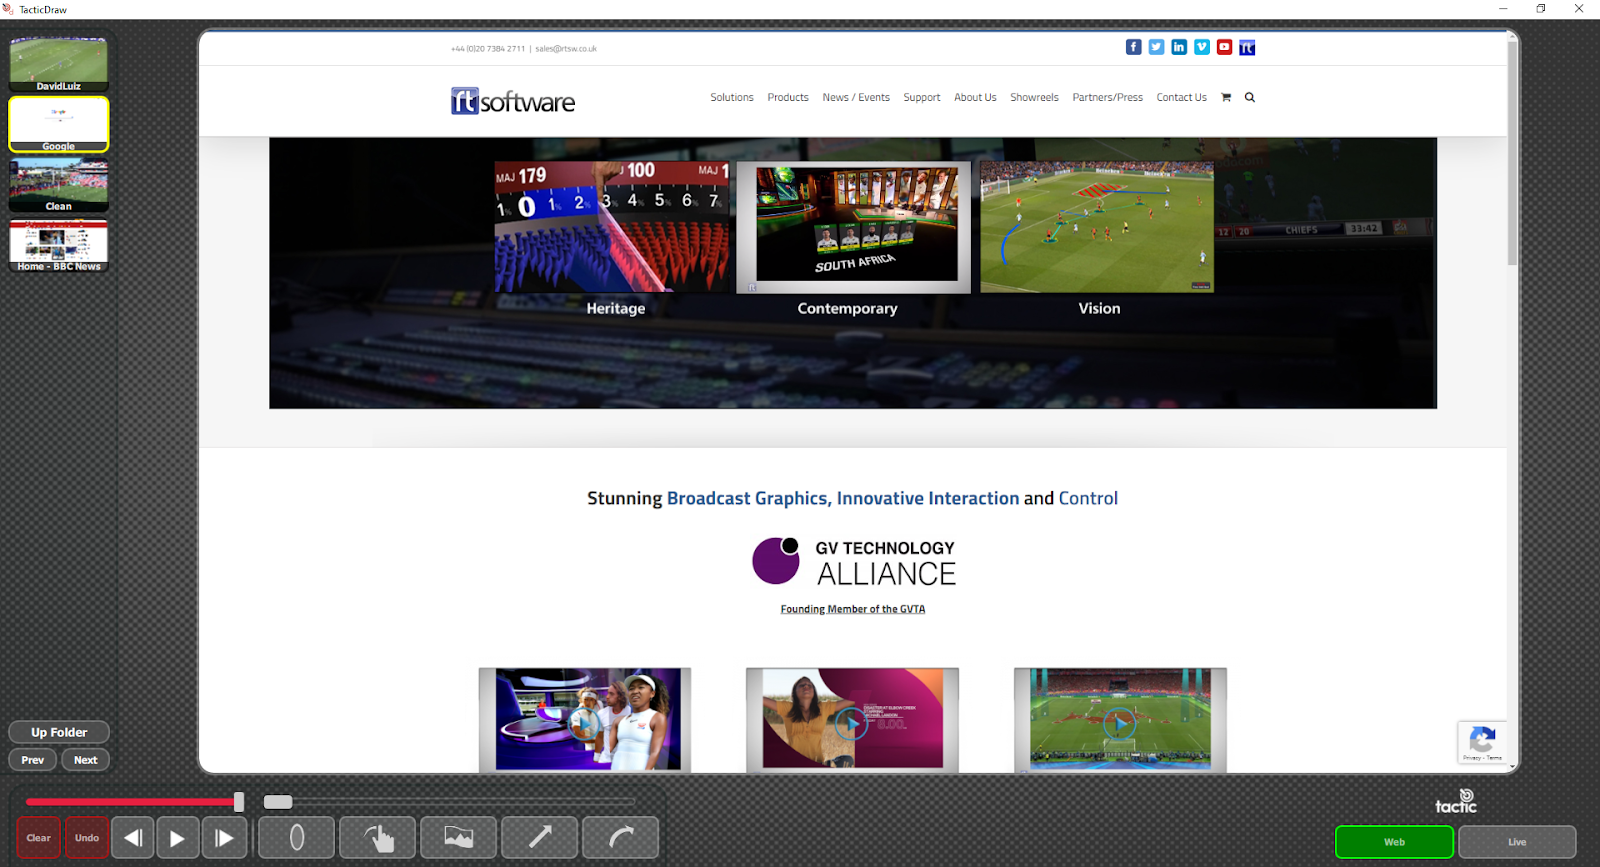
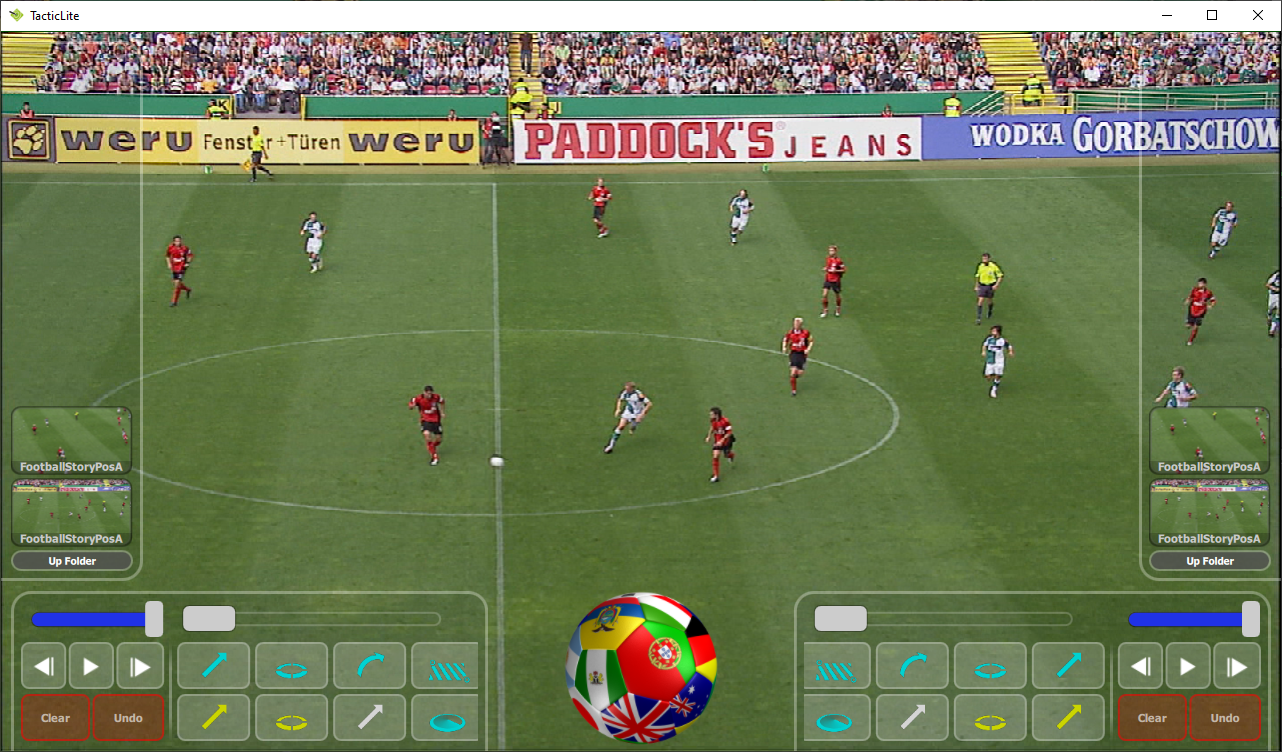
Presenter
The Presenter interface is designed for use on a Touch Screen for live presentations.
It enables you to load and play video clips and to add basic graphics.
Before using Presenter mode it is necessary to
Note complex animation sequences cannot be created or saved in the Presenter mode but it is possible to play back recordings of complex animation sequences that have been saved using Record Analysis.
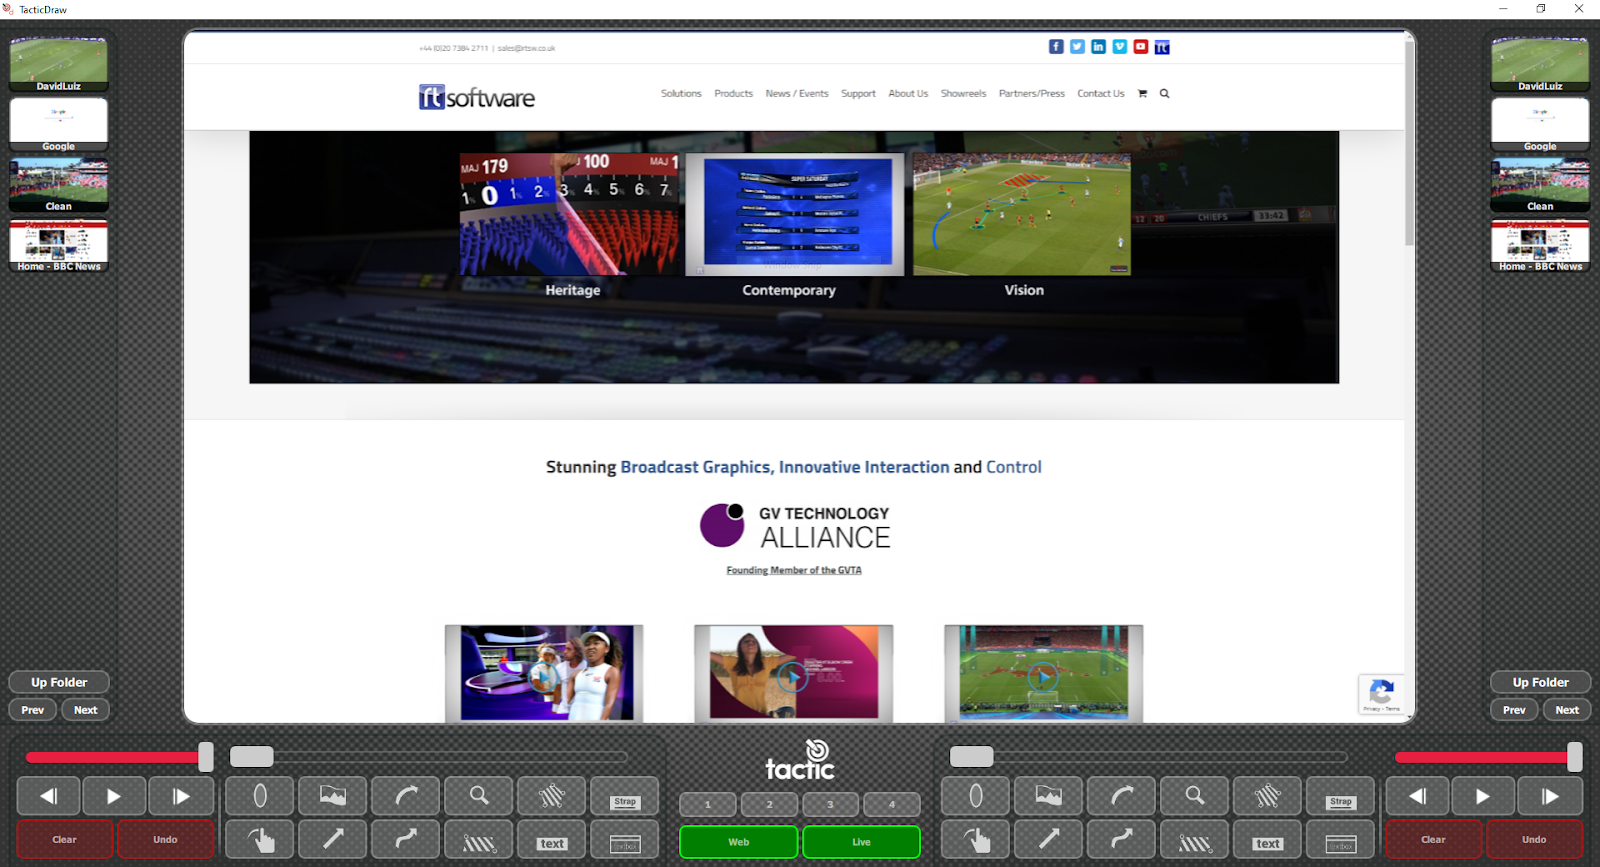
Note Navigation and Graphics tools are mirrored for left or right hand presentation and can be disabled if required.
- Clip Browser
- VT bar
- Play/Pause/Rewind/Slow Motion etc
- Graphics
- Tactic Logo Button
- Web Button
- Live/Channel Buttons
- The Web and Live/Channel buttons can be displayed/hidden via the preferences configuration
Enable Presenter

Exit Presenter
Keyboard F5

Toggle the interface from full screen to a window view by clicking on the Tactic logo.
e.g.

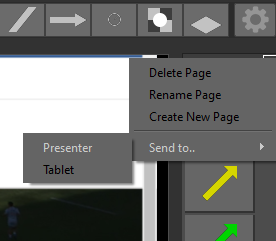
Change Presenter Tools
The tool page displayed in the presenter interface can be configured in the preferences.
Alternatively, select a tool page with the “Right Mouse Button”, select “Send to..”, and select “Presenter”
Drag and Drop Graphic tools to re-order the display order.
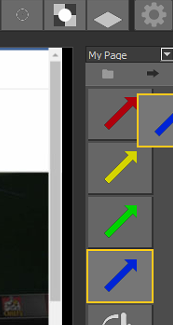
Re-open the Presenter interface to enable the updated tools …
Drag the tools left/right to scroll …

Change Presenter interface
In Preferences, set the interface tools on/off on the left or right hand side of the interface.

e.g.
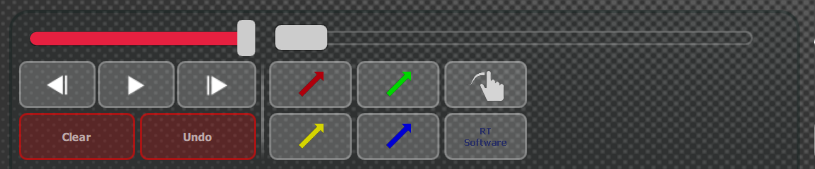
In this preferences menu there is also a “Large Display mode”. This is ideal when the display you are using the presenter is large and wish to have more smaller buttons on the interface like in the example below:
Change Presenter logo
The default logo on the Presenter screen is the Tactic product logo:

To change the logo, in Preferences, replace the Brand Image file:

The new file MUST be the same name as the original and the same image type.
e.g.

Note a .png format image with a transparent background will work best …
Change Presenter background and colours
To customise the appearance of the Presenter interface, in Preferences, replace the Background Image file or change the colours of the panels, Buttons and Sliders …

Appendix A – Preferences Reference
NOTE: The exact Preferences available may depend on software licence options.
NOTE: Restart Tactic for any changes to take effect.
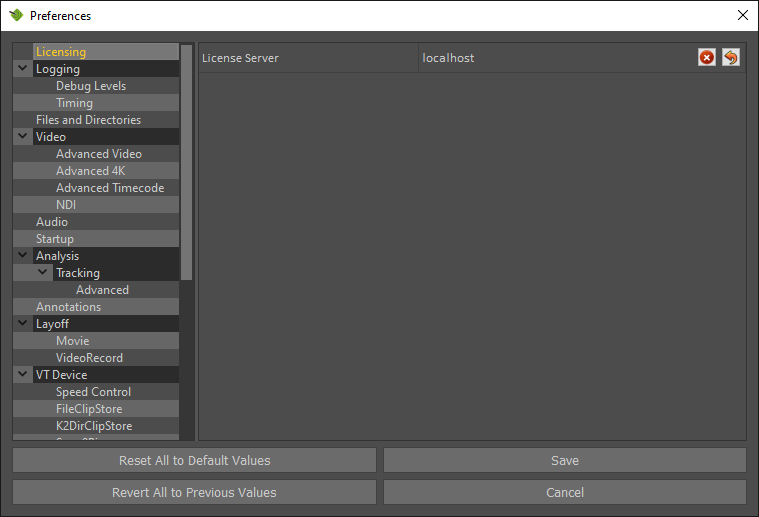
Licencing
Licence Server, Default is localhost. “localhost” should be used when using a license dongle or software license. If using a license server, the IP of the server goes here.
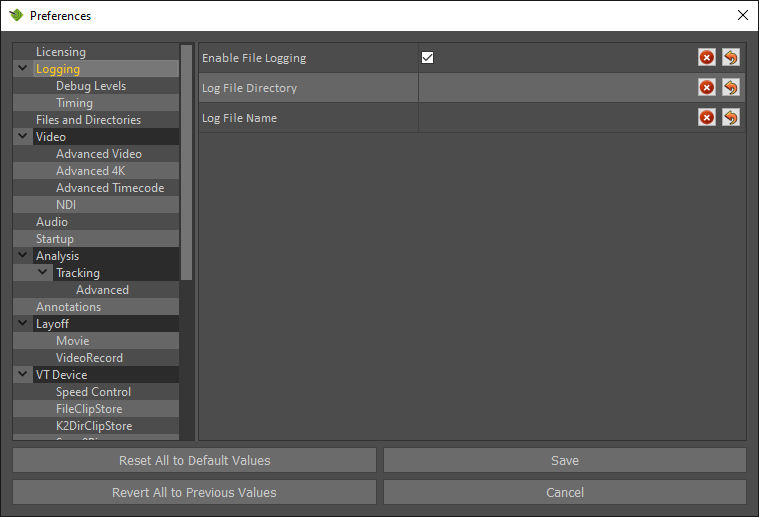
Logging
Enable File Logging: Default on.
Log File Directory: Default blank.
Log File Name: Default blank
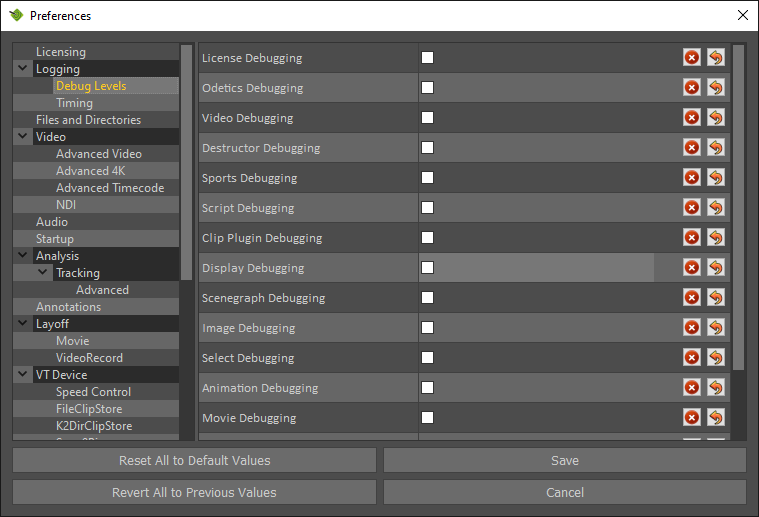
Debug Levels
Debug parameters should ONLY be used on instruction from RT Software.
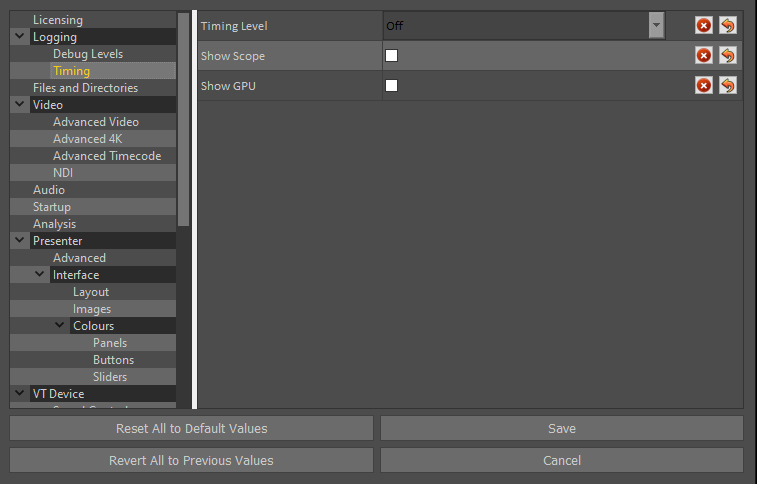
Timing
Timing Level: Default setting is off. Timing level will display information about how long it is taking for graphics to be rendered across various processes.
Show Scope: Default setting is off. Gives a live scope of GPU Processing usage.
Show GPU: Default setting is off. Shows live memory usage details.
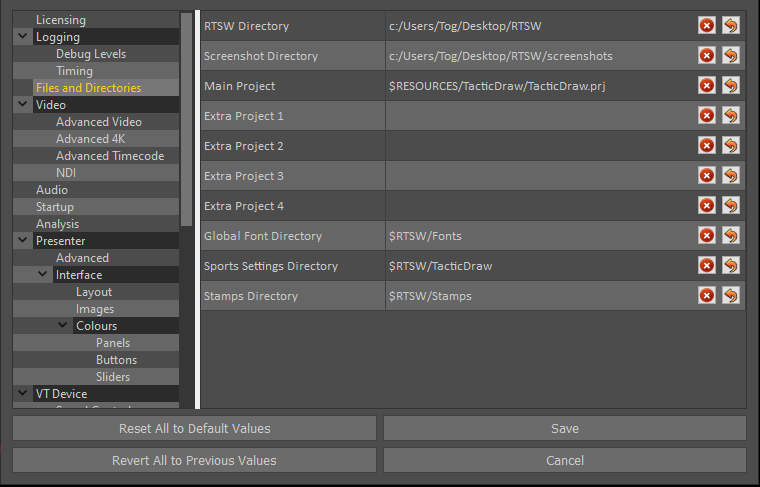
Files and Directories
Project parameters should ONLY be used on instruction from RT Software.
RTSW Directory: This is the directory where most user generated content is saved.
The following project folders are where default content is stored and should not be changed.
Main Project: Default is $RESOURCES/TacticDraw/TacticDraw.prj
Extra Project 1: Default is $RESOURCES/TacticDraw/Tacticadv.prj
Extra Project 2: Default is $RESOURCES/TacticDraw/Tacticlite.prj
Extra Project 3: Default its Blank.
Extra Project 4: Default its Blank.
Global Font Directory: Default is $RTSW/Fonts. This is where imported fonts are stored.
Sports Settings Directory: Default is $RTSW/Fonts. The folder where sports user generated content is saved.
Sports Package Directory: Default is $RESOURCES/SportsPackages
Sports Package to Load: Default is Blank
Sports League to Load: Default is Blank
Stamps Directory: Default is $RTSW/Stamps. This defines where imported stamps are saved.
Screenshot Directory: Default: /RTSW/screenshots. This is the location where screenshots (when taken from the button next to the clip menu) are saved.
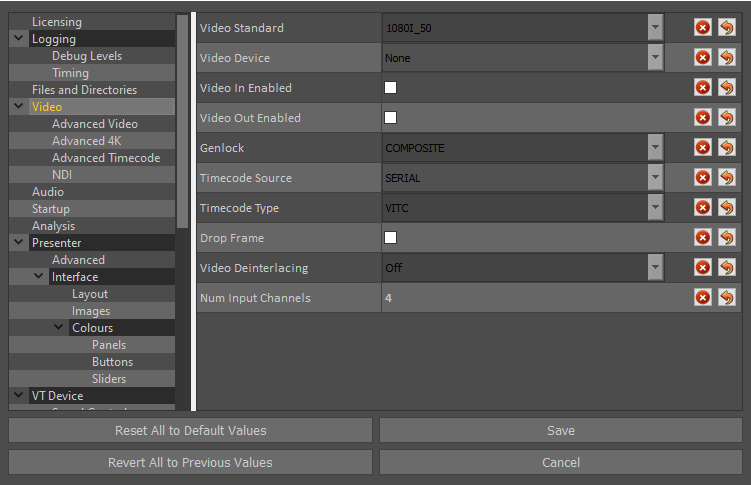
Video
Video Standard: Set this to match the format of the video clips you intend to analyse.
Video Device: Set this to match the video card type. e.g. “AJA”
Video in Enabled: Default is off.
Video out Enabled: Default is off.
Num input Channels: Default is 2.
Genlock: Default is COMPOSITE.
Timecode Source: Default is SERIAL.
Timecode Type: Default is VITC.
Drop Frame: Default is off.
Video Deinterlacing: Default is off.
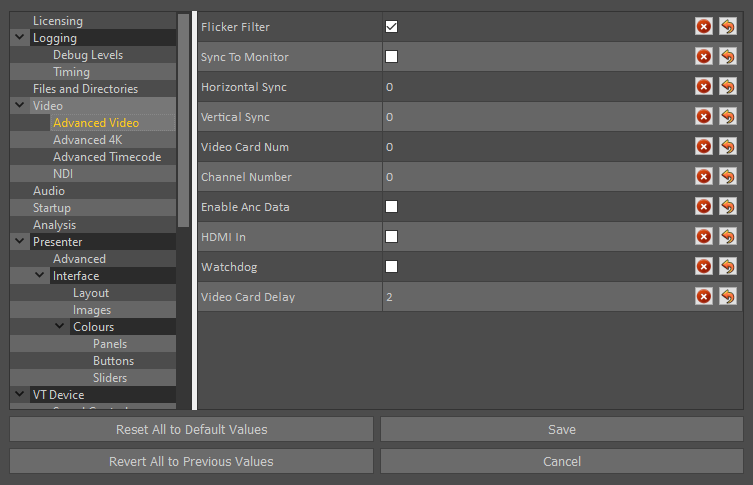
Advanced Video
Video Card Delay: offsets the video card delay on the output. Default is 2.
Sync to Monitor: Synchronises the video output to the display to remove screen tearing on the monitor out. Default is unticked.
Horizontal Sync: Offsets the Genlock in pixels. Default is 0.
Vertical Sync: Offsets the Genlock in Lines. Default is 0.
Channel Number: Input the number of input channels you are using. Default is 0.
Enable Anc Data: Enable Ancillary data on output. Default isdisabled.
HDMI In: Enable if using the HDMI in input on an AJA card. Default is dsiabled.
Watchdog: If enabled Tactic will send watchdog data to allow use for fail safe features on AJA Corvid 24s and DVS cards that support this feature. Default is unticked.
Video Card Delay: Offset Video Card Delay. Default is 2.
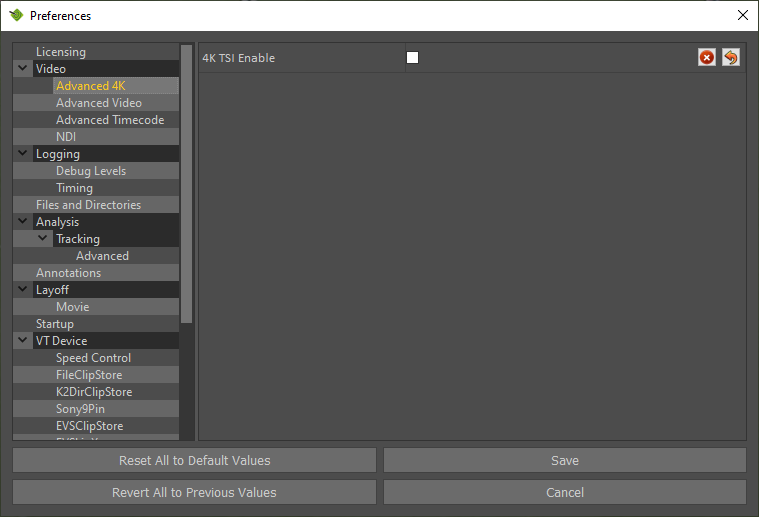
Advanced 4K
4K TSI Enable: Default is off. Uses TSI four tessellation outputs instead of quadrants over four 1080p outputs.
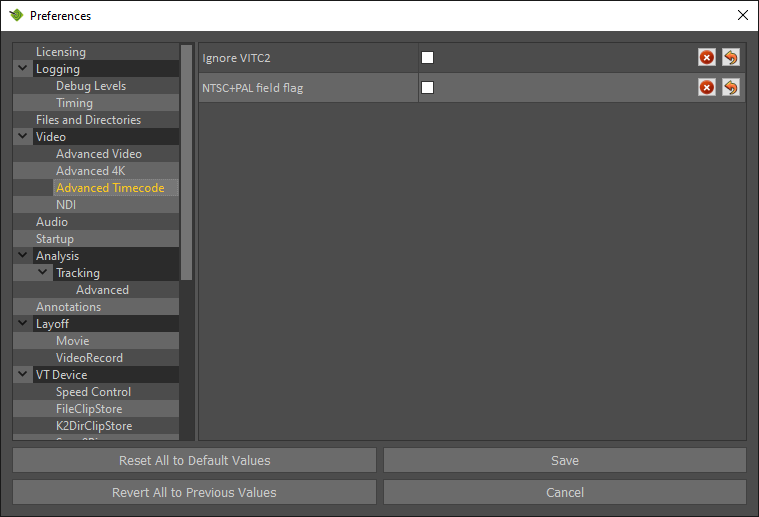
Advanced Timecode
Ignore VITC2: Default is off.
NTSC+PAL field flag: Default is off.
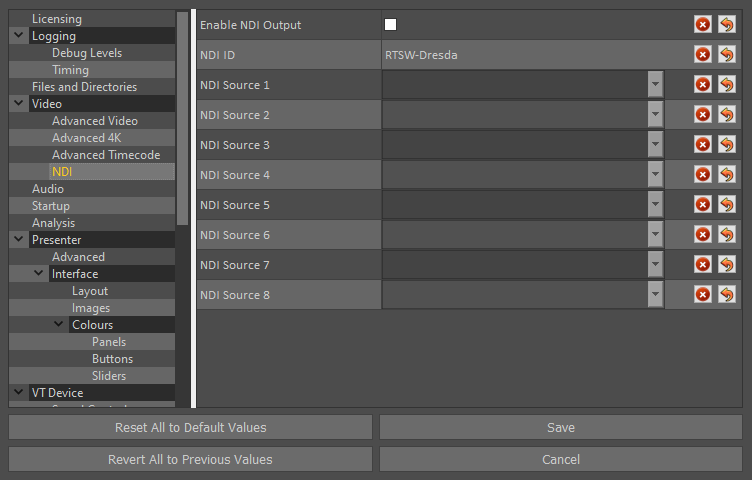
NDI
Enable NDI Output: Default is off.
When enabled Tactic will output an NDI feed of the video out using the defined “NDI ID”
NDI ID: Default is the PC’s Name. The NDI ID is what Tactic will broadcast on if “Enable NDI” Output is Enabled.
NDI Source 1-8: Default is not set.
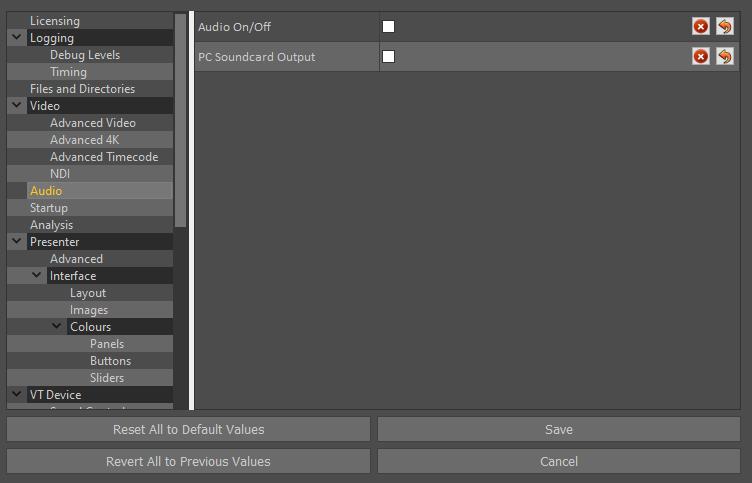
Audio
Audio On/Off: Default is unchecked. When enabled Tactic will play the audio of the clip or live input on the video out.
PC Soundcard Output: Default is unchecked. When checked this will output the audio of the clip or live input out of the PCs default output.
Startup
Threaded Project Load: Default is unchecked. This allows projects to load much faster if using a dedicated GPU. It is recommended to only use this when using a machine which only has an Nvidia GPU.
Start Fullscreen: Default is unchecked. When checked, Tactic will start fullscreen.
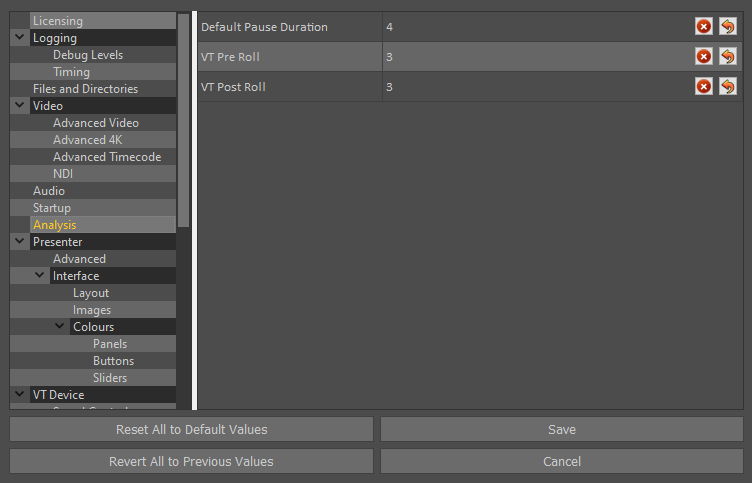
Analysis
Default Pause Duration: Default 4 seconds. Defines how long manual pauses last after hitting play/space.
Default Camera Morph Duration: Default 1 second.
Default Image Blend Duration: Default 1 second.
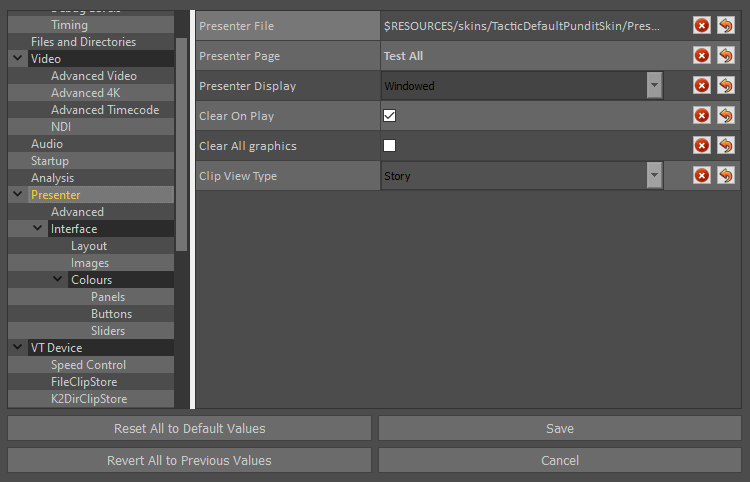
Presenter
Presenter FIle: Default location of Presenter interface
Presenter Page: Default Blank
Presenter Display: Default Windowed
Clear On Play: All graphics automatically clear when video clip plays
Clear All graphics: Default Off
Clip View Type: Clips/Bookmarks/Story
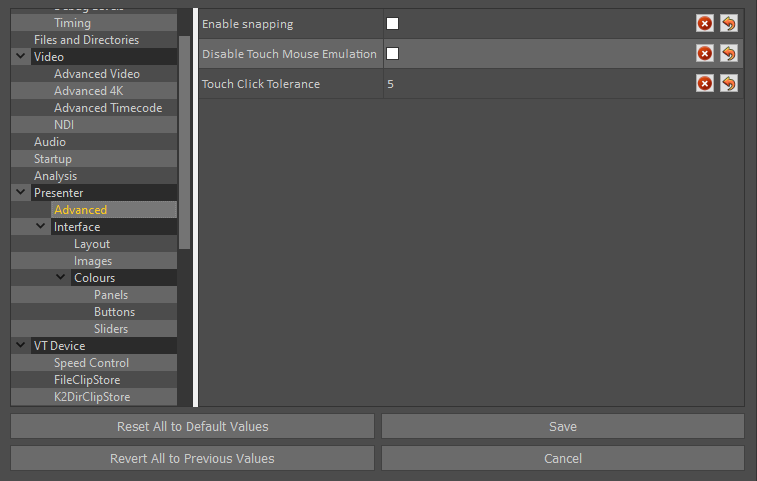
Presenter Advanced
Use Player Detections: Default on. This makes graphics placed on the presenter interface snap to the existing player detections.
Disable Touch Mouse Emulation: Default Off
Touch Click Tolerance: Default 5
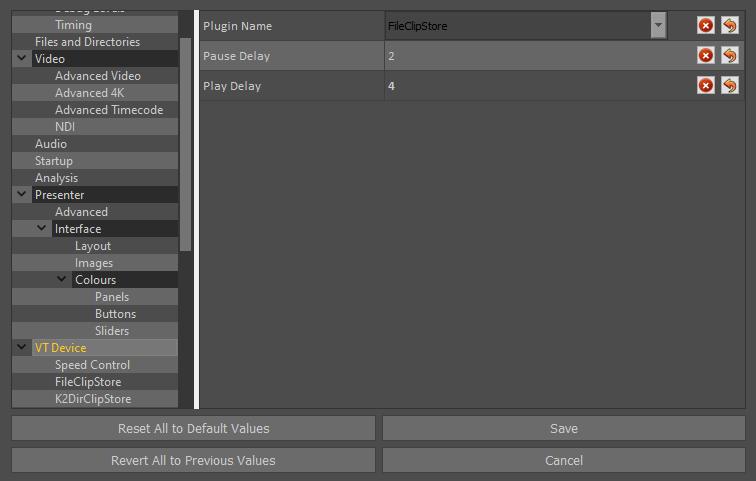
VT Device
Plugin Name: Default is FileClipStore. Select the VT (clip) source, for local clips in RTSW/Clips, use “FileClipStore”.
Pause Delay: Default setting is 2 frames. Adjust this if you find that when playing the video clip it does not pause at the selected timecode once analysis graphics have been added.
Play Delay: Default setting is 2 frames.
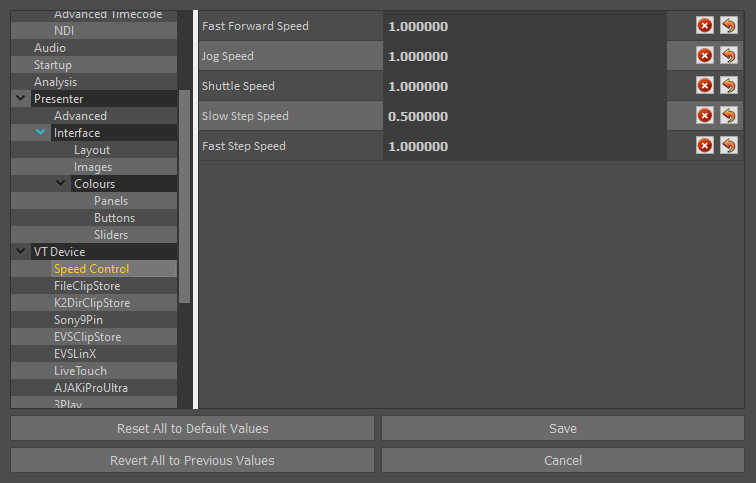
Speed Control
Fast Forward Speed: Default 1.0
Jog Speed: Default 1.0
Shuttle Speed: Default 1.0
Slow Step Speed: Default 0.5
Fast Step Speed: Default 1.0
K2DirClipStore
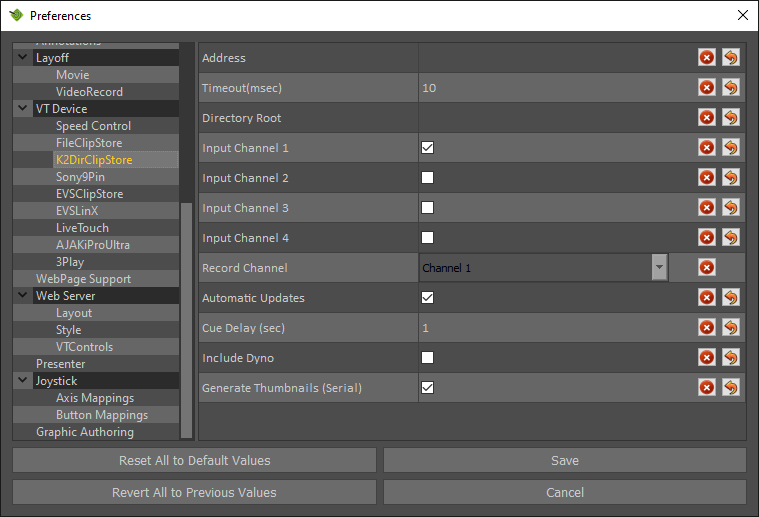
Address: Set to the network address of the control port of the K2. This is a standard IP address or hostname. E.G.: 192.168.10.10, or K2Control.
NOTE: Based on the entry address typed here, Tactic will determine whether to use network or serial connection. Setting the address to tty… or COM… will select serial control. An IP address will select network connection.
Timeout: In case of serial control it indicates the timeout on trying to send a command to the K2 before an error returns on failure.
Directory Root: Type in a file path to limit which directories on the K2 will be searched and made available. For example, default/steve/tmp would only look inside of the “tmp” directory on the K2.
Input Channel 1-4: Tick the boxes next to the channels that Tactic will control on the K2 server. The corresponding channel selector buttons will become available on the VT Control section.
Record Channel: When using the Record functionality, this defines which channel of the device to control for recording clips.
Automatic updates: Turn on automatic update if you want Tactic to automatically update its list in sync with the VT device. Clip changes on the VT device will be reported from a known sentinel point such as a refresh. If you delete or add clips these changes will automatically update Tactic Clip window.
NOTE: Network connection is preferred to serial connection because the network is faster and the serial does not support auto thumbnail creation.
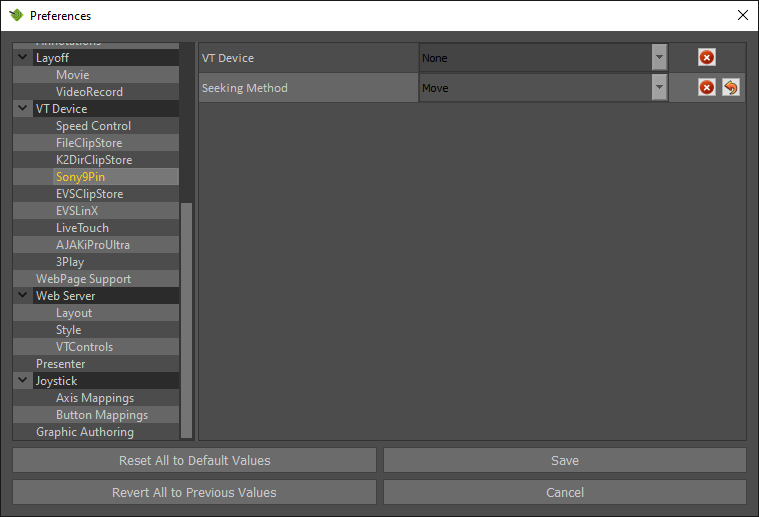
Sony9Pin
The Sony9Pin (BVW75) clip plugin provides VT control over any video device that supports this protocol. Tactic has been qualified with major brands such as K2, EVS, Sony Digital Betacam and Doremi.
The EVS is connected by a straight-through pin-to-pin RS422 serial cable to a serial extension panel of the Video Board on the Tactic PC.
VT Device: This setting defines how the System responds to some of the controls. It especially affects how the eject button works.
Seeking Method: This defines which Sony command is used for clip seek. If you are experiencing problems with seeking on clip restart you may find that changing this setting helps. This is especially true for VT Decks.
EVS configuration for the Sony9Pin plugin
This section describes how to set up an EVS Video Server for Sony9Pin control under Tactic. It assumes that the systems have been connected appropriately as described before. The control protocol used is Sony BVW75 (9 Pin) and allows simultaneous control between the EVS and the LSM Remote controller.
Although the EVS configuration is outside the remit of this document a brief outline is provided here to assist operators in setting up and troubleshooting the system. Bear in mind that these settings were correct at time of writing, but if the EVS workflow has changed since then they may not be correct – consult the relevant technical studio/broadcast staff to check. At this time, a single EVS is being used for both the Tactics system and Rostrum System.
There are 3 EVS configurations that need to be setup for correct Tactics/Rostrum operation.
The first is to configure the EVS to have 3 inputs and 3 outputs. This allows the EVS to be controlled by 3 separate devices.
The second is the Remote RS422 control. This is done through the LSM controller.
Multicam Version 10
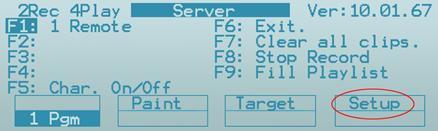
From the Main system menu (Shift+Menu) select Setup (Shift+D). This will change to:
Set the control for input 2 for Sony BVW75. This means that you MUST connect the serial link from the Tactics table into serial i/p 2 on the back of the EVS.
- Now select page 7.2 (F10)
This page dictates which program channel the devices control. Set them up as shown above. This says that the LSM and Sony (Rostrum) can both control PGM1.
- Now select Page 7.4 (F10 twice)
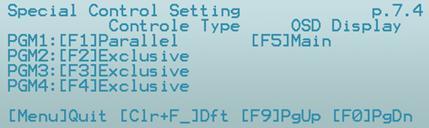
This page determines how the LSM and Sony (Rostrum) are to share control.
Setting F1 to Parallel means that they can both control the channel together rather than 1st control 2nd control.
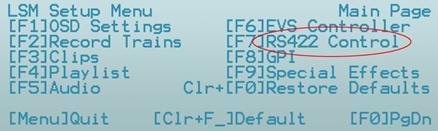
Multicam Version 11
LSM Remote Main page
- From the Main system menu (Shift+Menu) select Technical Setup (press F10). Then use F10 to advance pages and F9 to go backwards in the Technical Setup menu.
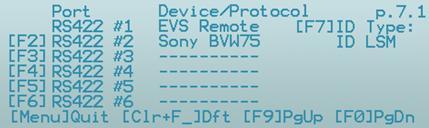
LSM Remote Main System menu
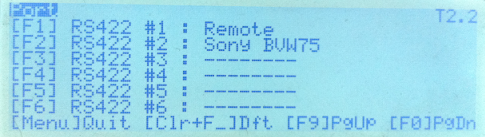
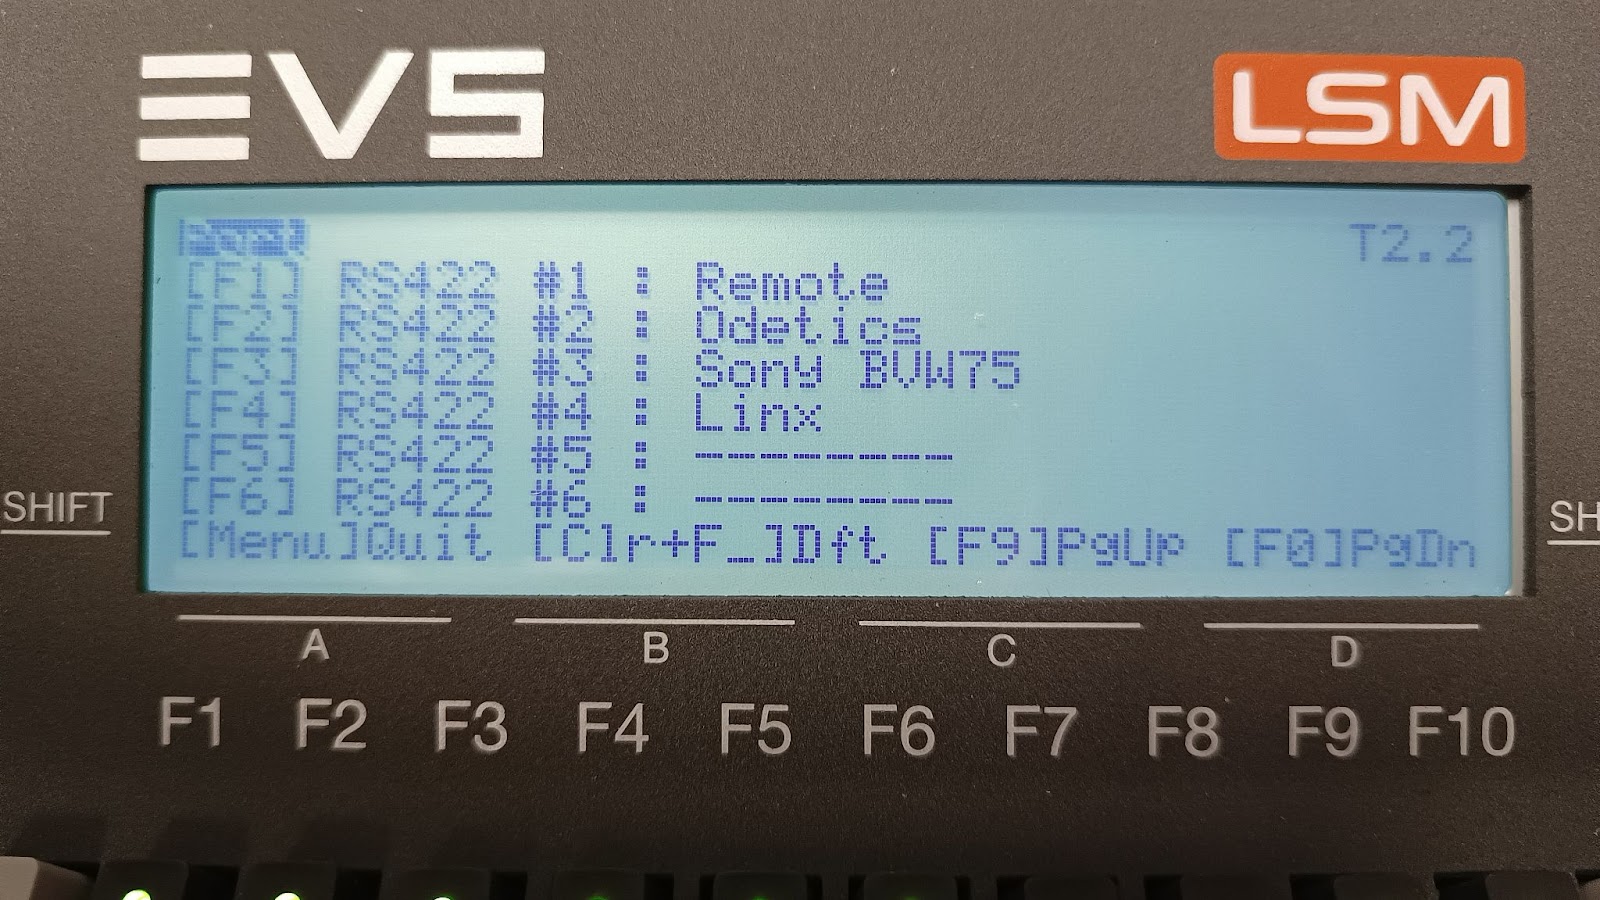
- Find page T2.2 – as indicated in the top right corner of the screen and set by pressing F2 and then using the Jog Wheel to select SonyBvw75 from a list of available protocols:
LSM Remote Page T2.2
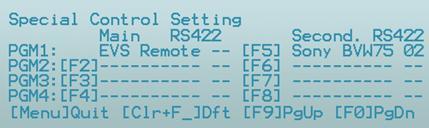
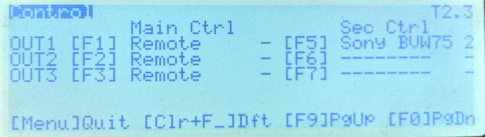
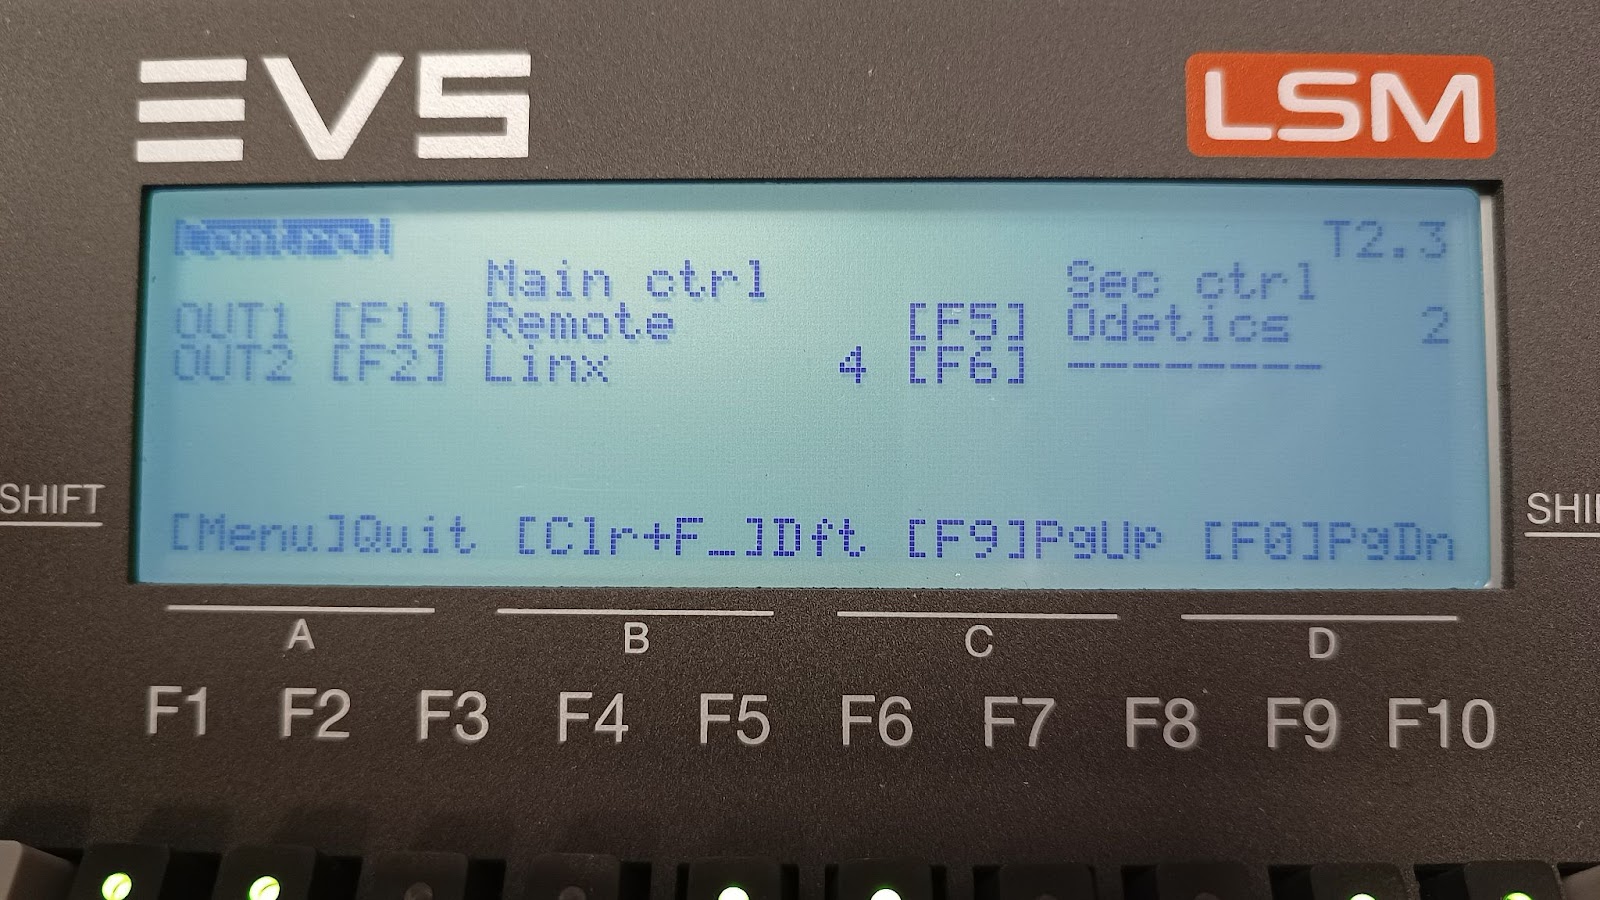
- Advance to page T2.3 and set SonyBvw75 as a secondary controller.
LSM Remote Page T2.3
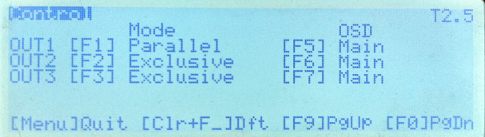
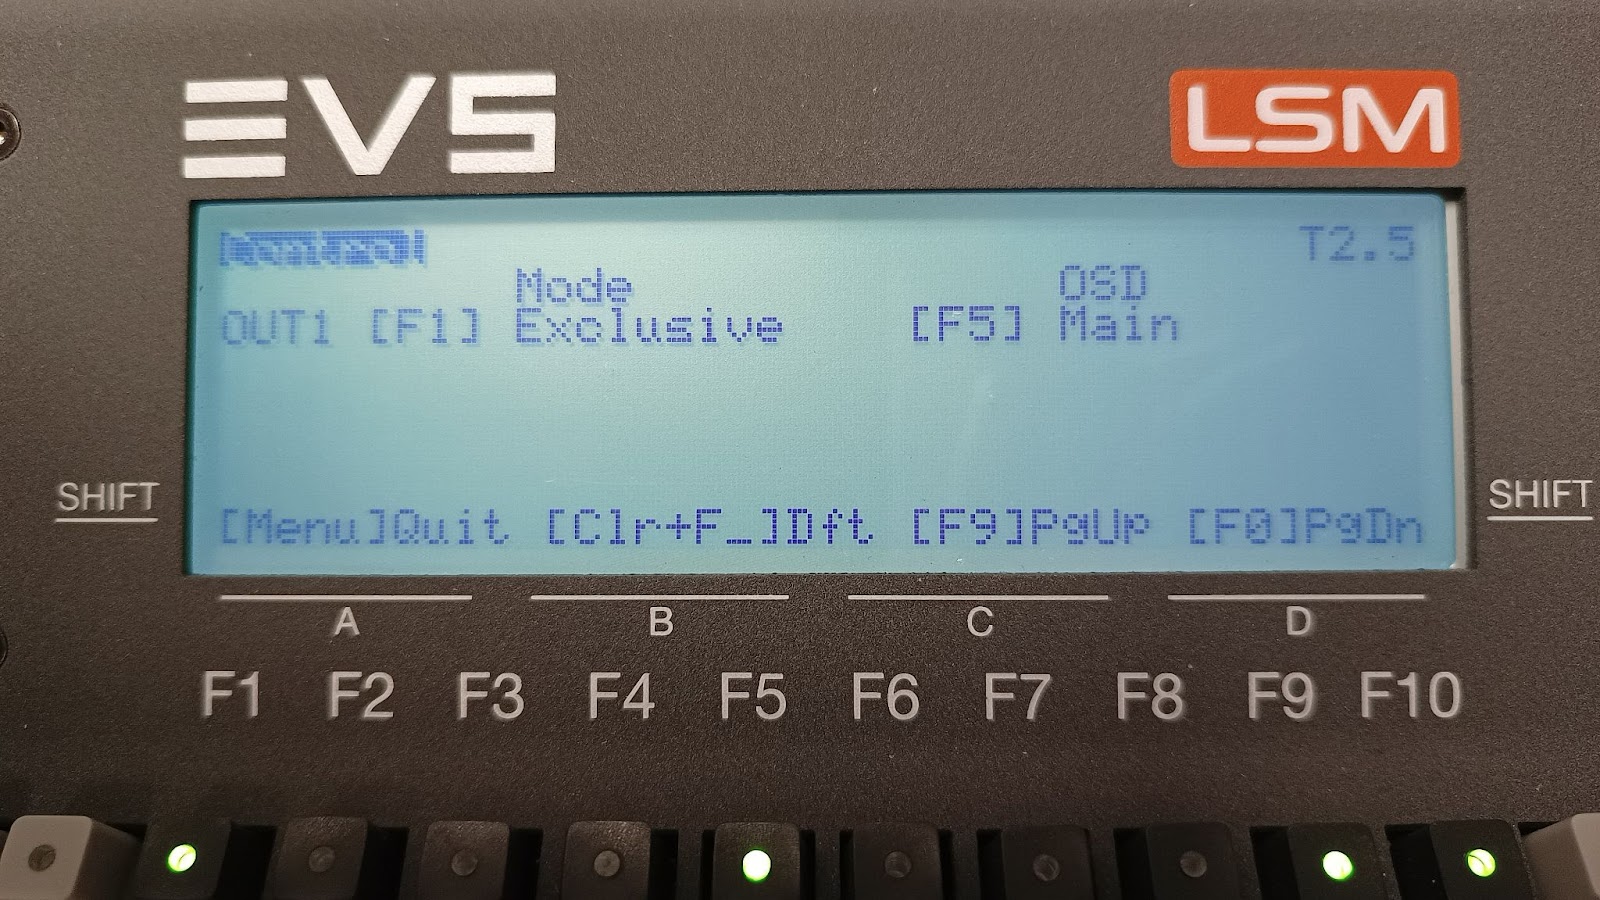
- Go to page T2.5 where you can set SonyBvw75 to parallel or exclusive.
LSM Remote Page T2.5
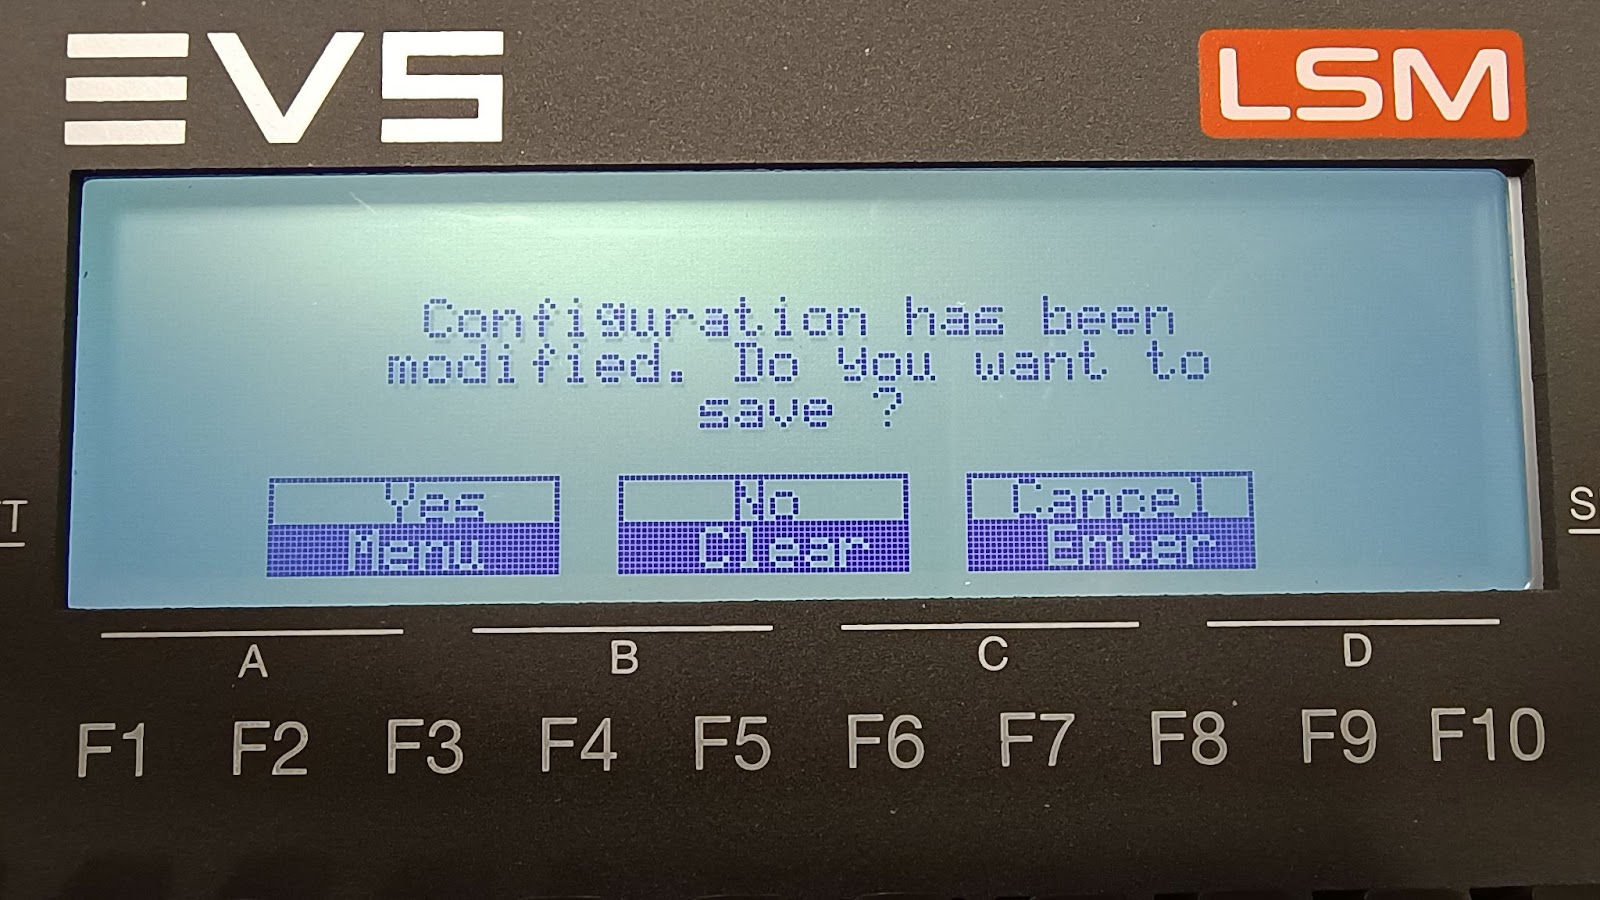
- When you finished you can press Menu to quit the setup menu and the system will prompt to save the changes you have made. It is necessary in order to use these changes. Press Menu again if you are happy with your changes.
Multicam Version 15
You can quickly set up a LSM for the selected channel on the EVS. The LSM Setup menu is selected by pressing Shift+Menu
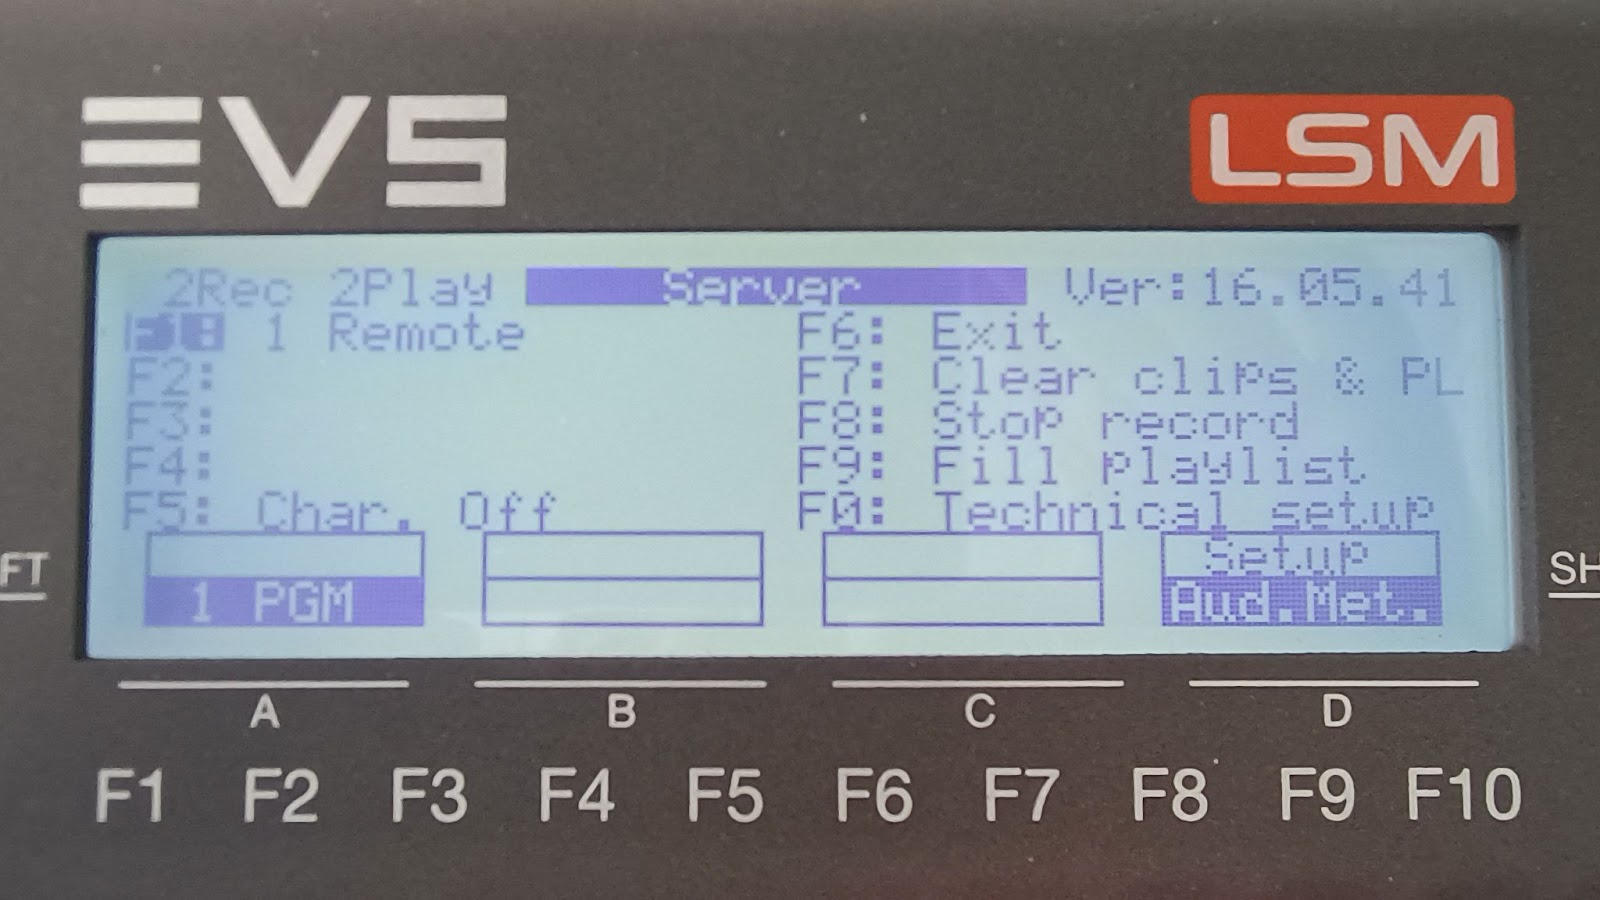
From here select the setup menu Shift+D
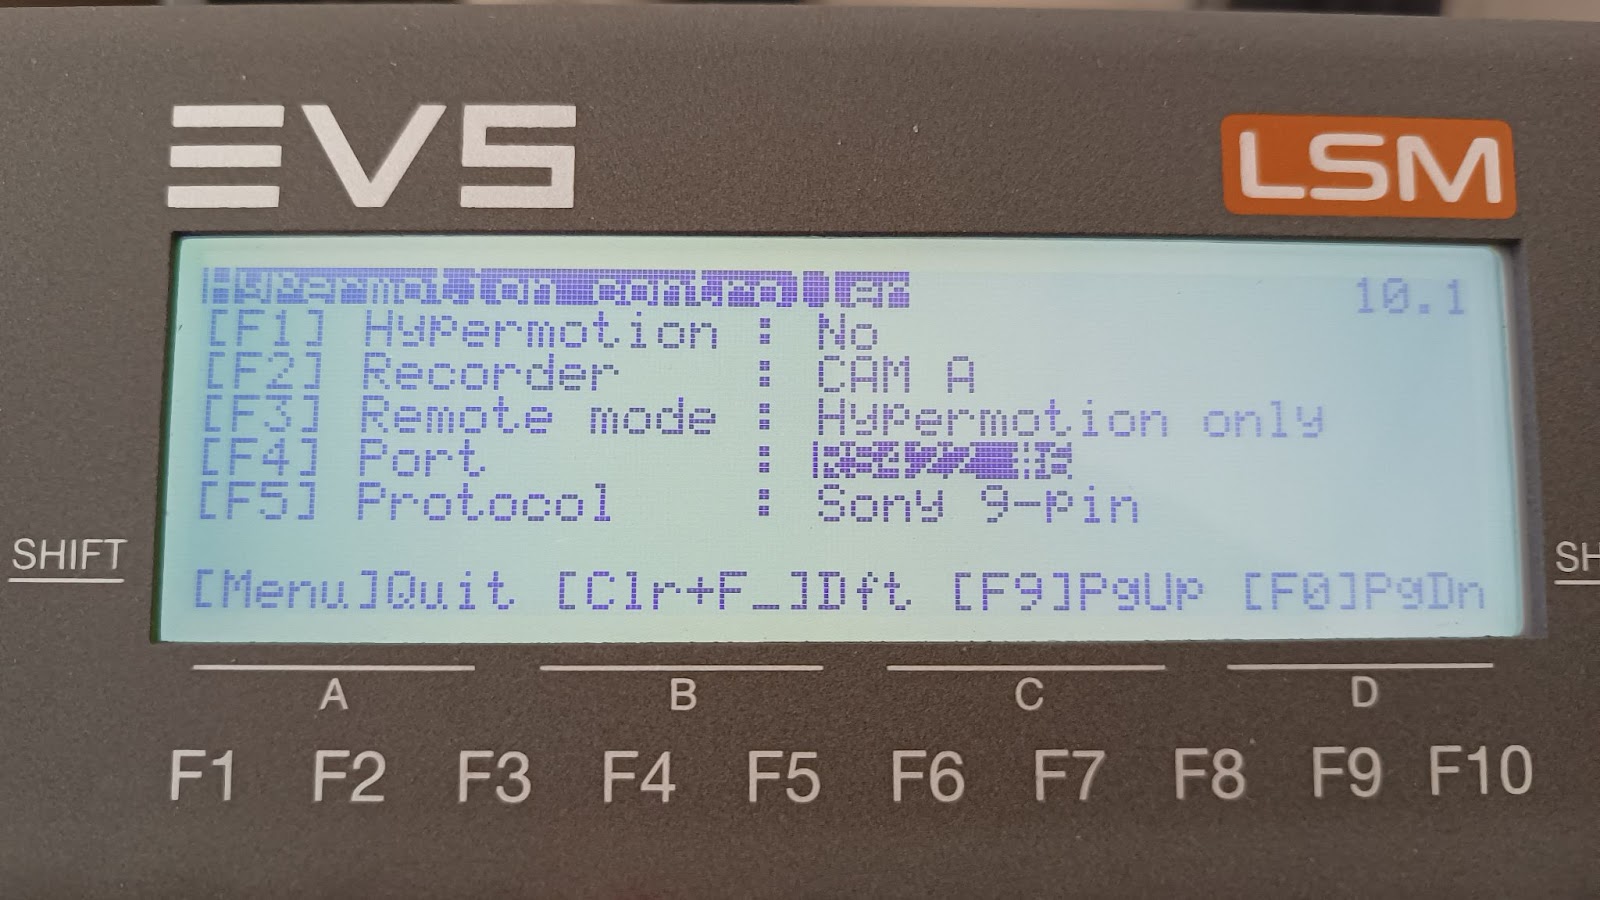
Now select F4 to select the port mode, here you can select a RS422 port or Lan using the jog wheel.
Note: To put the EVES in Parallel mode in Multicam 15 you must go the the EVS Web interface (enter the EVS IP into your browser).
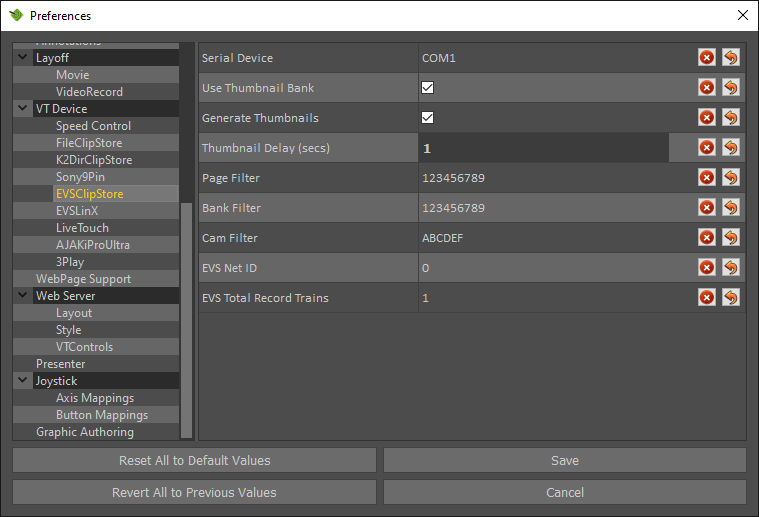
EVSClipStore
This plugin provides control over clips stored on an EVS using the Odetics protocol through serial RS422 connection to a generic serial port on the Tactic machine. Video streams are delivered over SDI.
Quick Setup
Connect an EVS 9 pin port to the COM port of the Tactic PC, in many instances this will require a RS422 to RS232 adapter. Then assign that port to Odetics on the EVS and to the video channel which is sending video to Tactic.
In Tactic Preferences enter the VT Device page and select EVSClipstore. Then head to the EVSClipStore page for the EVSClipStore Preferences. You must select the right serial device, this is usually “COM1” but check Windows Device manager if you have multiple COM Ports. EVS Net ID must be correct for communication between the EVS and Tactic, in a single EVS set up this is 0, otherwise check what EVS ID is assigned to your EVS.
It is recommended to use VITC time code (in Tactic video preferences) and to to turn off “Generate Thumbnails” if you have lots of clips on the EVS to make the clip window refresh faster.
This is the core set up for EVS Clip Store / Odetics, however, it is common to use bank, page and cam filters so only the clips in your designated bank/page on the EVS appear on the Tactic cliplist. See below for details on all LinX parameters in Tactic.
Serial Device: Set to the serial port that is connected to the EVS. This is usually COM1.
Use Thumbnail Bank: This option has two features:
- Sorting clips into separate directories according to Keywords that are set for clips on the server side.
- Selecting a specific video frame from which the thumbnail will be made. See the Use Thumbnail Bank section below.
Generate Thumbnails: deselect this in case no thumbnails are needed.
Thumbnail Delay: Used in thumbnail creation. Set the delay between EVS starting to load a clip and Tactic grabbing the thumbnail. That is in case it takes too long for the EVS to load a clip.
Page Filter: Include only these page numbers (0-9) when updating the clip list.
Bank Filter: Include only these bank numbers (1-9) when updating the clip list.
Cam Filter: Include only these camera inputs (A-F) when updating the clip list.
EVS Net ID: This will be 0 if the EVS server to which Tactic is connected is the very same server that Tactic needs to control.
If the EVS server of interest is NOT the one physically connected to Tactic but one on its network of servers, then set the target EVS server Net ID (1-99).
Please see the EVS documentation for further explanation on EVS server networks.
EVS Total Recording Trains: Specify how many record channels previously configured on the EVS you wish to be available.
Creating Thumbnails
The EVSClipStore plugin uses the SDI video input signal of Tactic to make thumbnails for the clips in the built clip list. For this it loads each clip on the EVS one after the other on whichever PGM channel Odetics is configured. If Use Thumbnail Bank is selected then only specific clips will load. Read the Use Thumbnail Bank section for more details.
NOTE: make sure that this process will not interrupt your production.
Use Thumbnail Bank
In this mode when the clips are prepared, the operator should clear all clips from other channels and save the clips on Cam A. They should then make a single frame clip from the clip on Cam A, and save it to the corresponding Page and Bank number on Cam B. This clip will be the thumbnail clip and it will only be used to generate the thumbnail.
E.G.: supposing there is a clip with ID 133A/00 the thumbnail MUST exist on 133B/00.
NOTE:
- Make sure that the Cam Filter settings exclude the channels where the thumbnail clips are stored. (Cam B usually)
- It is actually not restricted which channel to use for thumbnails and clips. Tactic will always look for a clip with the matching Page and Bank number on the channel consecutive to the selected clip’s channel: A->B, B->C, C->D,…
EVS configuration for the EVSClipStore plugin
Video connection
The EVS server provides VT source material via the SDI input to the Tactic system. The installed video board is equipped with several BNC connectors and input-1 is where the selected channel on the EVS should be connected. The Output socket provides HD SDI output for Tx. This combines the EVS input with telestration. The Ref input is not used since Tactic is synced to its SDI input.
Serial connection for VT Control
The second connection between the EVS and the Tactic system is the RS422 Serial control feed. The serial connection is a straight thru cable and may be extended via CatV at the Studio panel or via fibre. The port on the EVS should be on the same channel as the EVS video output.
The Serial cable is terminated at the PC thru an RS422/232 converter to the COM1 port. The converter is vital and correct operation will not occur if it is omitted. Ensure it is connected the correct way round with the 422 end plugged into the cable going to the EVS and the 232 end plugged into the computer.
The final stage in EVS configuration is the setup of Odetics protocol on the EVS LSM controller.
Exclusive and parallel modes
The Odetics protocol can be used in three different modes on the EVS:
- Odetics being set as a Main Controller on a PGM channel. No other controllers including the LSM can access that channel.
- Odetics being set as a Secondary Controller in Exclusive mode. Both the main (LSM) and secondary (Odetics) controllers receive permanently the status of the channel(s), but only one controller at a time is able to actually control the channel. The main controller can decide at any time to pass the control to, or to retrieve the control from the secondary controller.
- Odetics being set as a Secondary Controller in Parallel mode. Both the main (LSM) and secondary (Odetics) controllers receive permanently the status of the channel(s), and both controllers are able to control the same channel at any time. Either of both controllers can take the control as long as the other controller is not executing a command. The control can thus be freely passed on from one controller to the other.
The following sections describe how to set all this up on the Multicam user interface.
LSM setup on Multicam 16
The following is a working example on how to use Odetics with Tactic through a RS422 serial connection.
In this example, on all the EVS channels the LSM Remote is set as the main controller and Odetics is set as a secondary controller in parallel mode on channel PGM1. The serial cable is plugged into RS422 #2 connector on the server.
From the Main system menu (Shift+Menu) select Technical Setup (press F10). Then use F10 to advance pages and F9 to go backwards in the Technical Setup menu.
Find page T2.2 – as indicated in the top right corner of the screen and set by pressing F2 and then using the Jog Wheel to select Odetics from a list of available protocols:
Advance to page T2.3 and set Odetics as a secondary controller.
Go to page T2.5 where you can set Odetics to parallel or exclusive.
When you finish you can press Menu to quit the setup menu and the system will prompt to save the changes you have made. It is necessary in order to use these changes. Press Menu again if you are happy with your changes.
EVSLinX

Overview
The EVSLinX plugin is used to access and control clips stored on an EVS video server. Using the LinX protocol over network Tactic can control program and recording channels. Video streams are delivered over SDI.
Main features
- Full Tactic VT control on up to 2 PGM channels on the EVS using LinX as a Main Controller.
- Monitor any two of the Recording trains in E2E mode on two separate Tactic input channels.
- Full Tactic VT control on any of the recording trains.
- Record back to an EVS recording train in real time including Tactic graphics and clip creation.
- Create a clip list with thumbnails in Tactic. Thumbnails are grabbed from the SDI input while clips are loaded in a sequence.
- Auto update Tactic’s clip list in response to new clip creation and clip changes made on the EVS.
NOTE: EVS only supports LinX on Windows operating systems.
Connections
In a typical configuration the connections and work-flow between Tactic and the EVS server would be as follows:
Network connections
EVS Pc LAN socket → main Ethernet Network.
Tactic PC network socket → main Ethernet Network.
Video SDI connections
EVS OUT-2 → TACTIC IN-1
TACTIC OUT-1 → EVS IN-1
In this configuration Tactic can control one PGM channel on the EVS while monitoring it on the video input. Build its own customized clip list based on id filtering preferences from the clips that exist on the EVS server and create thumbnails for them by grabbing one frame of each clip.
After building an analysis sequence in Tactic the clip can be recorded back on to the EVS with the overlaid graphics, then Tactic will make a clip on the server at the specified time codes.
Network connections on the Tactic PC
LinX
The LinX protocol controls the EVS channels and connects to the PC LAN socket on the server.
Local IP setting
If there are more than one physical, active network connection on the Tactic PC on the same subnet to the EVS network then it is possible that LinX cannot reliably detect which local connection to use. In this situation you can set the Local IP address in the Preferences menu to avoid this. This is the IP address assigned to the network port that connects to the EVS. Check the Windows network settings.
It is recommended, however, that 2 different subnets are used for the 2 connections.
EVS configuration for LinX
This section will explain how to set up a working configuration for LinX by using the EVS Multicam 20 software interface. See the EVS documentation for further details.
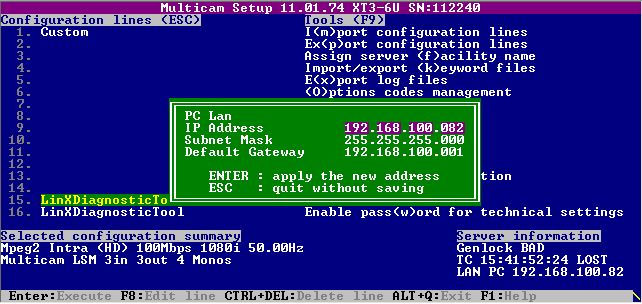
- Open up the main configuration window.
This is the main window that appears after the EVS has started up. If the Multicam is at the clip list view then you must exit by either pressing ALT+Q or by using the LSM Remote.
Network connections
- To set the PC LAN port IP address:
- Select a configuration line at the left side of the setup window
- Press L
- Set the IP address, Subnet and Default gateway
- Press ENTER to apply
Main configuration window on EVS from Multicam 16:
Setting up channels for LinX
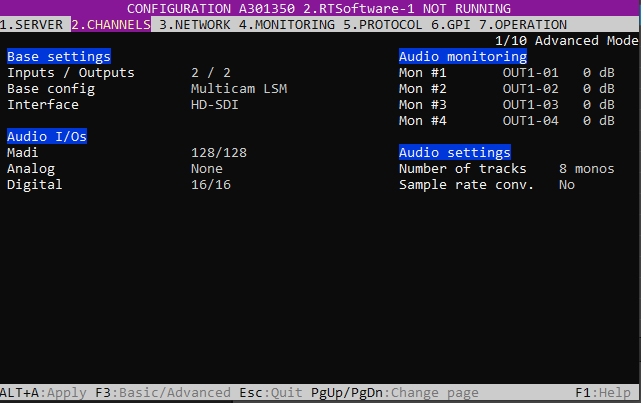
- To set the channel configuration on the EVS:
- Select a configuration line under the setup window
- Press F8 then F3 for Advanced Mode
- Navigate to the CHANNEL window by pressing the RIGHT arrow
- Press TAB several times to navigate to the required line
- Set Base config to Multicam LSM.
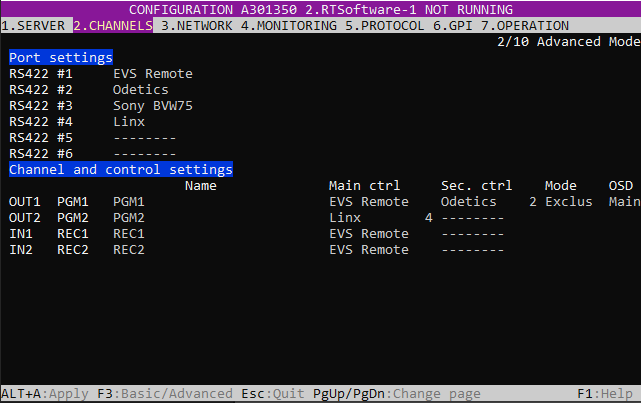
- Press PageDown for the 2nd page and TAB to select the RS422 ports
- Set one of the RS422 ports to LinX.(This port and channel will be used exclusively by LinX)
- Set LinX as a Main controller on one or two OUT channels depending on how many channels Tactic will need to control.
NOTE: in Multicam LSM mode PGM1 and RS422 #1 has to be set to EVS Remote.
- When finished press ALT+A to apply
CHANNELS configuration windows on EVS from Multicam 16
page 1:
page 2:
Setup Tactic for LinX
To open the EVSLinX plugin open preferences and in the “VT Device” section select Linx. Then, expand the TV Device folder in preferences and go to the LinX page (see screenshot below). Set the LinX and Local IP.
If there are lots of clips on the EVS, it is recommended to to disable thumbnails so the clip list will refresh faster.
Set your EVS ID, in cases where you have only one EVS on the local network set this to 0, otherwise use the EVS ID the EVS is assigned too.
Set record channel 1 to whatever channel you have assigned LinX to on the EVS. If you are using a second channel in Tactic and have a second video in from the EVS, this should be set to the second channel LinX is assigned too. The Record channel is the output of Tactic going back to the EVS, set this to whichever channel is assigned to recording the Tactic return on the EVS.
It is recommended to use VITC timecode (see video preferences in Tactic) for most use cases.
This is the core set up for EVS Linx, however it is common to use bank, page and cam filters so only the clips in your designated bank/page on the EVS appear on the Tactic cliplist. See below for details on all LinX parameters in Tactic.
Opening EVSLinX plugin for the first time
On selection of the EVSLinX plugin for the first time after installing Tactic the plugin will not be initialized correctly. The first item to set is the LinX IP address of the EVS server. See the EVS Configuration for LinX section to determine this address.
Once the LinX IP is set LinX will try to re-initialize and if successful Windows will prompt to allow network connection to the EVS server. This will have to be authorized through a Windows pop-up dialogue.
Until LinX is configured correctly Tactic will repeatedly attempt to open the communication channels used to communicate with the EVS. This will result in various error messages appearing on the Tactic debug window until successful connection . See LinX debug output for further details.
EVSLinX setup via Tactic preferences / VT Device / EVSLinX:
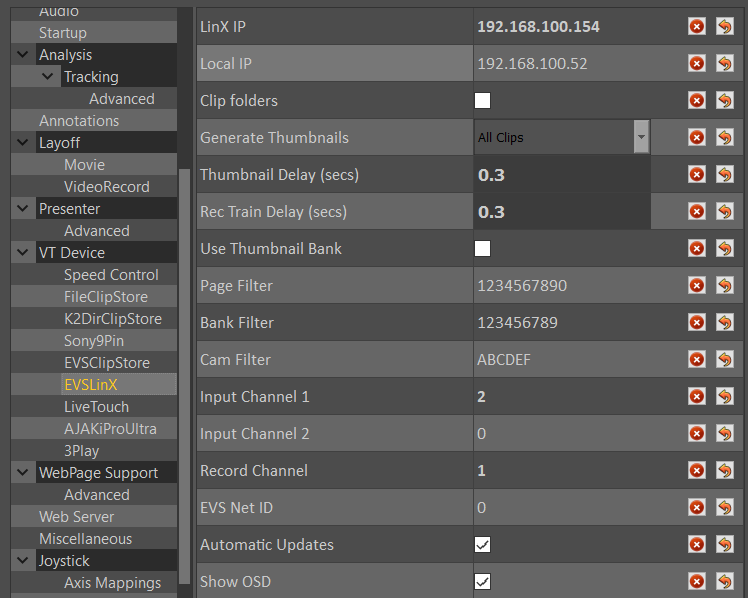
LinX IP: PC LAN connection IP address set on the EVS server for LinX.
Local IP: This has to be set if there are more than one active network ports on the Tactic PC. Set this to the IP address of the network port that is connected to the same network as the PC LAN port on the EVS.
Clip folders: Thumbnails will be organized into directories according to the assigned EVS keywords in the clip.
Thumbnail Delay: The delay between requesting a thumbnail and grabbing it from video in. When thumbnails are grabbed from SDI input after being brought to air on the EVS this delay is the period of time that the plugin will wait before capturing video from the input.
Rec Train Delay: Optional delay to give time to EVS to switch to a LIVE channel when loading a recording train from the clip list or when loading an analysis before another event happens. This might be 0 depending on the usage and circumstances.
Generate Thumbnails:
- All Clips: make a thumbnail for every clip in the built clip list.
- New Clips Only: going through the clip list for each clip Tactic looks for a matching thumbnail file of the correct format in the Thumbnails directory. For every file that is missing, Tactic will grab a thumbnail.
- No: no thumbnails will be transferred. Tactic will still look for existing thumbnails in the Thumbnails folder and use them or set a default blank thumbnail for the clip.
Page Filter: Include only these page numbers (0-9) when updating the clip list.
Bank Filter: Include only these bank numbers (1-9) when updating the clip list.
Cam Filter: Include only these camera inputs (A-F) when updating the clip list.
Input Channel 1: Set EVS OUT channel (1-6) that is connected to Tactic video IN 1.
Input Channel 2: Set EVS OUT channel (1-6) that is connected to Tactic video IN 2.
Recording channel: Set EVS recording train (1-6) on which Tactic output will be recorded (via SDI) for creating clips, locally or by Tactic.
EVS Net ID: This will be 0 if the EVS server to which Tactic is connected is the very same server that Tactic needs to control.
If the EVS server of interest is NOT the one physically connected to Tactic but one on its network of servers then set the target EVS server Net ID (1-99).
Please see the EVS documentation for further explanation on EVS server networks.
Automatic Updates: Default to false. Automatically update Tactic clip list with changes made on the EVS regarding add/remove/rename clips.
Show OSD: Outputs text information on Linx channels the same way the Main channel does (on LSM Remote). Clip name, Timecode, etc..
Using the EVSLinX plugin
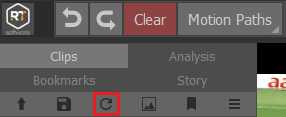
Build clip list
Clip list is always built and updated based on the Page, Bank, Cam filter settings in preferences.
To import the clip list, click on the Refresh Clips icon
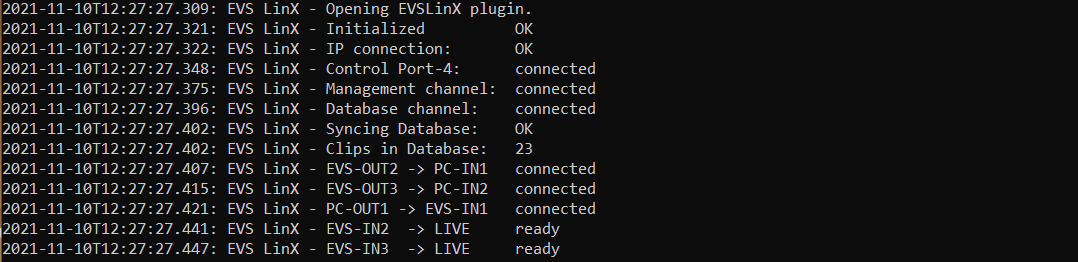
EVSLinX debug output
Successfully initialized LinX with 2 PGM channels and one recording channel. LinX is configured to control through RS422 port-4 on the EVS.
———————————————————————————————————-
Channel connection error
“LinX – A player channel must be set to load clips. Set Input Channel 1 or 2 to the configured LinX port.”
– No channels are set on both Input channel 1 and 2.
———————————————————————————————————-
“LinX – connecting EVS-OUT1 -> PC-IN1 failed.”
“LinX – connecting EVS-OUT4 -> PC-IN2 failed. Error: Error during open access”
– Channels settings are incorrect. Failed to connect EVS PGM1 and PGM4 to Tactic. Check EVS configuration whether LinX is set to control these channels or change Input channel 1 and 2 to different EVS channels.
———————————————————————————————————-
Time code error
“LinX – Failed to get time code Error: Bad channel type”
1) Didn’t set Input channel 1 and 2.
2) Only either Input channel 1 OR 2 is set correctly but the VT Control channel selector is on the wrong channel.
———————————————————————————————————-
Lost network connection
“LinX – Failed to get timecode Error: A time-out occurred”
“LinX – Lost IP connection. Error: Connect error. Trying to re-open EVSLinX plugin.”
“LinX – IP connection failed. Error: A time-out occurred”
– All these messages suggest that you have lost the network connection to the EVS. If the error message keeps appearing in a constant rate it means your connection is permanently off.
Every time the connection is lost Tactic will try to re-initialize the plugin.
———————————————————————————————————-
“LinX – Database connection failed.”
“LinX – Syncing Database failed.”
– When the database connection or synchronization fails but the IP connection is fine it means the database management was busy at the time and Tactic will try to re-open the connections.
EVSClipStore vs EVSLinX
This table collects the main technical differences between EVSClipStore and EVSLinX plugins. This is to help decide which plugin may work better for a particular production.
| EVSClipStore | EVSLinX | |
| Connections | ||
| Tactic control over EVS | serial cable + rs422 converter or USB-Rs422 | LAN via main Ethernet network |
| Tactic video I/O | SDI via video I/O boards | SDI via video I/O boards |
| Clip thumbnail transfer to Tactic | via SDI | via SDI |
| EVS setup | ||
| EVS channel occupation | can be set as a secondary controller on any EVS player channels, working in parallel with an LSM control. | Needs to occupy a whole EVS channel, taking exclusive control over it.
(This is under review by EVS) |
| Compatibility | Requires Odetics protocol being available on the server. It’s an old protocol so very much available and compatible to old servers and Multicam too. | – requires Multicam 11.47 +
– requires network Multicasting capabilities for Clip List Auto Update |
| Tactic Features | ||
| Making clips from Tactic output onto EVS (record+clip) | only manually via LSM | via Tactic interface with precise TC |
| Clip List Auto Update | no support | Tactic Clip List is managed by a regularly synced database. Any changes made on the EVS will appear in Tactic too. |
| Clip List thumbnails | Requires exclusive control over one EVS channel, temporarily.
For every thumbnail: – Tactic loads a clip on EVS – records the first frame onto disk via SDI input – scales the picture to thumbnail size – Takes 1-1.5 sec each |
Same as EVSClipStore |
K2 DLC
System Overview
This guide is to provide a systems operators, support staff and engineers in the setup, configuration and operation of the K2 Video Server using DLC (Distributed Lan Client) to provide clip information for Tactic direct from a K2 Summit/Solo or San system. The connection between the Tactic system and K2 is network based and utilises a DLC client/server mechanism called Storenext by Quantum. The diagram below illustrates the system architecture.
K2 DLC System Architecture
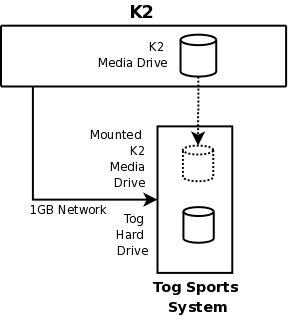
The principle behind the connection is basic file sharing. The media drive on the K2 is shared and is mounted onto the Tactic system. The DLC client provides a file system called CVFS or SNFS to allow this to be done.
Requirements and Warnings
There are a number of requirements to allow network mounted clip playback using SNFS/DLC. These are
- SNFS/DLC with the K2 is not guaranteed to be real time in all situations. There is a finite amount of bandwidth available on the K2 and if this is being shared with SAN backup, DynoPA, Proxy control then your playback may not be in real time. You can still play and record back to the DLC and the completed clips will be real time. But if you are trying to play direct to air you should fully test your K2/Tactic setup beforehand.
- Ensure you have JumboFrame support enabled on your network NIC’s If you do not you will not get the optimum performance and you will increase the chance of dropping frames.
- Ensure you have Reference clips enabled on the K2. Otherwise, all clips without reference mov files will appear as directories in Tactic.
- Ensure you are using the correct version of the SNFS Client for the K2 you are connecting to. RTSoftware does not supply the SNFS Client for this feature. If you require this then you should contact either GrassValley or Quantum.
Connection
The connection between the K2 and the Tactic system relies on a 1Gb network link. The network connections assume that network access is configured on both systems. It will also depend on whether you are running a DHCP server or not. If you are not running DHCP you will have to manually assign an IP address to the Tactic system.
The network cable should be connected to the Tactic system using the lower of the 2 network ports on the back of the machine (usually labelled ASF). You should have been supplied with a DLC.zip file that contains installers for Windows. It also contains this document as well as other docs for Windows configuration.
Windows Installation and Configuration
This guide does not cover the installation of the DLC client for Windows systems. This is extensively covered in the DynoPA system guide – PA_v2.0_ConfigMan.pdf
You will find this in the DLC.zip you should have obtained. The docs and installers are located in the Windows directory of the zip file.
Troubleshooting the K2 DLC
If you cannot successfully connect to the K2 you should check that the K2 is configured correctly. Check the following
- Ensure you have entered the correct information into the Tactic system configurations files
- Can you ping the K2 Open a Dos and type
ping <hostname of IP address>
The K2 should respond:
64 bytes from k2control.rtsw.co.uk (192.168.100.81): icmp_seq=1 ttl=128 time=0.090 ms
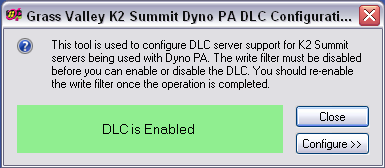
- Is DLC enabled and running on the K2? On the K2 desktop, goto System->All Programs->GrassValley->DLC Config->Launch DLC Tool.
If this is not there then DLC has not been installed. If it is, run it and check that DLC is running. If DLC is not running consult GV docs on how to start.
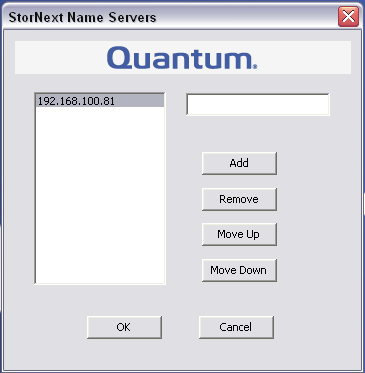
- Is the correct nameserver IP address entered? Run AllPrograms->StoreNext FileSystem->NameServers. The IP Address of The K2 should be configured. If it is wrong, delete the entry and type in the correct one. Note that you will need to disable the Write Filter to make permanent changes thru reboots. Check K2 docs for more info.
- Is the Name binding correct? Open up the Network Setting dialogue.
Open up Network connections on the K2. Select ‘Advanced Settings’ from the Advanced menu at the top of the dialogue.
- Ensure that the ‘Control Team’ is at the top of the binding list and that ‘Loopback Adapter’ is at the bottom. Use the arrow keys at the side to change.
LiveTouch
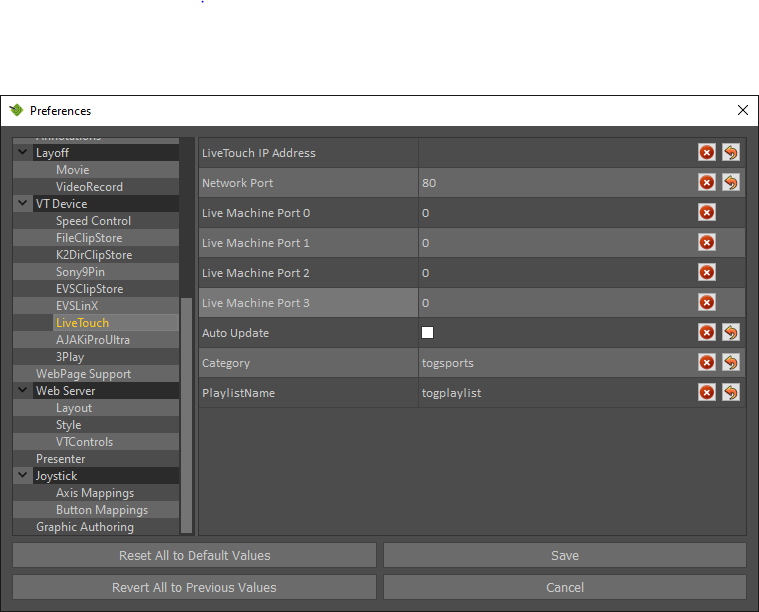
Live Touch IP Address: Default is Blank. The IP of the LiveTouch server
Network Port: Default is “80”. The PC network port to connect to the LiveTouch server.
Live Machine Port 0: Default is “0”.
Live Machine Port 1: Default is “0”.
Live Machine Port 2: Default is “0”.
Live Machine Port 3: Default is “0”.
Auto Update: Default is unticked. When ticked Tactic will automatically update changes from the LiveTouch server.
Category: Default is “togsports”.
PlaylistName: Default is “togplaylist”.
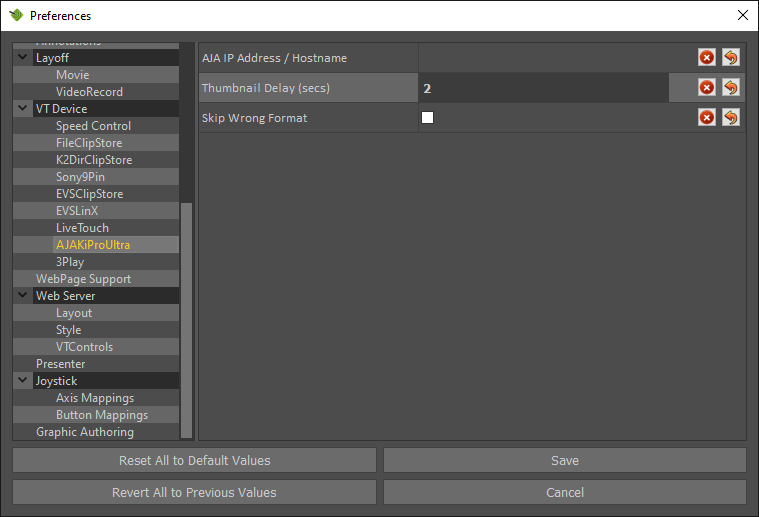
AJAKiProUltra
AJA IP Address / Hostname: Default is Blank. The IP/Hostname of the AJA IP host server.
Thumbnail Delay (secs): Default is “2”. The delay between requesting a thumbnail and grabbing it from the video input. This is to provide enough time for the server to receive the request and load the clip.
Skip Wrong format: Default is unticked. This skips clips that are not the format selected in the Tactic video settings.
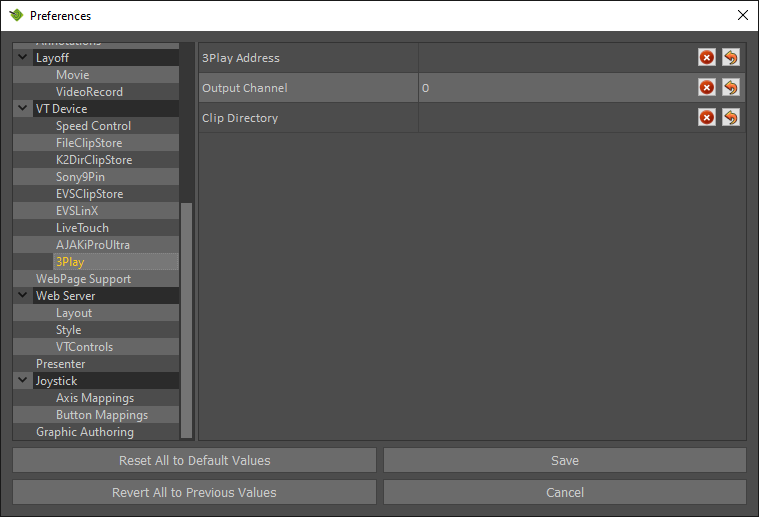
3Play
3Play Address is for the IP address of the 3Play server.
Output Channel Defaults to 0. This selects the output channel used on the 3Play Machine.
Clip Directory is the path to the 3Play drive. This should be mounted as a network share on the PC. See Mounting a Network drive on Windows 10 for details.
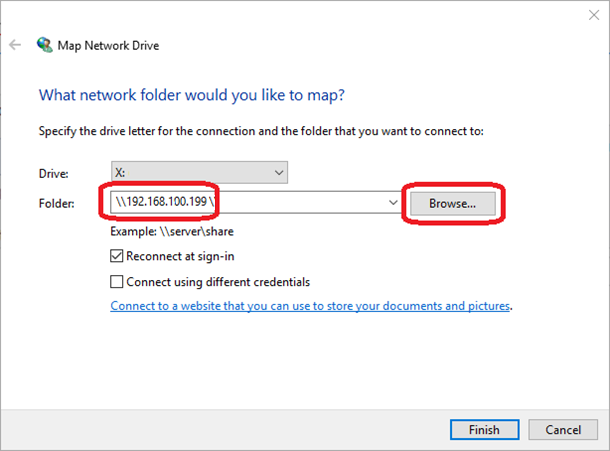
Mounting a Network drive on Windows 10
To mount a network drive on Windows 10, first navigate to “This PC” in Explorer. Then Select the “Computer” tab and select “Map Network Drive”.

In this example X: has been used for the drive letter and the IP address of the NewTek system is \192.168.100.199 and select Browse.
Expand the folder tree and select your clip folder.
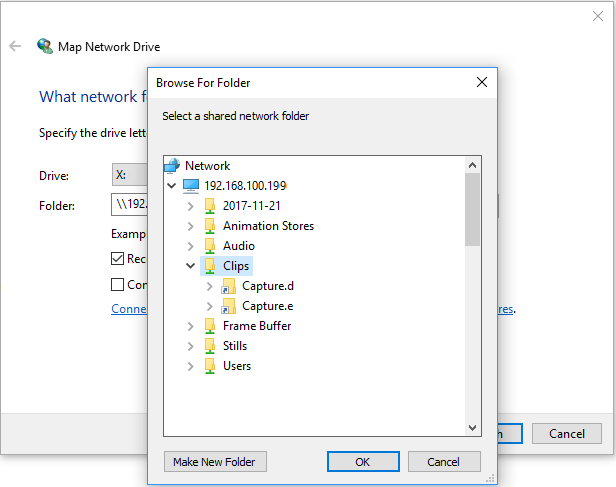
You can now navigate to this folder in explorer from “This PC” and obtain your clips directory for Tactic.
WebPage Support
In WebPage support there are the settings for the web control (tablet interface). The “Cef Home Page” is the first page you will see when hitting the “Web” button.
A sting is an animation or transition which will appear when loading Web or Clips, these can be enabled/disabled here.
Cef Home Page: Default: www.google.co.uk Defines your home page when you hit the Web Button.
Cef Cache Directory: Default $RTSW/Cache Defines the directory where Cef (browser) will cache data. This should not change with normal use.
Use sting on Web Navigate: Default Unticked. When enabled, Tactic will use a Sting while the web page is loading.
Use Sting on Clip Load: Default ticked. When enabled, Tactic will use a Sting while a clip is loading.
Delay before page displayed: Default is 0.5
Take off Delay on Sting (secs): Default is 0.5. This defines the duration of additional time the sting will remain active after the take off has completed, in seconds.
Clip Load Delay (secs): Default 1.0. This defines the duration of additional time the sting will remain active after the clip load has completed, in seconds.

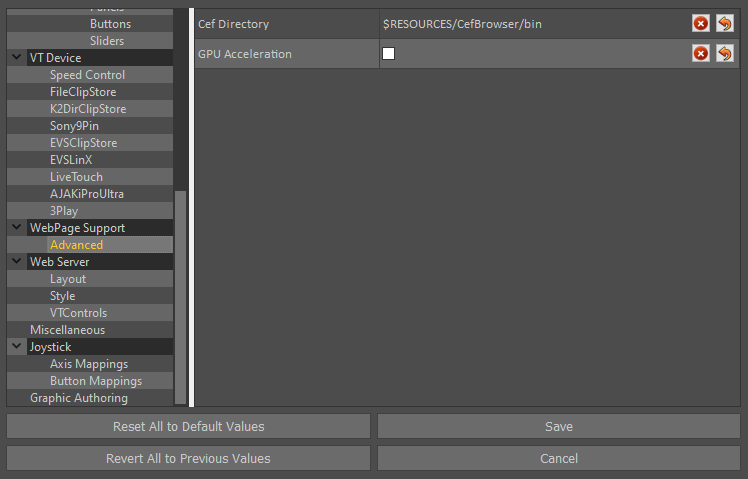
In the Advanced subwindow you enable GPU Acceleration, this will give better web performance for systems running dedicated GPUs. It is only advised to use this on a system which has a dedicated GPU.
The Cef Directory allows the use of specific versions of Cef, this should be left at default for normal users.
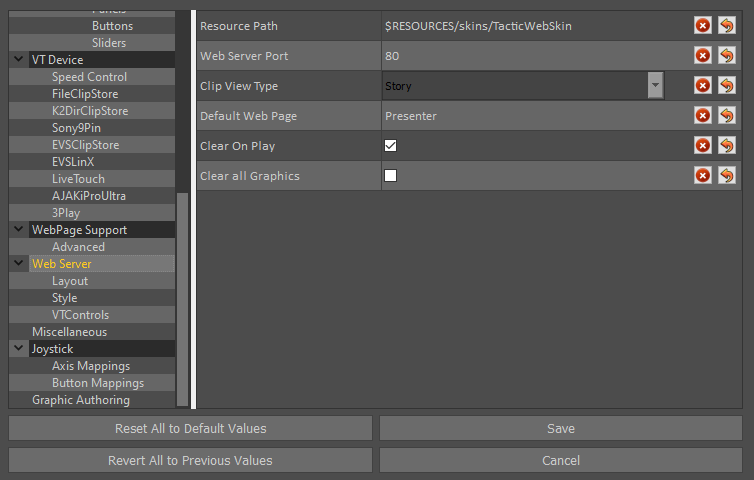
Web Server
Resource Path: Default is $RESOURCES/skins/TacticWebSkin. This can be changed to select between custom and the default Tactic Web skin.
Web Server Port: Default is 80. This is the network port the web server will operate on.
Clip View Type: Default is “Story”. This defines what clips will appear in the web interface clip panel.
Default Web Page: Default is “Presenter”.
Clear on Play: Default is checked. When ticked, all graphics laid down in the presenter interface will be cleared when the play button is pressed.
Clear all Graphics: Default is unchecked. When checked this will clear (hide) all graphics made in the main edit window in the web view (tablet mode).
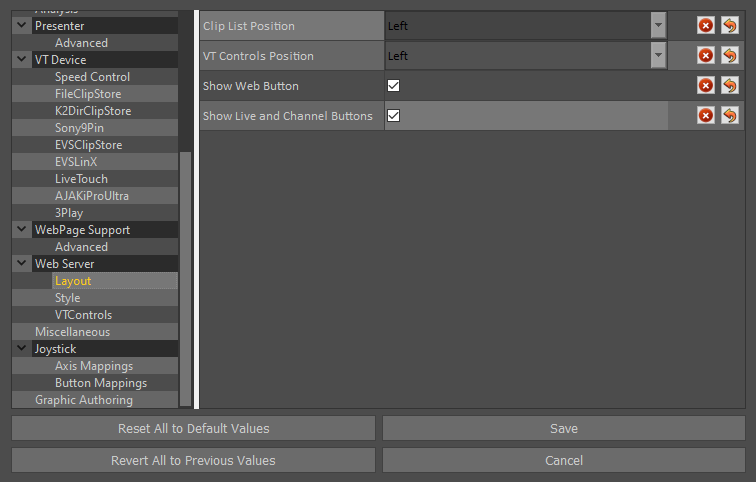
Layout
Clip List Position: Default Left. The Clip List Position defines where the clip list (or burger menu to open it) will be placed on the Tactic Web Interface. It may be placed left or right.
VT Controls Position: Default Left. Defines where the VT Controls (rewind, play, pause and so on) will be placed on the Tactic Web interface.
Show Web Button: Default is unticked. When ticked a web button will be present on the Tactic Web Interface. When pressed it will open the Tactic built in web browser.
Show Live and Channel Buttons: Default is unticked. When enabled a live button will be present in the Tactic Web interface in the burger menu. When clicked Tactic will switch to the live video in.
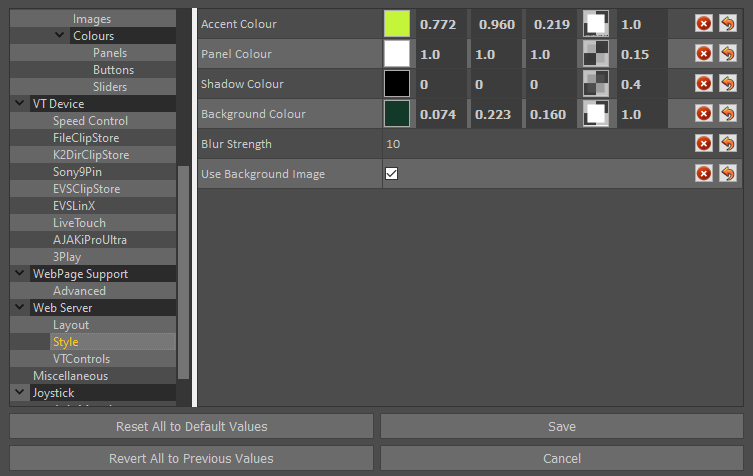
Style
The style menu allows you to customise aspects of the Tactic Web Interface. Left clicking on colours brings up a colour picker allowing full customisation of the Web interface. RGB values may be entered manually too. The final options on the far right are transparency values.
Blue Strength: Default is 10. This defines how much background blur there is on the Tactic Web Background.
Use Background Image: Default is Ticked. When unchecked the background image found in the Tactic Web Interface will be hidden.
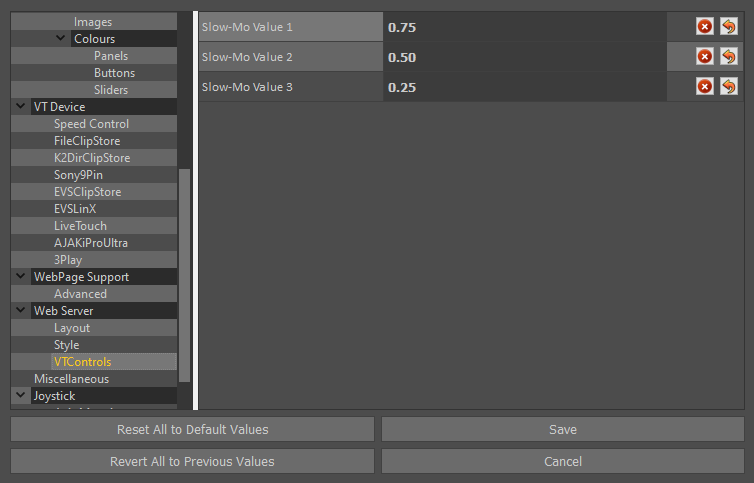
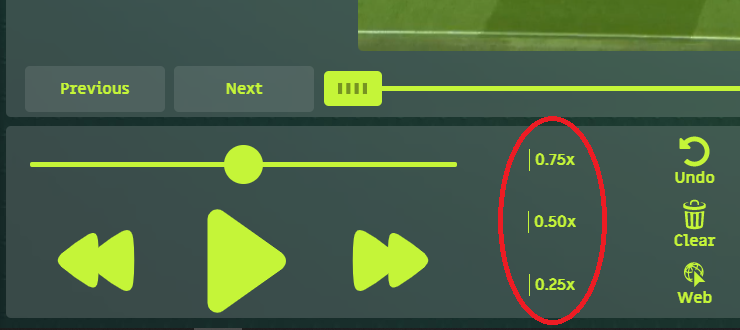
VT Controls
In the Tactic Web Interface there are three slow-motion buttons with varying speeds. By default these are 0.75, 0.50, 0.25. These can be changed in this menu. 1.0 is 100% playback speed, 0.50 is 50% playback speed.
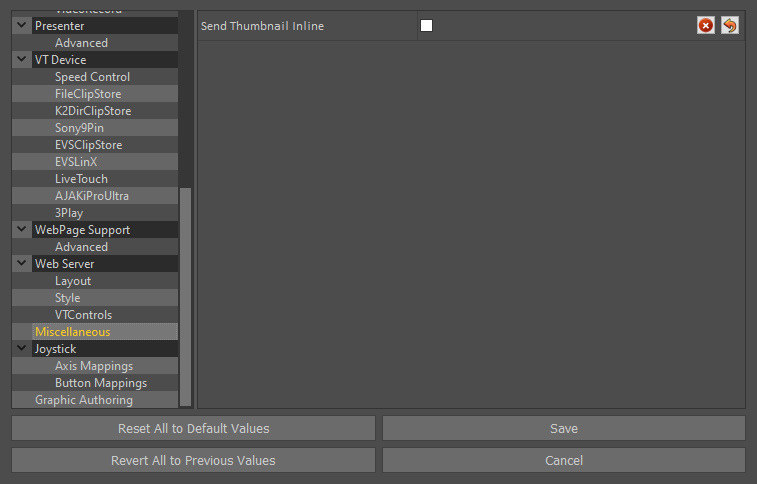
Web Server-Miscellaneous
Send Thumbnail Inline: Default is unticked. This sends the scaled thumbnail inline with the WebServer thread rather than using a worker thread.
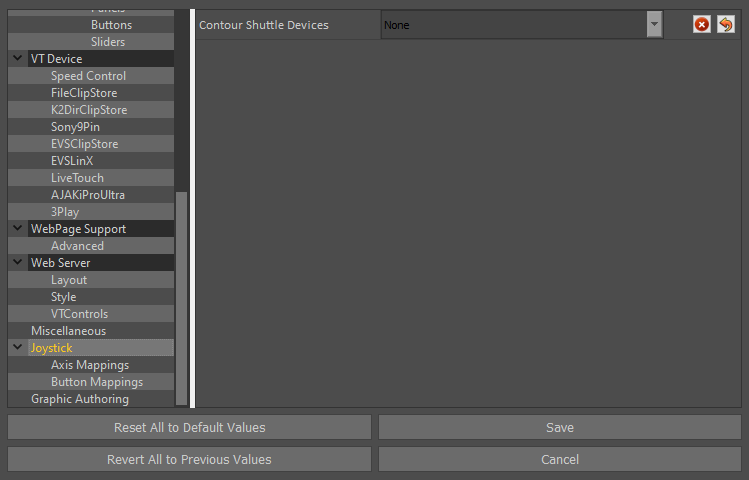
Joystick
When using a Contour Shuttle, select which model you have here.
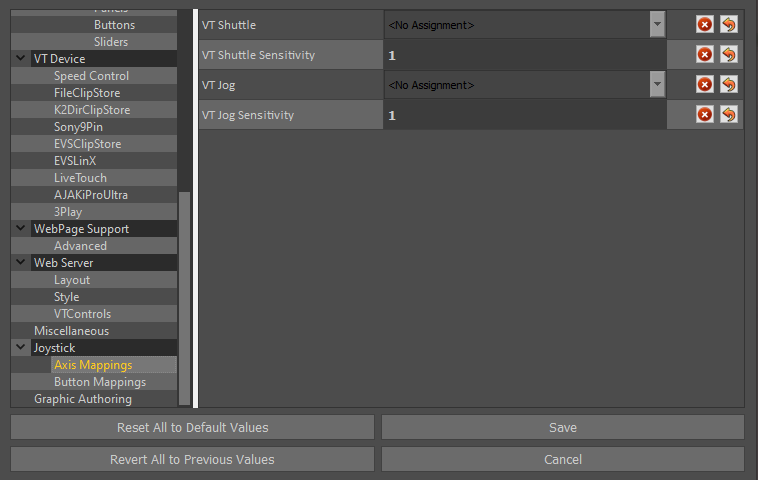
Axis Mappings
To use this a contour must be selected in the “Joystick” menu. Here you can button map the shuttle and adjust the sensitivity of the wheel.
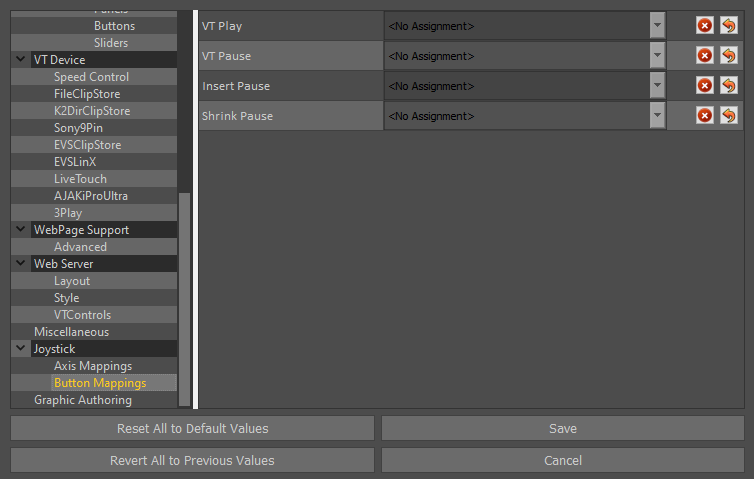
Button Mappings
To use this a contour must be selected in the “Joystick” menu. Here you can button map the shuttle.
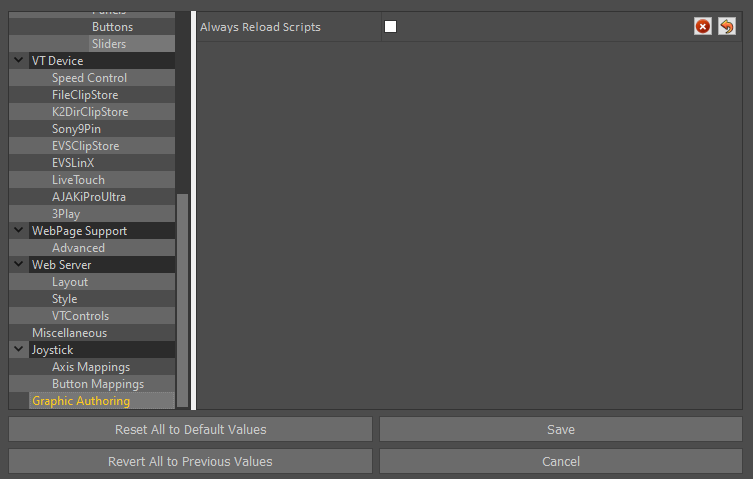
Graphic Authoring
Always Reload Scripts: Default is unticked. When enabled scripts will always reload from disk when a graphic is run. This is slower, but means you can edit scripts and see the results without restarting Tactic.
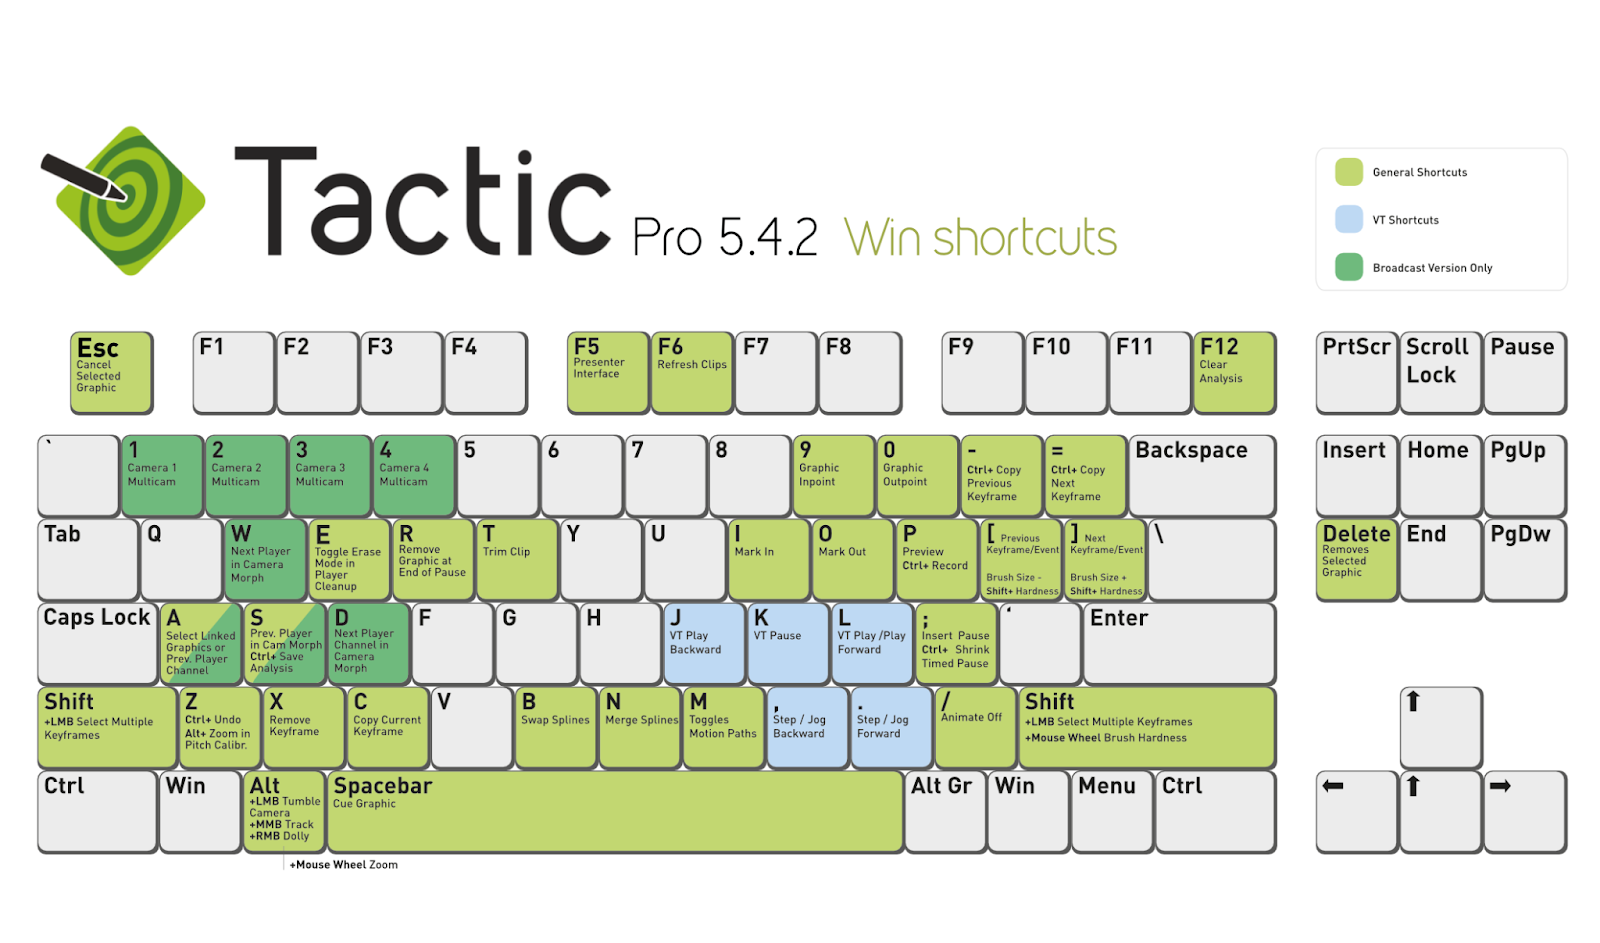
Appendix B – Keyboard Shortcuts
“F5” Presenter interface
“F6” Refresh Clips listed in the Clip Browser
“F12” Clear Analysis
“1” Camera 1 (Multicam)
“2” Camera 2 (Multicam)
“3” Camera 3 (Multicam)
“4” Camera 4 (Multicam)
“9” Set the In Timecode of the currently selected graphic(s)
“0” Set the Out Timecode of the currently selected graphic(s)
“-“ Copy Previous Keyframe
“=” Copy Next Keyframe
“R” Animates out the currently selected graphics at the end of the current pause.
If no pause exists, one is created.
“T” Trim automatically sets the Mark In and Mark Out Timecodes to before (pre-roll) and after (post-roll) the graphics in the timeline.
The pre-roll and post-roll times are configurable in Preferences > Analysis
“I” Mark In
“O” Mark Out
“P” Preview
“Ctrl” + “P” Record
“[“ Previous Keyframe / Event
“]” Next Keyframe / Event
“A” Select linked Graphics
“Ctrl” + “S” Save Analysis
“Ctrl” + “Shift” + “S” Save Analysis As
“J” VT Play Backward
“K” VT Pause
“L” VT Play Forward
“;” Insert Pause
“Ctrl” + “;” Shrink/Delete Timed Pause
“Shift” + Left Mouse Select Multiple Keyframes
“Ctrl” + “Z” Undo
“X” Remove Keyframe
“C” Copy Current Keyframe
“B” Swap Splines
“N” Merge Splines
“M” Toggle Motion Paths
“/” Animate Off
“Alt” + Left Mouse Tumble Camera
“Alt” + Middle Mouse Track
“Alt” + Right Mouse Dolly
“Spacebar” Cue Graphic
Keyboard Shortcuts (Windows)
Appendix C – Licensing
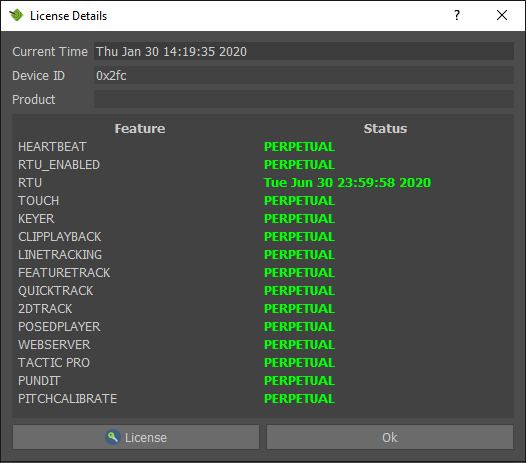
Licence Details
Select the “gear” icon in the top right corner and select “Show License Details” …
Exact License Details will be specific to the version and features of Tactic Draw purchased.
If no License is found the following dialog will be displayed.

The top section of this dialog refers to the older style USB Security Key and can be ignored if using a Trial license, Software License and the new style USB Security Key.
Press “License” to Install / Update a Trial license, Software Licence or new style USB Security Key.
New style USB Security Key
Install a Trial Software Licence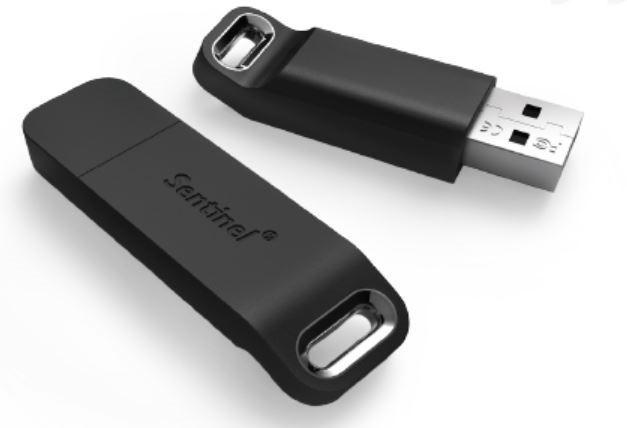
A Trial Licence is available upon request from RT Software https://rtsw.co.uk/
To obtain a Trial Licence, contact sales@rtsw.co.uk
Upon receipt of the Trial licence file (TacticPro-30Days.v2c), save the file on your PC in a convenient location and apply the licence as follows.
Press “License”
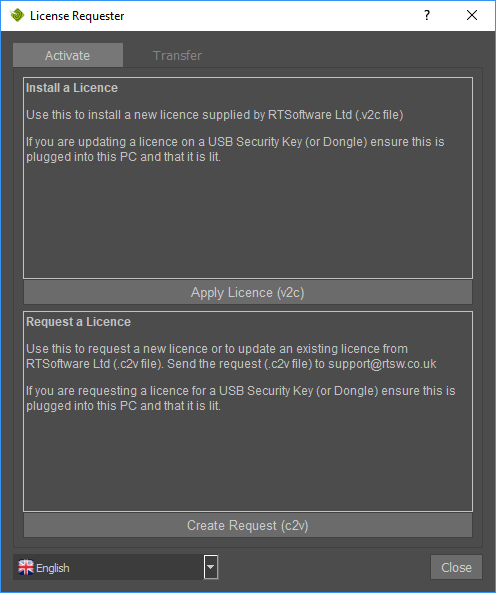
Press “Apply Licence (v2c)”

Locate and Select the Trial licence file.
Request and Install a Software Licence
A Software Licence is available upon request from RT Software.
To obtain a Software Licence, contact licence@rtsw.co.uk
Press “License”
Press “Create Request (c2v)”

Send the request file (Example_0.c2v) to licence@rtsw.co.uk
Upon receipt of your new licence (e.g.12345678901234567.V2C), save the file on your PC in a convenient location and apply the licence.
Press “Apply Licence (v2c)”
Locate and Select the licence file (12345678901234567.v2c)
Update a Software Licence or USB Security Key
To update your Licence, contact licence@rtsw.co.uk
Press “License”
Press “Create Request (c2v)”
Send the request file (Example_12345678901234567.c2v) to licence@rtsw.co.uk
Upon receipt of your new licence (e.g.12345678901234567.v2c), save the file on your PC in a convenient location and apply the licence.
Press “Apply Licence (v2c)”
Locate and Select the licence file (12345678901234567.v2c)
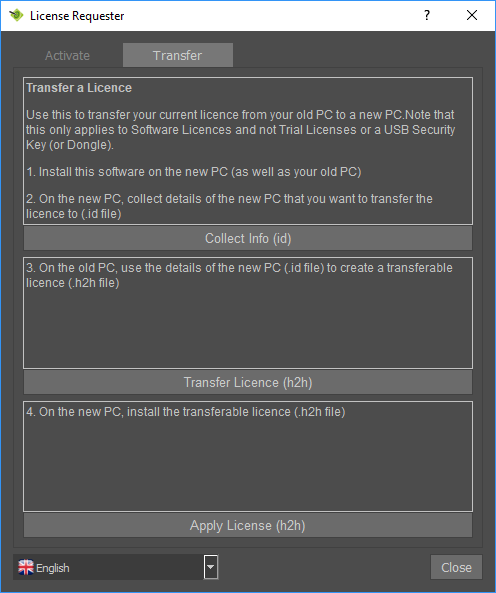
Transfer a Software Licence
A Software Licence may be transferred from an “Old” PC to a “New” PC.
This can be performed at any time without contact with RT Software Ltd.
- Install Tactic Pro on both the “Old” PC and the “New” PC.
- “Collect Info” and create the *.id file on the “New” PC.
- “Transfer Licence” and create the *.h2h file on the “Old” PC using the *.id file from the “New” PC.
- “Apply License” *.h2h on the “New” PC.
Press “License”
Select the “Transfer” tab.
Install a Software Licence via the Web Portal
If you were provided with a product key instead of a v2c file, please visit https://licensing.rtsw.co.uk/
and copy/paste the key in the appropriate field then hit “Login”.
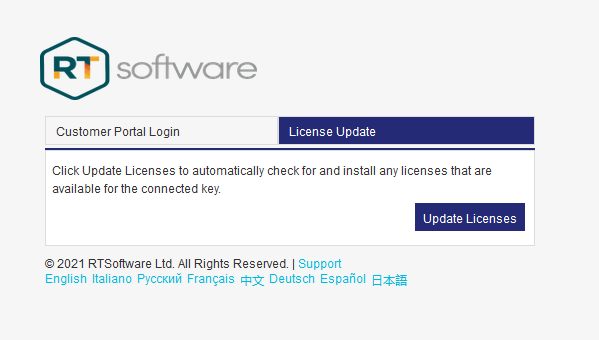
Update a Software Licence via the Web Portal
Once an update to your licence is available, please visit https://licensing.rtsw.co.uk/
And click on the “License Update” tab then click on “Update Licenses”
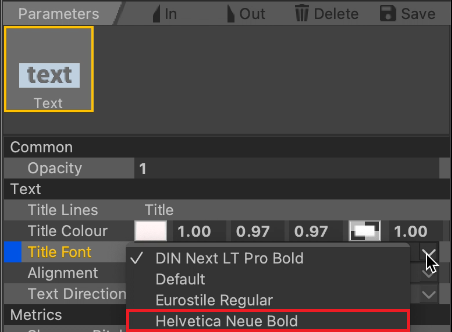
Appendix D – Importing Fonts
Windows
Select the “gear” icon in the top right corner and select “Import Font” …
Locate the desired font …
Imported Fonts can be used in any graphic tool that uses text.
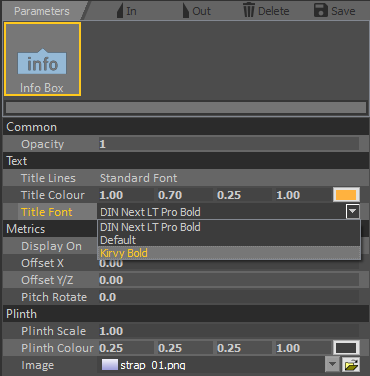
e.g.the Info Box

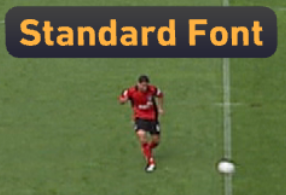
Change the Title Font parameter to the new font …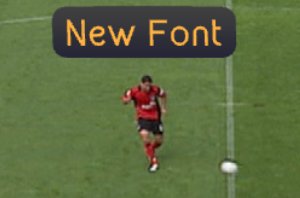
Mac
Tactic supports TTF fonts, if your desired font is in a different format is has to be converted first.
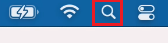
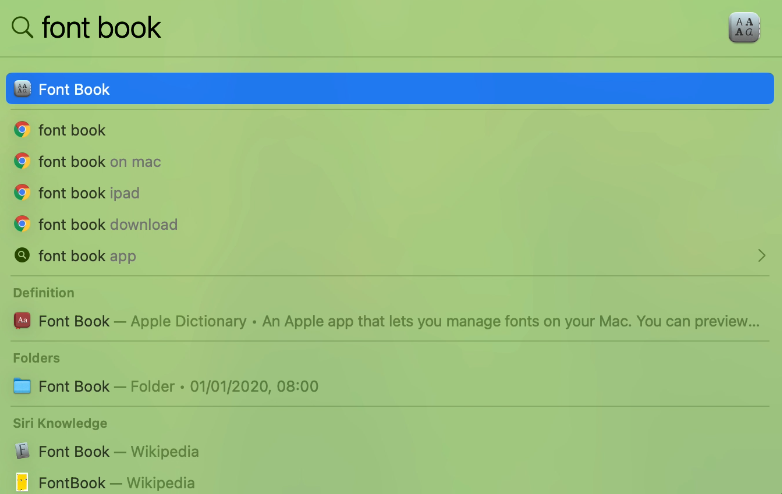
Open up the Spotlight Search bar on your Mac
Search and open “Font Book”
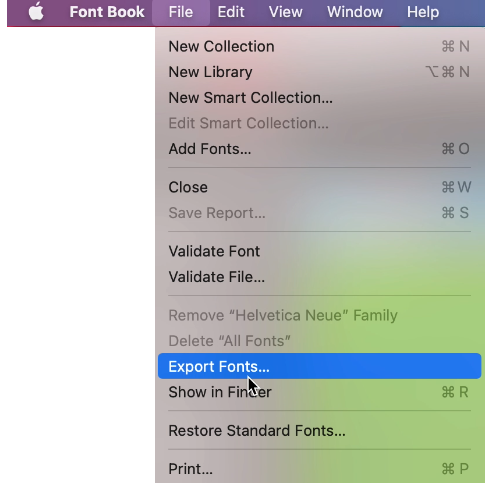
Navigate to the font that you want to export (the below example is a TTC font that needs converting)

Click on File > Export Fonts… and save it in a location of your choice.
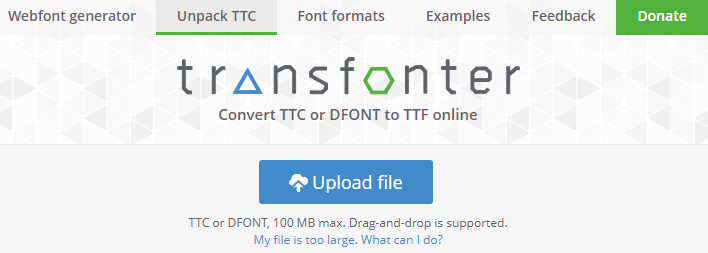
To convert the TTC file to TTF, please visit https://transfonter.org/ttc-unpack and upload the TTC file
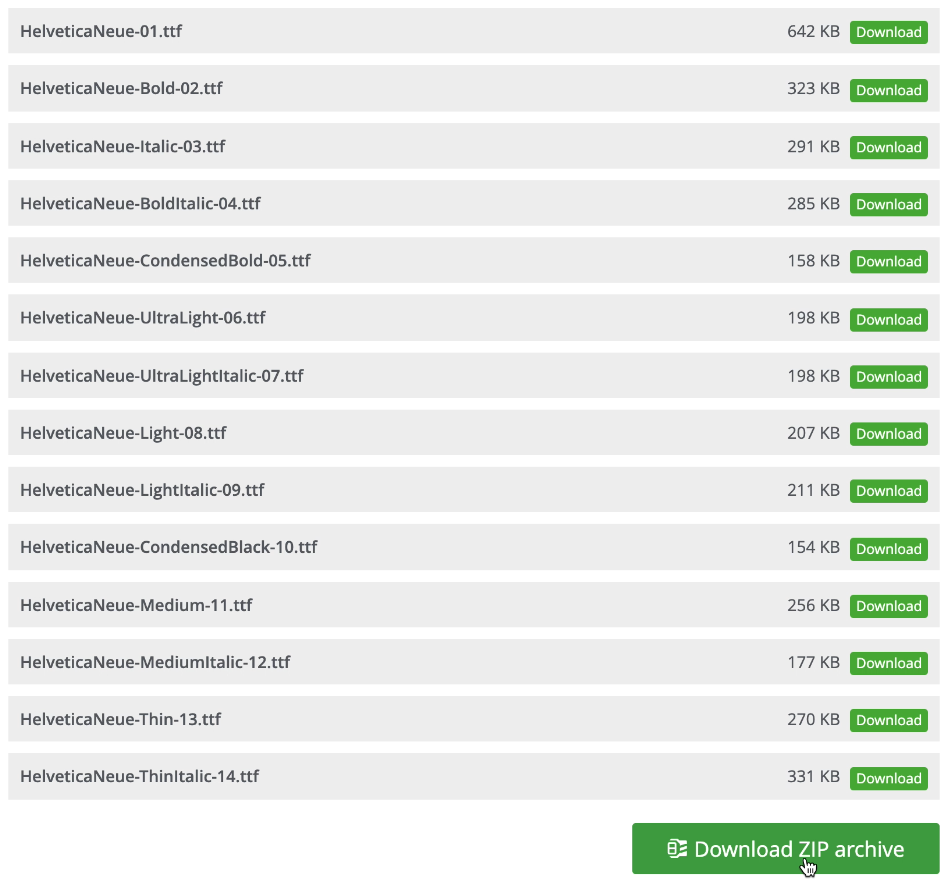
Once converted, download the zip file
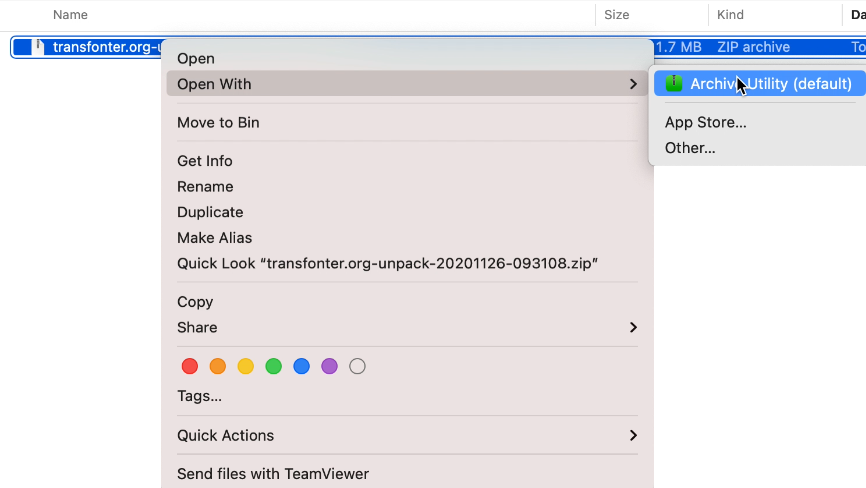
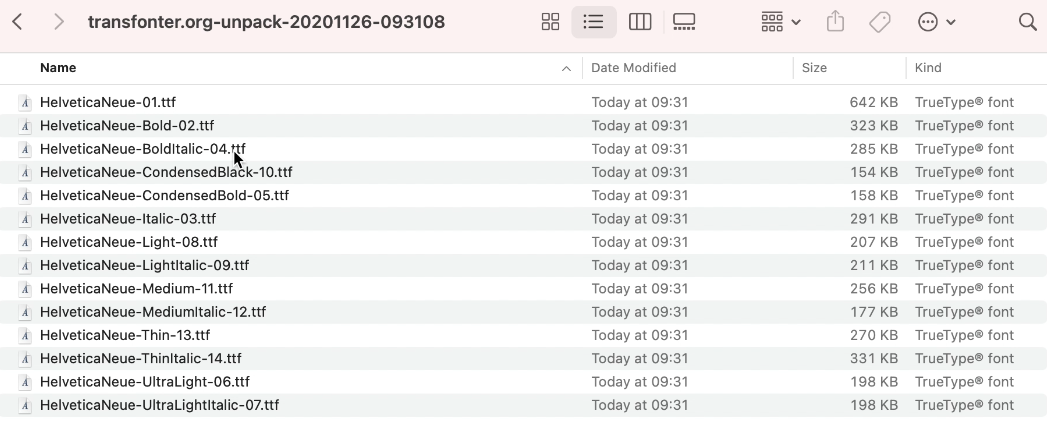
Extract the content of the zip file using the “Archive Utility” and you will have a new folder of the same name containing all TTF files.
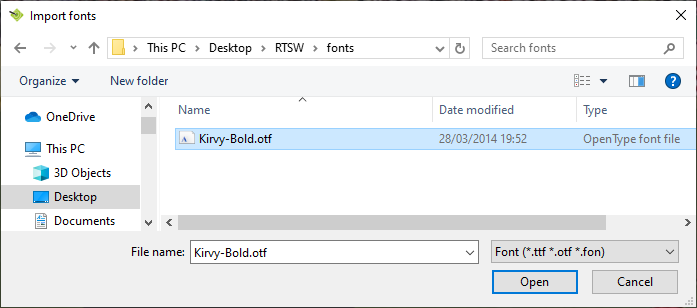
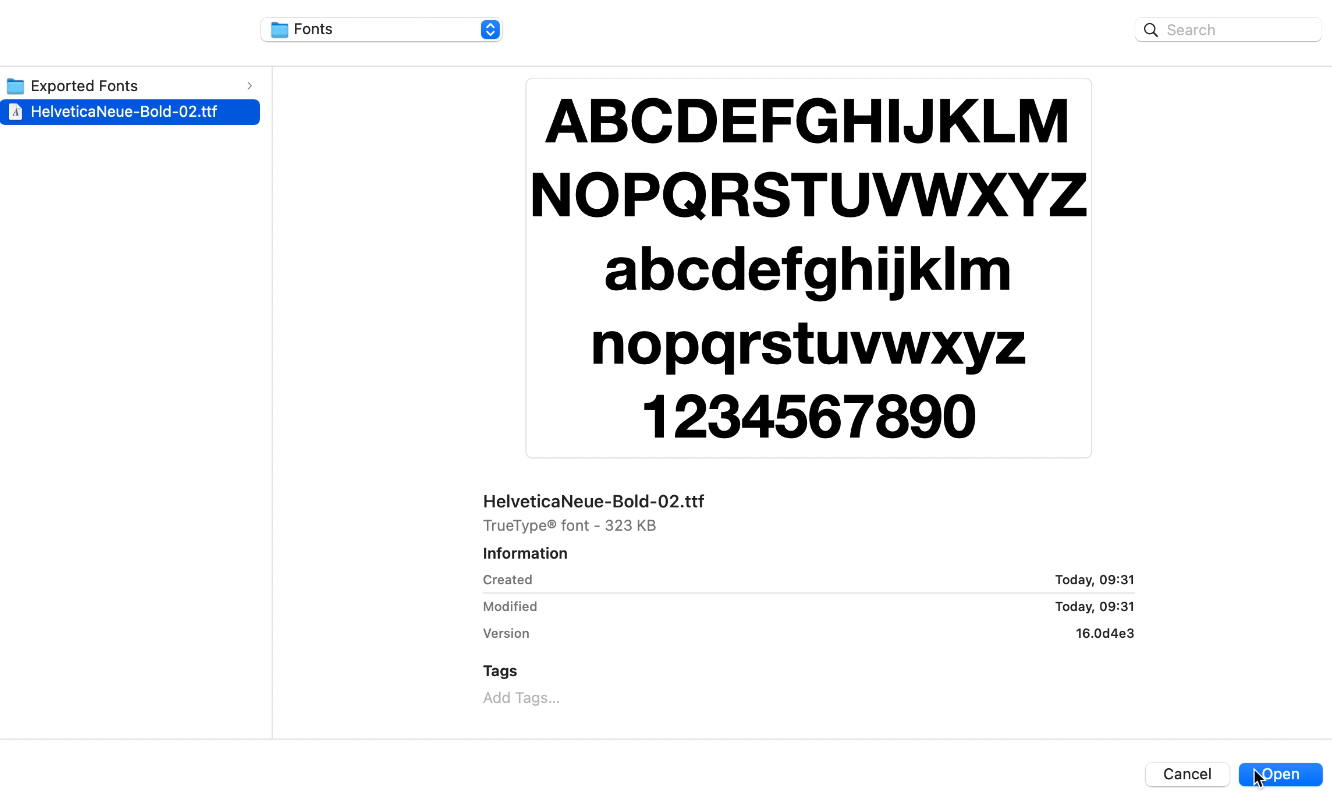
In Tactic, select the “gear” icon in the top right corner and select “Import Font” …
Navigate to the location of the TTF file that you want to import and click on “Open”. If you want to import multiple fonts, you need to repeat the process.
Once imported, the new font should be usable in Tactic.